2023-10-31 06:34:54 Author: blogs.sap.com(查看原文) 阅读量:6 收藏
While you may have briefly ventured into the realm of short-term cash positioning through a 10-minute guide, there’s so much more waiting to be discovered in Short-Term Cash Positioning. This blog serves as your comprehensive guide to help you not only understand but master every setting in Define Cash Position Profiles, the app that empowers you to customize your reports in Short-Term Cash Positioning, tailoring them to meet your unique business needs. Are you ready to dive in and unlock the full potential of this powerful tool? Let’s get started!
In the Short-Term Cash Positioning app, bank accounts are organized in a hierarchical order. You can define how the bank accounts are organized by specifying a hierarchy source. For example, you can directly use the bank account hierarchy defined in the Manage Bank Account Hierarchies app. If you want to organize the bank accounts by certain attributes, you can define the hierarchy levels according to your needs. What’s more, if you have cash pools, you can even view bank accounts organized by cash pools.
Here are some details about the options for using a hierarchy source:
- Option 1: Derived by Bank Account Master Data
Select this option if you want to customize a hierarchy according to the key attributes defined in the bank account master data, for example, company code, bank country/region, bank account currency, and so on. After you select this hierarchy source, for a hierarchy to be determined you need to specify an attribute for at least the level 1 hierarchy. You can define an attribute for up to three hierarchy levels according to your business needs.
For each hierarchy level, you specify an attribute of the bank account master data that is used to group bank accounts, such as company code and currency. The defined hierarchy levels determine the hierarchical structure of bank accounts displayed in the Short-Term Cash Positioning app.
Here’s an example of a three-level hierarchy setting and how it renders in the Short-Term Cash Positioning app.


You can also enable a root node if you need a global overview. To enable a root node, choose Yes in the Enable Root Node field and then enter a text in the Root Node Name field.

The node text appears as the root node in the hierarchy, and you can get a cash position overview for all entities in your hierarchy from the root node as shown below:

- Option 2: Derived from Bank Account Hierarchy
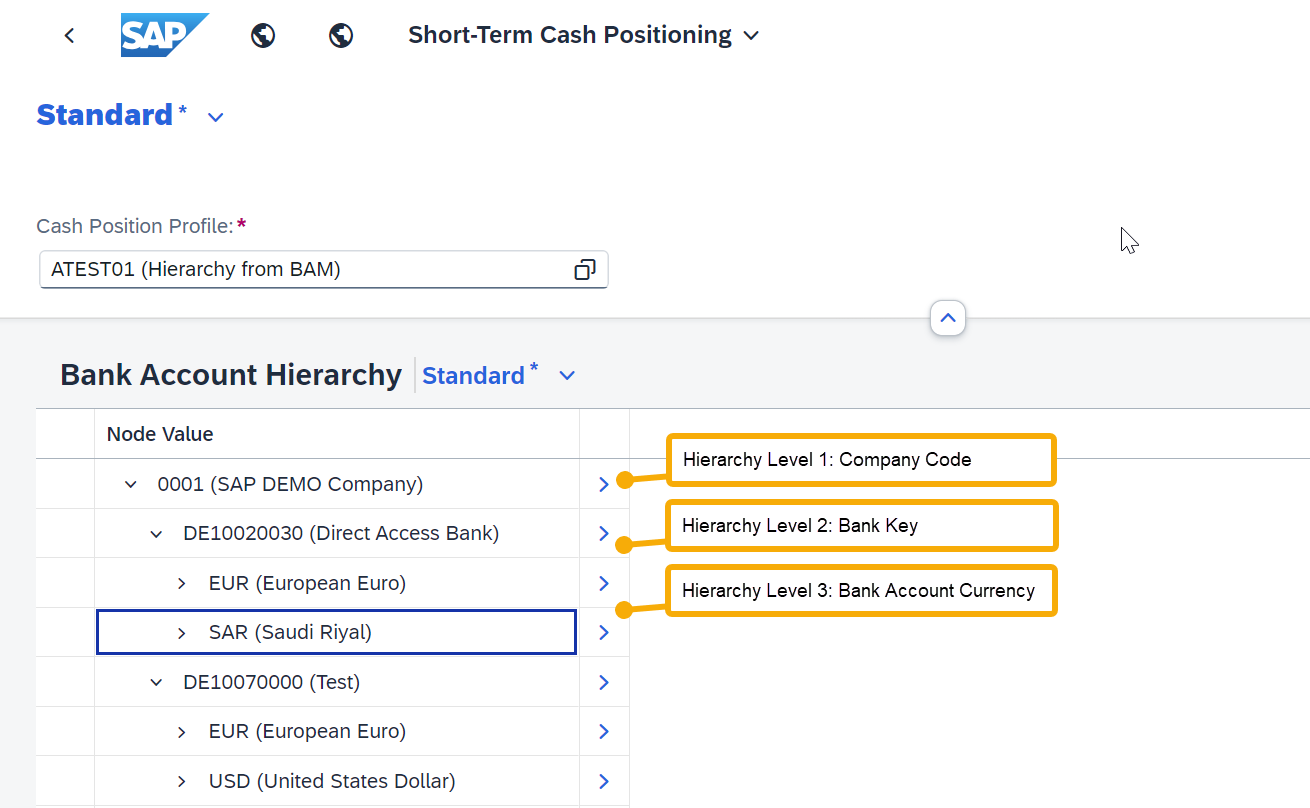
Select this option if you want to use an existing bank account hierarchy defined in the Manage Bank Account Hierarchies app. You can define different bank account hierarchies for different management purposes and use various structures when displaying reports.
After you select this hierarchy source, you need to specify a hierarchy ID.

With this hierarchy source, the root node defined in the specified bank account hierarchy is used. Here’s how it looks in the Short-Term Cash Positioning app.

- Option 3: Derived from Cash Pool and Bank Account Master Data
Select this option if you want to derive a hierarchy to show bank accounts in groups of cash pools. If you select this hierarchy source, the root node is not supported, and the hierarchy levels are fixed as follows:
- Hierarchy Level 1: Company Code
- Hierarchy Level 2: Bank Account Currency
Under the level 2 hierarchy (Bank Account Currency), bank accounts that are used in cash pools are displayed in their cash pool structure – subaccounts under the header account. Please note that only cash pools that are defined in the Manage Cash Pools (Version 2) app are supported in this case.

As shown below, cash pool CP01 is displayed with the header account 2023063001 as the parent node, and all of its subaccounts displayed as sub nodes. Other bank accounts that don’t belong to any cash pools are displayed directly under the bank account currency level.

Now you have learned how to define a hierarchy source for your cash position profile. Let’s take a break here. In the next post, we’ll take at look at other mandatory settings for cash position profiles.
- Cash and Liquidity Management (SAP S/4HANA Cloud): https://help.sap.com/s4_ce_clm
- Cash and Liquidity Management (SAP S/4HANA): https://help.sap.com/s4_op_clm
如有侵权请联系:admin#unsafe.sh