In this post, you will learn about control groups (cgroups) and namespaces required for running containers. Finally, you will create your container without the use of Docker.
Hello world! In the last post "How does Docker run Containers Under the Hood", I have discussed how does containerd service leverage runc runtime and start the ENTRYPOINT of the container defined in your Dockerfile and provide process level isolation. The questions you could ask is – What are these namespaces, haven't heard about them before? And, what if a container tries to act evil and eats up all the resources?
I had all these questions before writing this post and until last week I was also unaware of what namespaces are, being using it all time while using docker and other tools that rely on sandbox technique. So today's post will revolve around two topics Namespaces and Cgroups.
The lab used for following demonstration can be found on the AttackDefense platform – https://attackdefense.com/challengedetails?cid=2274
Control Groups (aka cgroups) is a kernel feature which is used to create something called "controller" and it is then used to monitor and kill the process if they try to access more resources than configured.
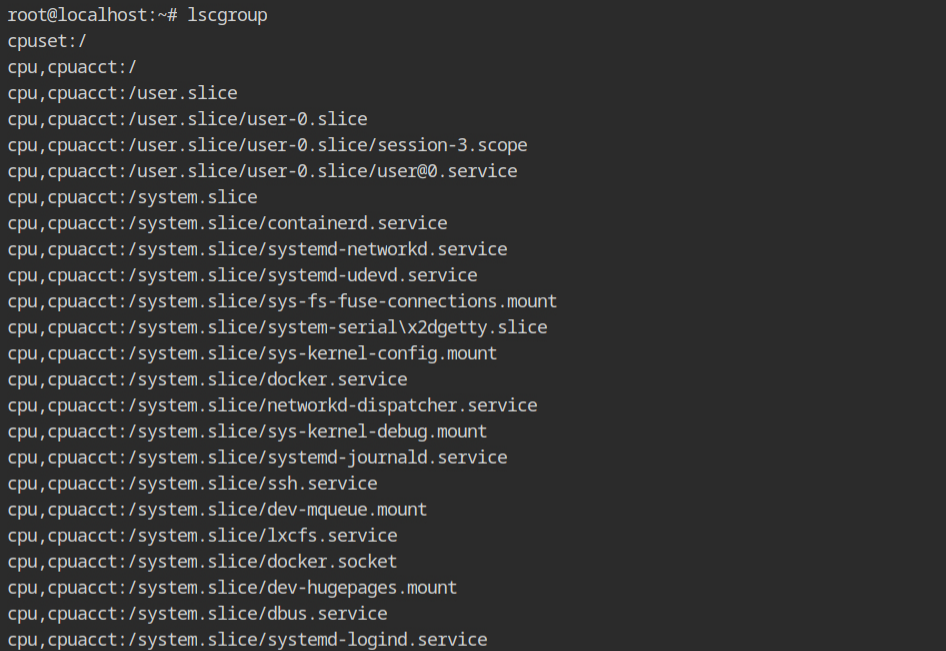
Why it is called group, anyway? Well, because there are several resources like CPU, Memory and most of them have nested configuration. You are free to create the control group for any resource you want, and this is what be call a controller. To list all the existing cgroups, execute lscgroup command which will give a long list of format controller,[controller...]:path

Note: If you want to get a list of systemd units currently using the cgroups, execute systemd-cgls command.In the current lab, a program exists used to allocate memory using malloc() function. You now see the memory controller of the cgroup in action.
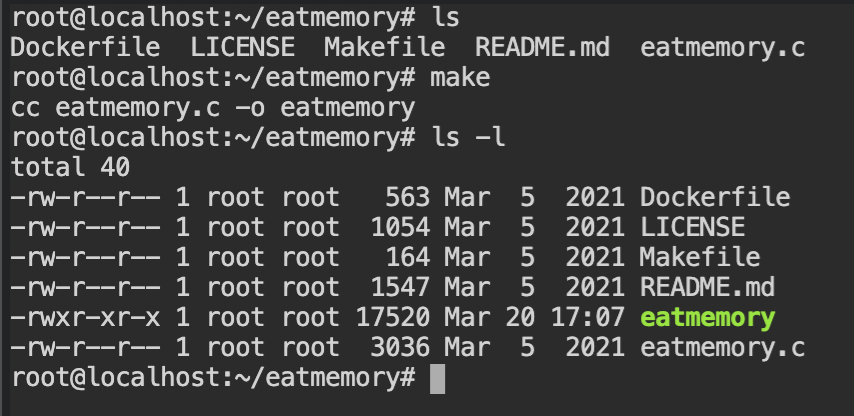
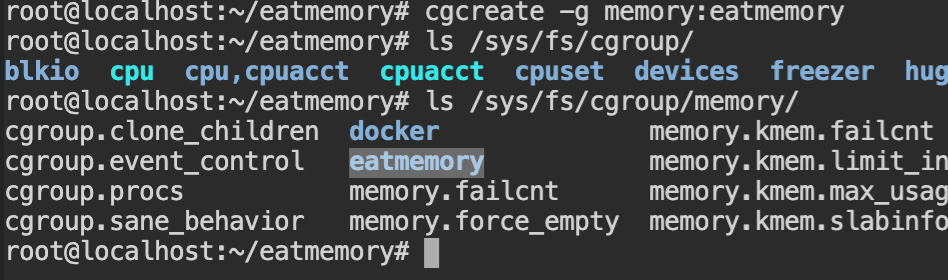
makeFirst of all, you need to create a new cgroup, using cgcreate command, with -g memory:eatmemory argument which will create a control group for "memory" controller in "/sys/fs/cgroup/memory"
Note: Path name could be any non-existing arbitrary string.
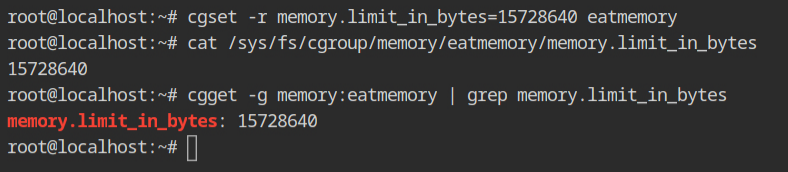
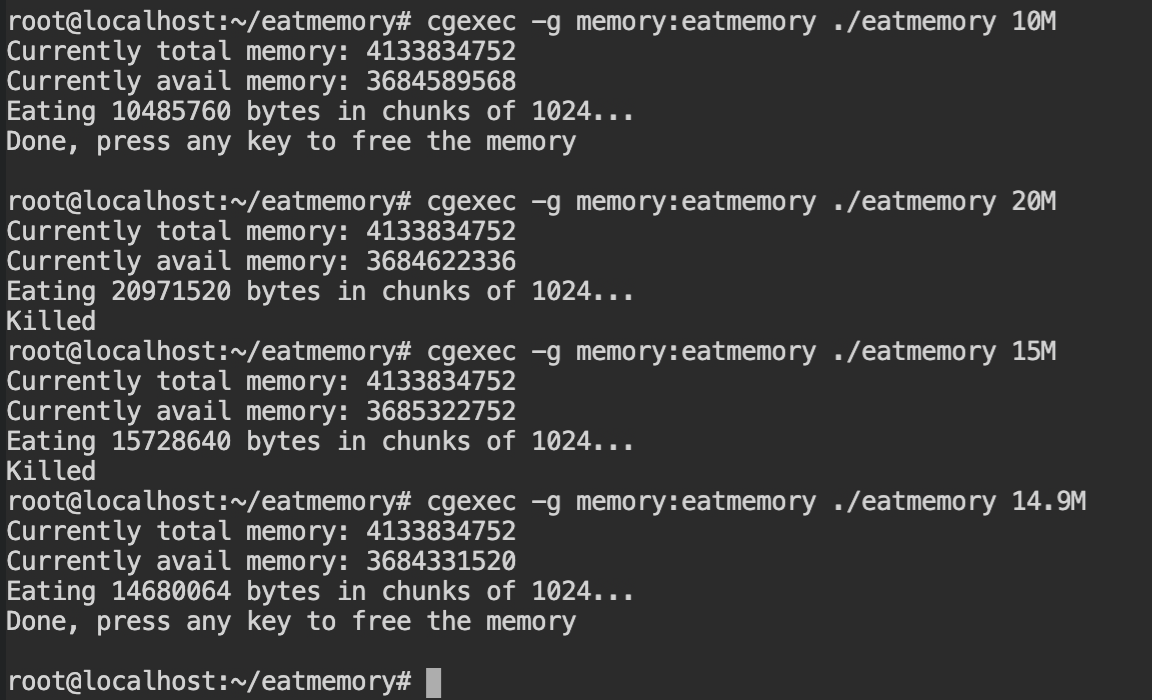
Set the memory limit for eatmemory path to 15 MB, which is 15728640 in bytes using cgset command. The value can be verified by reading the contents of the /sys/fs/cgroup/memory/eatmemory/memory.limit_in_bytes file or getting the variables in the memory controller of the eatmemory, using cgget command.
With the help of cgexec command, execute the ./eatmemory program with different values of the memory sizes. You will see that when the size is greater than or equal to 15 MB, it will be killed automatically.
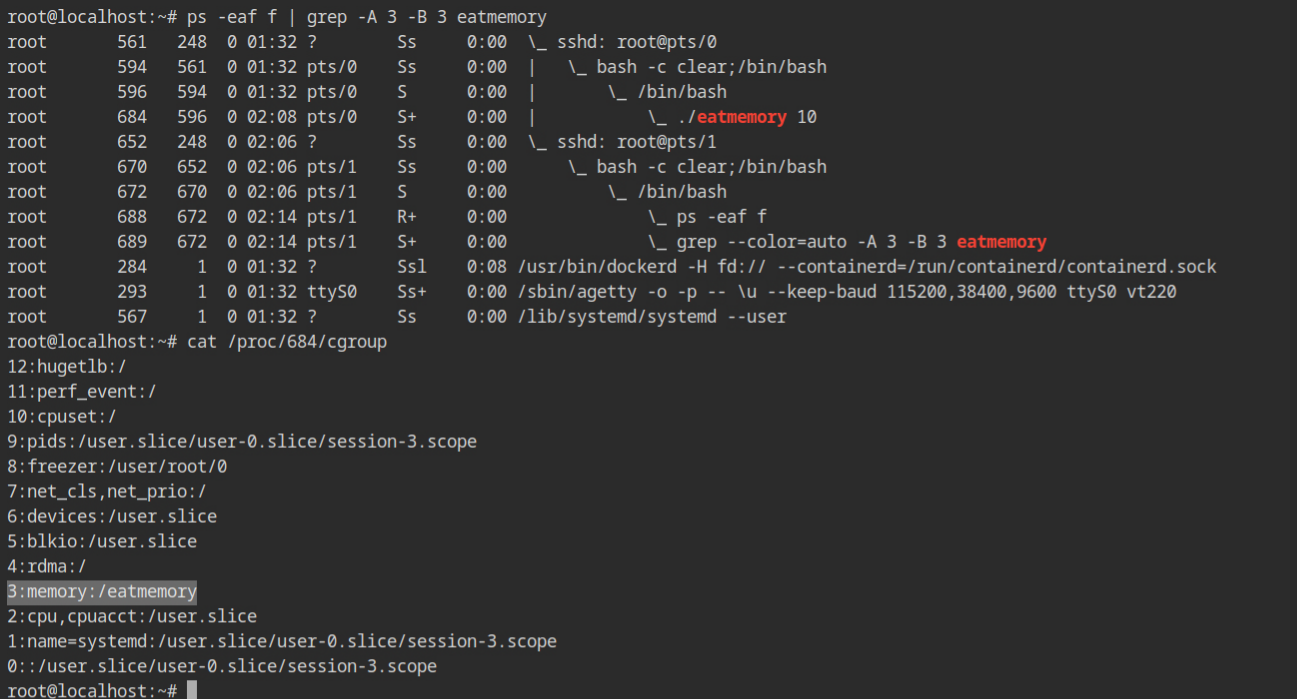
This is how process will look in the procfs, with all the cgroups being used and at what level. This list is sorted in descending order of implementation.
As you already know by now, namespaces are what makes containerization and isolation possible under the hood. But what are namespaces and how can we use it outside docker ecosystem? This isn't a fancy feature which gets installed with docker, it is one of the syscalls in the Linux kernel, after all. The unshare syscall is available since release of 2.6.16 version of the kernel which dates back to 2006, and runc was first released in the 2015.
A namespace wraps the resources (of system) for a initial process and it's children together in something "container like" thing. This abstraction helps to run in an isolated fashion where two such process in different namespaces can not interact with the resources of each other. You can think about it as chroot but only for resources.
In your Linux system, unshare command can be used to create the all the namespaces we will be discussing in this post.
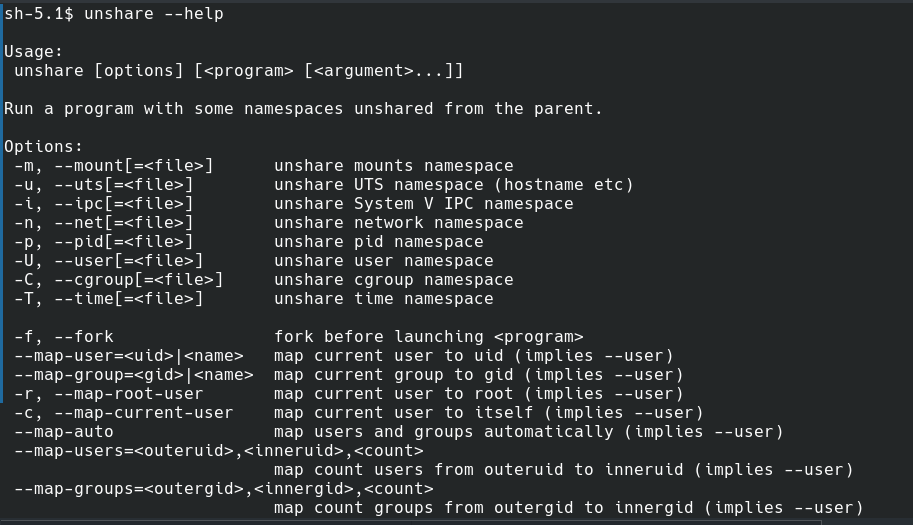
unshare command.PID Namespace
The PID namespace is used to isolate the process ids of the processes running in different PID namespaces. Outside the namespace, kernel will see it a normal process and assign a unique PID across system, but on application level two processes in different namespaces can have same process id.
Note: The /proc is not an actual directory on your computer. It is called pseudo file system for a reason.The first process in a newly created namespace gets its PID 1, and if other processes are called using fork or clone syscall, will create a new unique process id. This is usually incremented by 1.
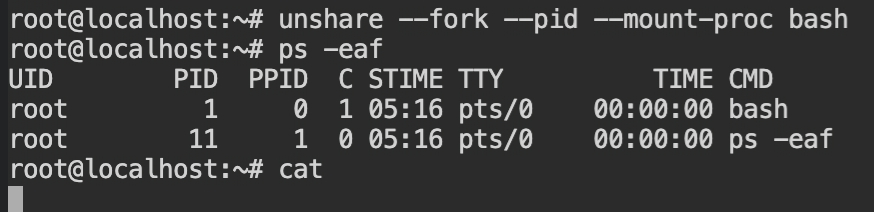
Using the following command, you can execute the bash shell in a PID namespace and when you will look the process list, the first process (here, bash) has process id 1 and ps -eaf has process id 11.
Note: Processes from ids 2-10 were executed by the bash sourcing and were killed. Therefore the counter has started thepsprocess with \(10 + 1 = 11\) PID. If you don't want this, you can disable with--norcflag with bash command.
Outside the namespace, when you will try to list all the processes, it will look like the following screenshot. The unshare command fork the process (here, bash) and then mount the "/proc".

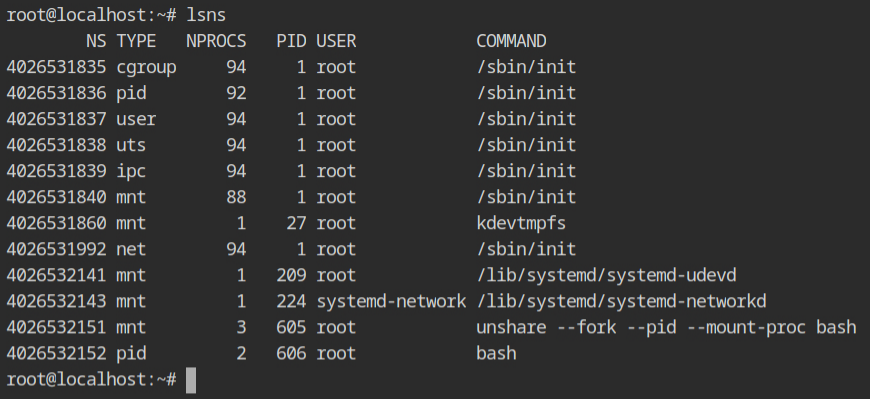
cat program running in PID namespace butOK, let's look at the lsns output to see what all namespaces are created and which processes are using it. You would see, that mount namespace has three processes unshare \( \to \) bash \( \to \) cat and PID namespace has two processes bash \( \to \) cat.
Since the strace tool is not installed on the instance provided by the lab. I have executed same command on the my system and dumped only execve, unshare, mount, fork and clone syscalls to see what happens during the execution of the unshare command.
execve("/usr/bin/unshare", ["unshare", "--fork", "--pid", "--mount-proc", "/bin/bash"], 0x7ffc37fca318 /* 25 vars */) = 0
unshare(CLONE_NEWNS|CLONE_NEWPID) = 0
clone(child_stack=NULL, flags=CLONE_CHILD_CLEARTID|CLONE_CHILD_SETTID|SIGCHLD, child_tidptr=0x7fc3989a8a10) = 464697
mount("none", "/", NULL, MS_REC|MS_PRIVATE, NULL) = 0
mount("proc", "/proc", "proc", MS_NOSUID|MS_NODEV|MS_NOEXEC, NULL) = 0
execve("/bin/bash", ["/bin/bash"], 0x7ffe14c71598 /* 25 vars */) = 0
clone(child_stack=NULL, flags=CLONE_CHILD_CLEARTID|CLONE_CHILD_SETTID|SIGCHLD, child_tidptr=0x7efc4698af10) = 2
/bin/bash process in the PID namespaceIn case you are feeling overwhelming, don't worry, I won't be discussing syscalls for other namespaces and try to wrap up things quickly.
User Namespace
In my old posts "Linux File Permissions" and "Demystifying SUID and SGID bits", I have discussed that while accessing the resources which are protected with discretionary access control lists, the effective id of users or groups are matched. Therefore let's say if the user is running with different user in the namespace, it would not be able to access the resources of the other namespace. In other words, the process has full privileges for operations inside the user namespace, but is unprivileged for operations outside the namespace.
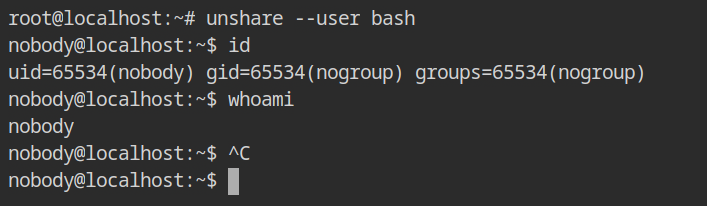
To create the user namespace, pass --user flag to unshare command. It will start the shell with user and group id of nobody (65534) and nogroup (65534).
This low privileged group will not have any capabilities in the effective. To confirm this behaviour, check out the output of capsh --print command, still it can read the protected files like /etc/shadow. But, why?

In the process listing outside the namespace, all the processes are running with the permission of the "root" user, and kernel will compare this root user with the DAC permissions of the resources. And you know, root user is the ultimate user on the Linux, which bypasses all the checks in kernel (except configured in MAC policies, of course)

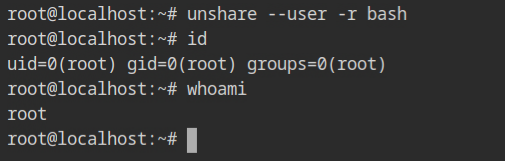
In case, you are wondering how to get that container like root user, pass the -r flag along with --user which will map the current user as the root user in the namespace. Similarly, use -c will be used to map the current user with itself, instead of nobody:nogroup.
Discussing all of the namespaces in this single post would make the knowledge more difficult to absorb. More information on namespaces can be found on their individual man pages.
Enough talking, but how can we use this outside docker or runc ecosystem, yet another post on Linux feature, huh? If you have this question, or not, this section is for you. In this section, I will use the knowledge gained from the previous posts, cgroups and namespaces to create a docker container without using docker CLI.
Set up the File System
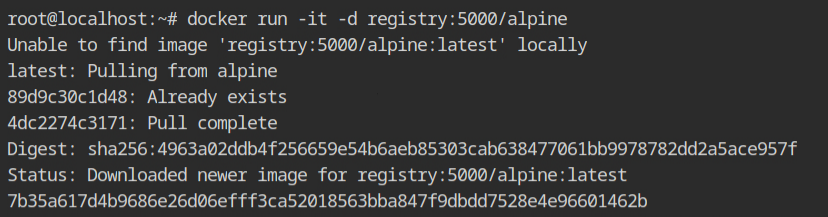
OK, copying file system from the current system would take a lot of time. Therefore allow me to cheat for a moment and to pull the alpine registry.
Start the container and copy the files using docker cp command into the host file system in /root/filesystem directory.

/root/filesystem directoryCopying eatmemory directory is optional. I just wanted to test the working of the cgroups inside the chrooted environment in the lab.
Set up Control Groups
Create the cgroup with cpu, cpuacct and memory controllers, name it as mycontainer for now. Set the memory limit of \( 10^9 \) bytes and cpu shares to 512. This will be used to set the CPU time and memory limits.

Start the Chroot Process in the Namespace with Cgroups
Using the following command, you can start the /bin/sh process in the different namespaces with the mycontainer cgroup. The execution flow will look like – cgexec \( \to \) unshare \( \to \) chroot \( \to \) sh \( \to \) mount \( \to \) sh.
cgexec -g cpu,cpuacct,memory:mycontainer \
unshare -fUmnpr --mount-proc --fork \
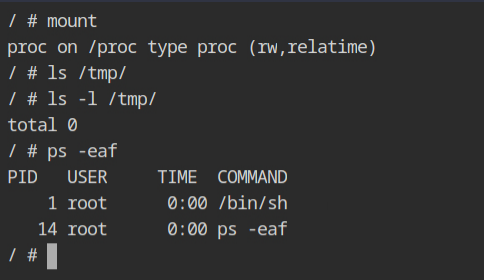
chroot /root/filesystem /bin/sh -c "/bin/mount -t proc proc /proc && /bin/sh"Since after the chroot, there is only one mount to proc file system, the output of mount command will show only that and also the processes running under PID namespace.
If you would check the hostname of the current container, it will be random hexadecimal string which looks identical to what we see when using docker container. This is because of the UTS namespace, which is responsible for providing the isolation of the hostname and the NIS domain name.
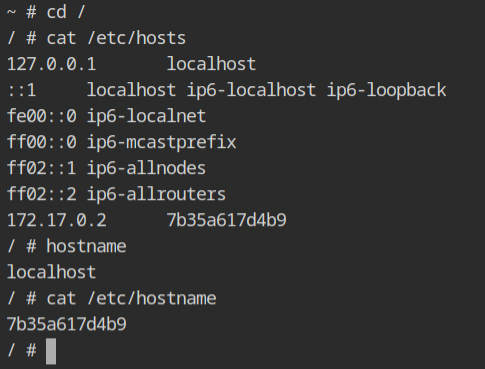
/etc/hosts file and hostnameThe output of the process listing command outside this namespace, on the host machine will look similar to what we are used to see with containerd-shims'.

So allow me to sum up what you have learnt today. Namespaces are what make resource isolation possible so that the initial process and it's child processes do not interfere with the processes of other namespaces. Some people (including me) also like to call it "chroot of resources". Control groups is the kernel feature which is used to monitor and limit the resource consumption for processes and its children.
Q: Can you run container w/o cgroups?
A: Yes, but there will be no boundary for resources consumption. So one process can perform DoS on others by allocating unnecessary resources.
Q: Can you run container w/o namespace?
A: No, because it is the one which is used to provide isolation and if it is not uses the processes in different container can see and access resources of other processes.
- https://tbhaxor.com/how-do-docker-run-containers-under-the-hood/
- https://stackoverflow.com/questions/34820558/difference-between-cgroups-and-namespaces
- https://www.nginx.com/blog/what-are-namespaces-cgroups-how-do-they-work/
- https://man7.org/linux/man-pages/man7/cgroups.7.html
- https://man7.org/linux/man-pages/man7/namespaces.7.html
- https://man7.org/linux/man-pages/man8/lsns.8.html
- https://www.youtube.com/watch?v=el7768BNUPw
- https://www.youtube.com/watch?v=sK5i-N34im8
- https://access.redhat.com/documentation/en-us/red_hat_enterprise_linux/7/html/resource_management_guide/sec-obtaining_information_about_control_groups
- https://www.reddit.com/r/linuxquestions/comments/v7a1z2/why_there_are_two_mounts_in_the_mnt_namespace_for/