
A gentle introduction to the OpenWRT web interface, LuCI, which can be used to configure wireless interfaces as well as remotely monitor traffic.
Hello World! Let's say you are in different geographical location and still want to capture the traffic or at least get the information of clients and access points on your system. How would you do that, the range of WiFi is not that much? A very naive approach is to setup a WiFi device in monitor mode and interact it via SSH, also Wireshark and Tshark can capture the traffic over SSH. It would be easy to capture and analyze live data.
Note There is already very less information on the net (or I am still not good at search), I can only provide you a very basic information on interacting with it.
OpenWRT is the most popular open-source OS for WiFi routers. It allows technical users to compile custom firmware for their devices and a web based UI (openwrt/luci) for intracting it from browsers over internet or intranet.
Instead of trying to create a single, static firmware, OpenWrt provides a fully writable filesystem with package management. This means that you can have all the features you need with none of the bloat, powered by a Linux kernel that's more recent than most other distributions.
💡
You can use CloudShark to remotely capture the packets. All you have to do to get started is install the cshark and luci-app-cshark packages and then configure it as per your requirements. It also offers connectivity with OpenWRT. The links can be found in the resources section.
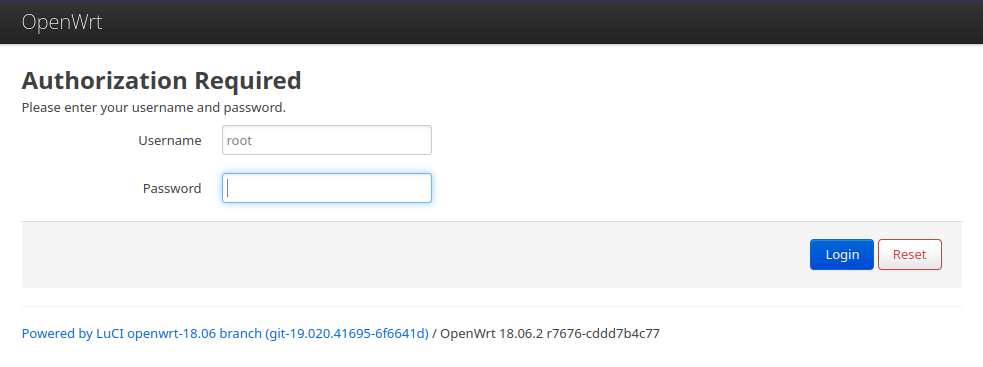
In this post, I will be using a lab from the attackdefense platform which provides a LuCI interface login. The login credentials are provided in the lab description already: username=root and password=chicago.
After a successful login, it will redirect you to the dashboard which will give you information about the current device, architecture it is running on and resource usage.

Hover your mouse cursor on the Network tab in the menu and click Wireless to get a list of all the interfaces supporting radio as communication medium. You can also see there are total 3 SSID configured in master mode (access points). Both of these can support all 802.11b, 802.11g, 802.11n and 802.11ac standards.
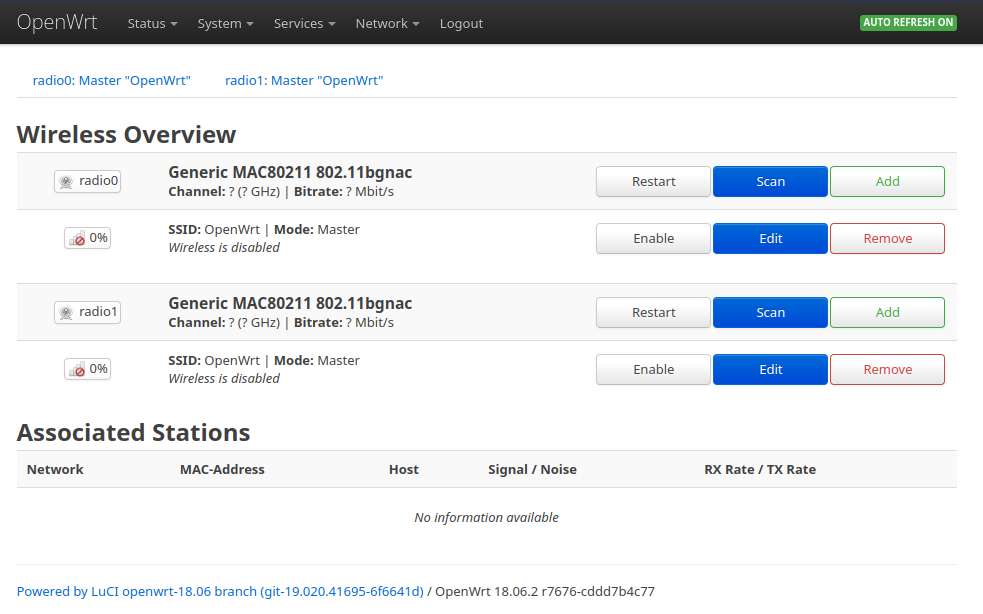
Click on the Scan button of any interface and wait for some time. It will capture the available WIFI networks in the environment and show you thier SSID, Operating Channel, BSSID and Encryption type.
Create a WiFi Access Point and Connect to it
Ohk so too much theory, let's create and configure a WiFi access point with SSID "MyWiFi" and WPA2-PSK Security and then later connect to it from a different interface. I will be using radio1 interface, but you are allowed to use any one of them.
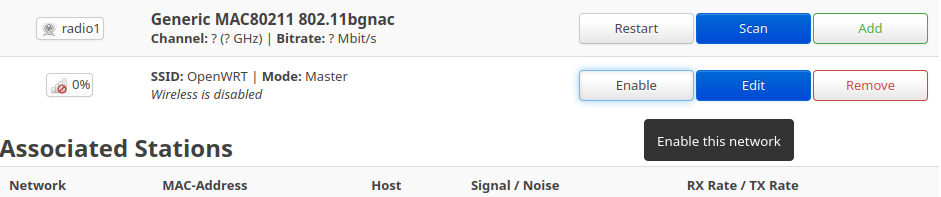
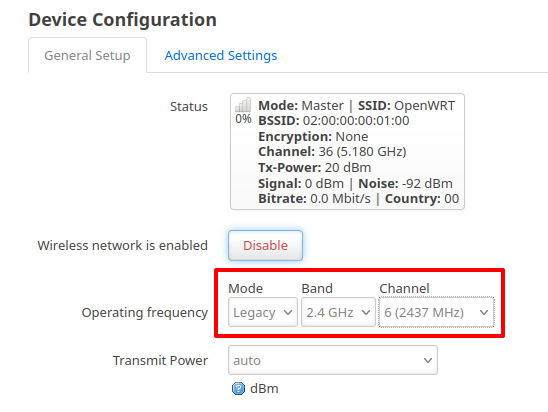
Once you click the Enable, it will start the network with default configuration, then click on the Edit button to update them.
In the General Setup under Device Configuration section, and make the following changes
- Select the Mode to Legacy, or N if you want channel bonding feature
- Set the band to 2.4GHz
- Set the channel to 6
Change the ESSID to "MyWiFi" in the General Setup under Interface Configuration section. You can select the "Hide ESSID" option if you prefer that the user enter the SSID rather than your network broadcasting it.

Under Wireless Security, set the encryption to WPA2-PSK and the key to "[email protected]@1234". Any random string, at least 8 characters long, may be used as the key.
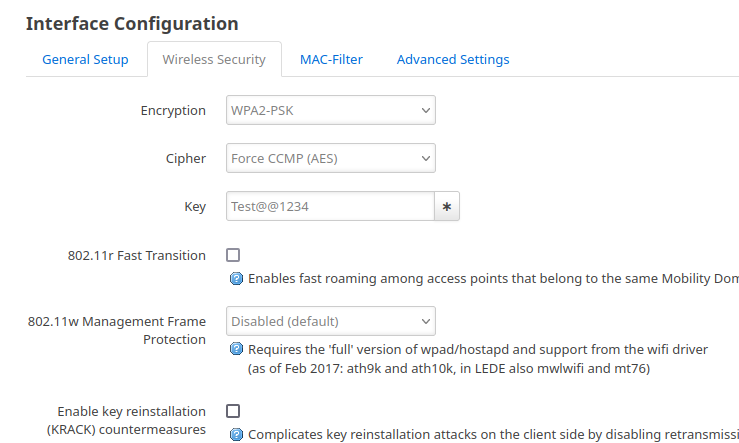
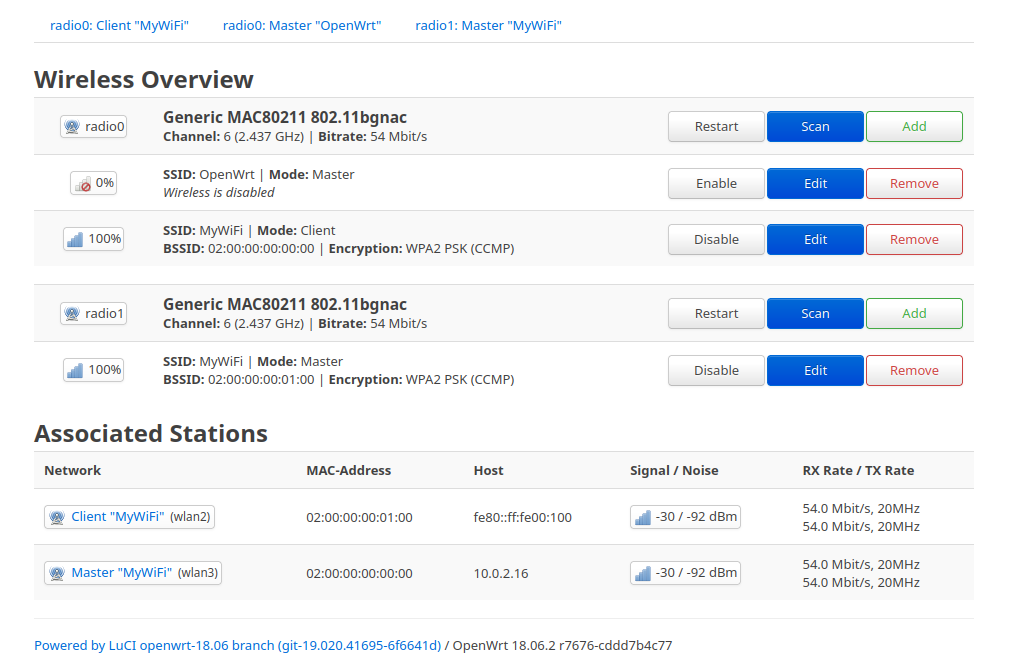
When you are finished, click the Save button, and the Networks \( \to \) Wireless page will reload. Look at the setup now; under the radio1 interface, you will notice the updated data.

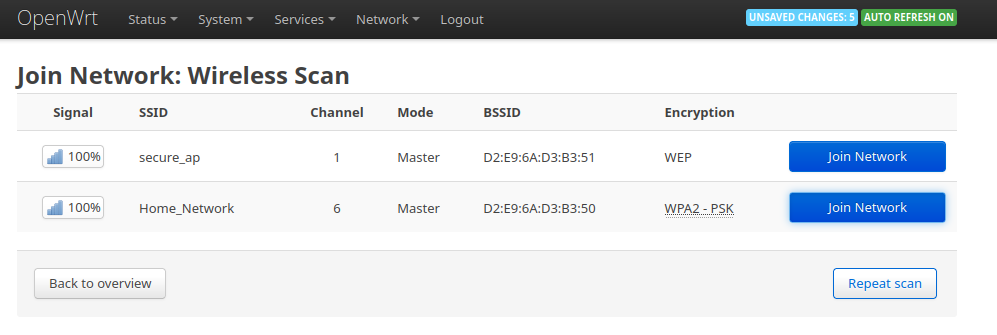
Click the "Scan" button on radio0 interface and wait for the client to capture the beacon frames and list the WiFi network details.
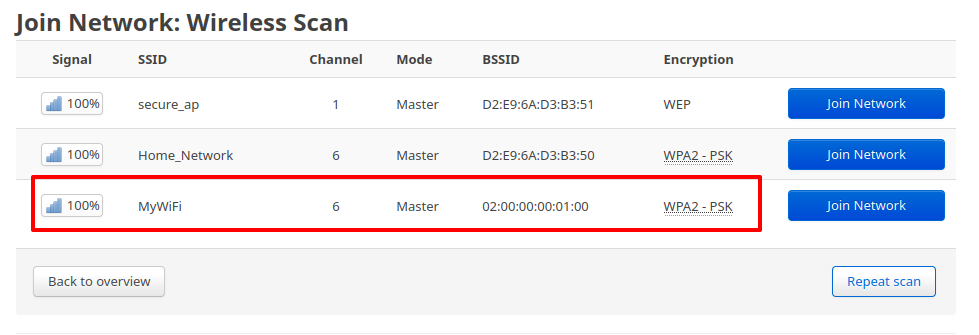
You will be directed to the next screen after clicking the Join Network button, which will ask for additional information. You need simply enter the WPA passphrase and click the Submit button.
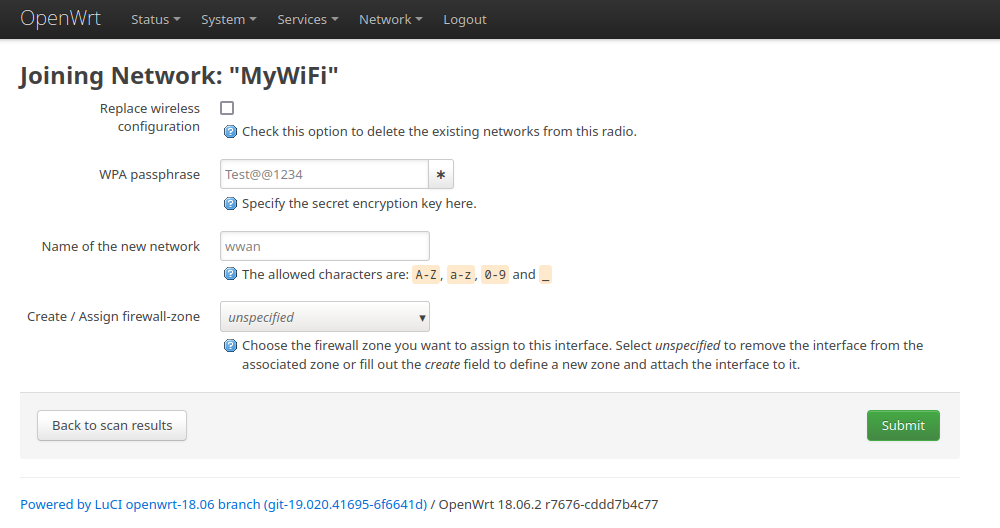
You will then be redirected to the Wireless networks page, where you can see that one interface is in access point (master) mode, while another is in client (station) mode. Additionally, the association information is provided below.
如有侵权请联系:admin#unsafe.sh