Unfortunately, we will NOT be selling the "Spot the Vuln" shirts we mentioned on the podcast. Its just due to some tax things I don't have the time to deal with right now, maybe next year.
If you're willing to put in some effort though what follows is basically a tutorial on recreating the shirt within Printify so you can order it from a producer yourself.
Printify is kind-of a drop-shipping system for custom clothing. You can create a product that will be fulfilled by some producer. You can then issue orders manually from that producer for the shirt, or hook up an external store and have orders automatically sent to the producer.
I also want to make clear that I have not yet recieved my own order of the shirt so I cannot comment on the quality of the print or end result. The mock-ups look great but I'm sure the end results might deviate. I'll update when I do get my order in.
Setup
- Register on Printify
- Find "Catalog" on the top menu, and select Men's Clothing > T-Shirts.
- In the search bar, search for
Men's Polyester Tee (AOP)which should only have one result. That is "Fulfilled by Miami Sublimation." Select it by clicking on it. - Click the green "Start Designing" button
- Click the "Product variants" link near the top-right corner, select whatever sizes you want and then the Update button.
Design
There are two shirts however most of the design process is the same for both.
First, you'll need a copy of the design assets for the shirt, all of the files mentioned in the tutorial can be found in this zip: shirt-assets.zip
Common Elements
Background
- Select "Front Side" from the left side panel.
- On the Right Side menu, select "New design" and then under "Add design from..." sekect "My Device"
- Select the "static.png" file
- On the right side you should see the
static.pngimage, and a menu form under it with "width" and "height" options. If this isin't visible just click on the entry and it should expand. - Set the Following Values:
- Width: 24.26in
- Height: 28.31in
- Rotate: 0deg
- Scale 78.24%
- Position left: 0.01%
- Position top: 0.01%
- On the right side with the static image selected you should have a floating menu either above or below the image. Click the "..." button on that menu and then "Apply to all areas".

Spot the Vuln Text
- Back to the right menu, "New design" > "Add design from ..." > "My Device" and select
stv-logo.png. - Editing the positional values again:
- Width: 9.42in
- Height: 1.29in
- Rotate: 0deg
- Scale 116.11%
- Position left: 30.58%
- Position top: 24.87%

Sleeve Patch
- Activate the "Left Sleeve" display
- Add the "shoulder-logo.png" image
- Set the following values:
- Width: 3.52
- Height: 3.05
- Rotate: 0
- Scale: 77.74
- Position left: 41.52
- Position top: 35.17

Vulnerable Code
This is the part that changes between shirts. You have two options:
justbepositive.png- This is the memory corruption vulnerability.regex.png- This is our bounty-style vulnerable code.
See if you can spot the vuln, otherwise I'll put the solutions up in a separate post. Choose the image you want.
justbepositive.png
- Width: 11.58
- Height: 11.59
- Rotate: 0
- Scale: 111.43
- Position left: 28.59
- Position top: 35.55

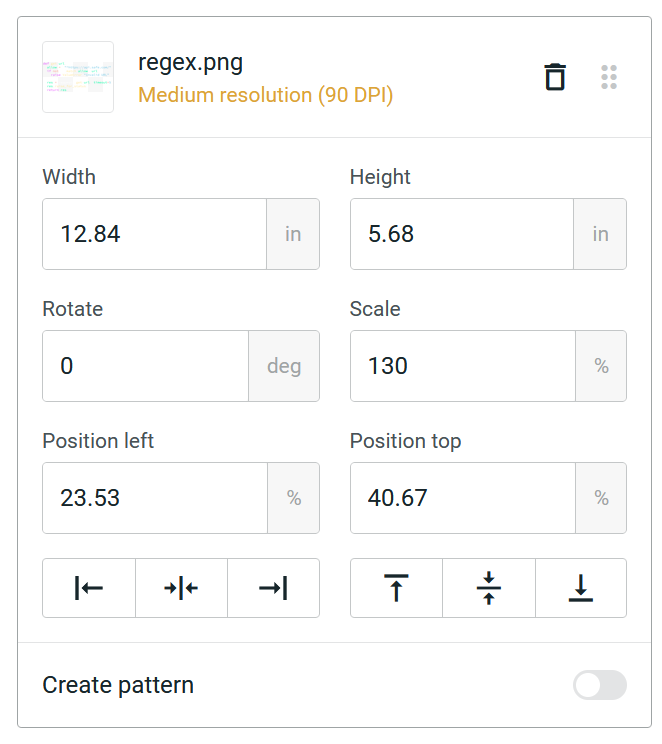
regex.png
- Width: 12.84
- Height: 5.68
- Rotate: 0
- Scale: 130
- Position left: 23.53
- Position top: 40.67

Back of the shirt
The last step is to just repeat the steps for the "Spot the Vuln" text, and your chosen code image on the "Back Side". The values are exactly the same you just need to add the assets again and place them on the back.
Final Design and Ordering
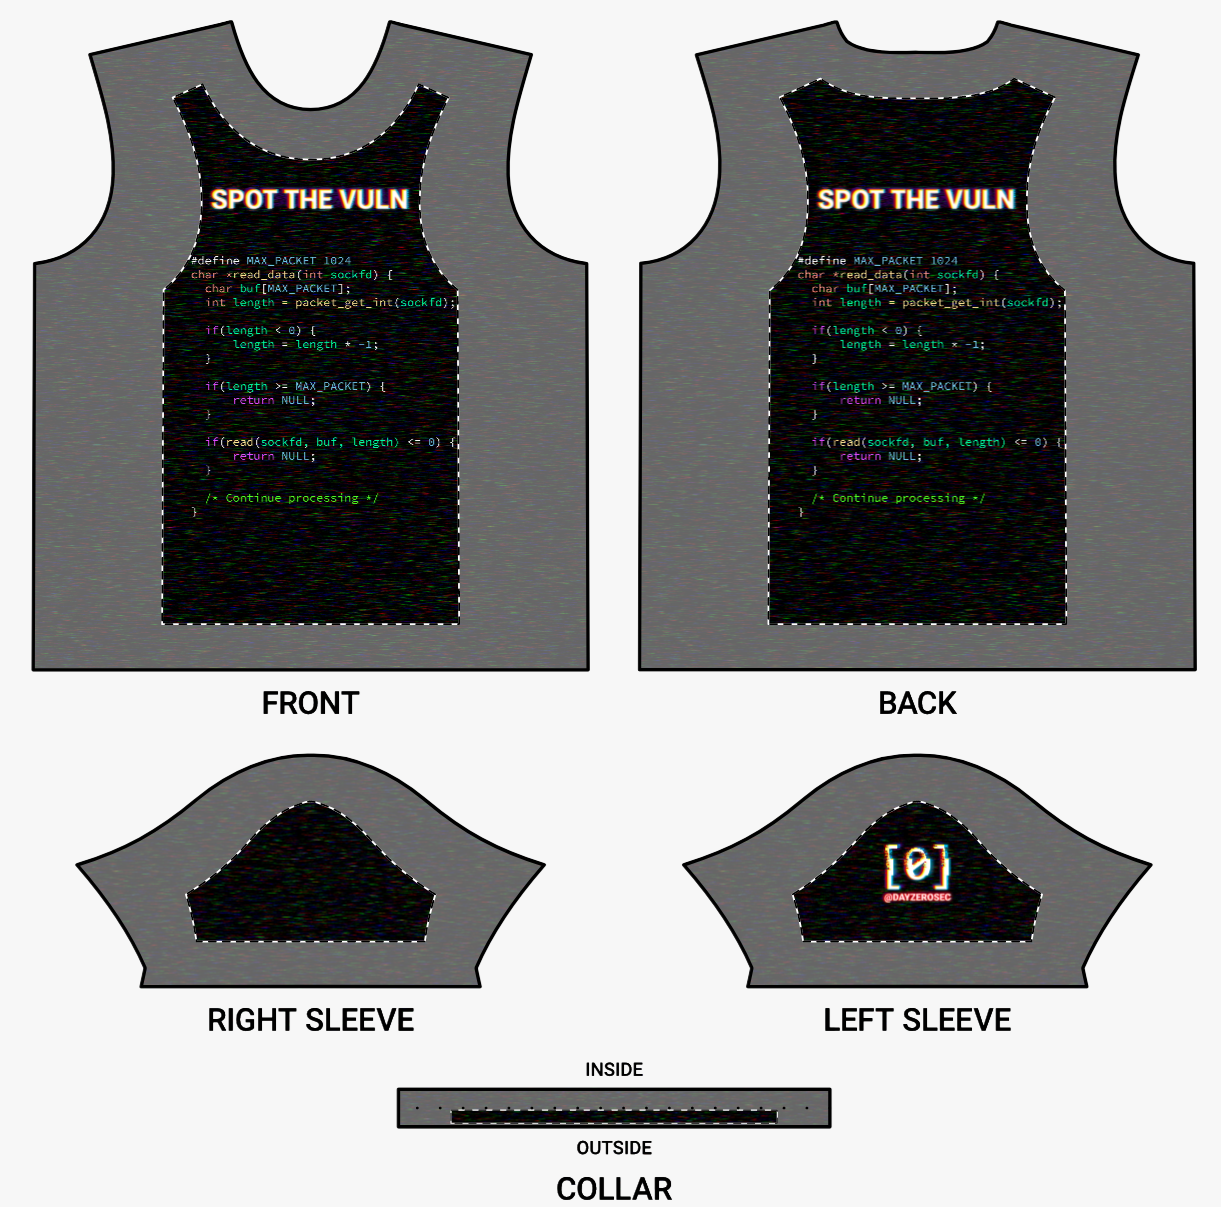
With the above steps done, if you active the "All Areas" view, you should see something similar to the above image.
- Click on "Save Product"
- Give it any name and description you want
- Hit "Save as Draft".
Ordering
The product should now appear in your "My Products" page and can be ordered.
- From the "My Products" page, press the green "Create Order" button, and select "Manual"
- Select the shirt you want
- Select the size.
- If you want to order multiple shirts there is a "Add Product to order button" you can hit that to add the other shirt or whatever you want.
- Hit the big green "Shipping >" button and the rest is pretty standard online order stuff.
An annoying process to be sure, but I hope it worked for you.
See you all at DEF CON o/
如有侵权请联系:admin#unsafe.sh