2024-1-26 07:57:40 Author: blog.sucuri.net(查看原文) 阅读量:14 收藏
If you’ve recently launched a WordPress website, you might be asking, “How do I log in to WordPress?” or “Where is my WordPress login located?” Don’t worry — you’re not alone, and these are essential questions to ask.
Understanding where to find your WordPress login URL and how to use it is a fundamental part of managing your website. But it’s not just about getting access to your WordPress admin dashboard, it’s also a critical element of your site’s overall security strategy.
This blog post will help you find your WordPress login URL, explain how to log in through your hosting dashboard, and provide valuable insights to protect your website from hackers and brute force attacks. We’ll also delve into some advanced topics, such as how to customize and secure your WordPress login URL.
So, let’s dive in!
Contents:
- What is the WordPress login URL?
- Where do I find the WordPress login URL?
- Finding a custom WordPress login URL
- Why is the login URL vulnerable to hackers?
- How to change the WordPress login URL
- Protecting your WordPress login
What is the WordPress login URL?
The WordPress login URL is the specific web address where you (and any other team members) can access the WordPress dashboard to manage content, settings, and other functionalities.
In essence, the login URL is just like the front door to your house — it’s the primary entry point. Instead of a physical key, you use your username and password to gain access. And just like your home, you definitely don’t want uninvited guests (hackers) inside, making it incredibly important to protect your login URL.
Where do I find the WordPress login URL?
By default, you’ll find your WordPress login URL at one of the following four locations:
- /wp-admin/
- /wp-login.php
- /login/
- /admin/
To access your WordPress admin login page, you’ll need to enter your domain name followed by one of these page locations like this:
https://yourwebsitedomain.com/wp-admin/
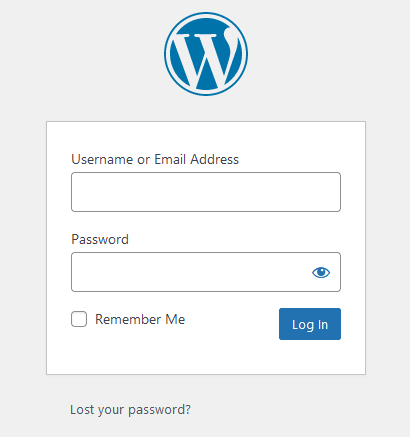
Using this login URL will take you to your WordPress admin login screen where you can log in with your username and password.

Bypassing the WordPress login with the ‘Remember Me’ feature
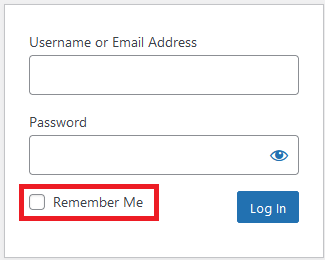
You might also notice a checkbox marked Remember Me on your WordPress login screen.
By checking this box before you complete a login, your future visits to the admin area become smoother. WordPress won’t prompt you for login credentials for the subsequent 14 days (or whatever number of days you have defined in your browser’s cookie settings).

Keep in mind that this feature, while convenient, can introduce additional risk to your WordPress account — especially if you’re on a shared or public device.
It’s always important to balance convenience (like staying logged in) with security considerations. When in doubt, it’s much safer to log out after each session and not use this WordPress ‘Remember Me’ feature.
Finding a custom WordPress login URL
Sometimes, your web hosting provider will set up WordPress for you and in the process change the default login URL. If they’ve done this, they will likely send you a link to the login page in an email or within your hosting account.
That means (depending on your web host) you might not have to go through the usual WordPress login process. In fact, some hosts have a one-click link to access your WordPress dashboard directly.
If there’s no such option from your web host or you’ve forgotten a custom WordPress login URL location and you can’t access your site from /wp-admin/ or /wp-login.php, you’ll need to find the login URL yourself. To do this, you can use the File Transfer Protocol (FTP) to access your website’s files to locate the page.
First, you’ll need FTP details and an FTP client like FileZilla to connect your computer to your website’s server. If you don’t have these, you can get them from your web host.
Once you connect to the server, go to the folder that has your WordPress files. This might be named public, public_html, www, or your site’s name.
In this folder, you’ll find a file named wp-login.php:

Open this file carefully with a text editor (don’t change or save any code edits!). Next, search for site_url in this file. When you find it, look at the corresponding line of code. This will help you identify your site’s custom login URL.
Why is the login URL vulnerable to hackers?
Unfortunately, WordPress login pages can be easy for hackers to find. This is because most of them use a standard address like /wp-admin/ or /wp-login.php. Hackers know this and can easily find these pages if they’re not protected behind a website firewall.
Hackers may use a method called brute force to attack a login page and gain unauthorized access. They try many different usernames and passwords until they find the right one. If your username is simple or easy to guess (like ‘admin’ or your own name), then this process is even easier for them.
Furthermore, the default settings in WordPress allow unlimited login attempts. This means hackers can keep guessing your details without any cutoff or penalty.
There are fortunately a couple of steps you can take to harden your WordPress site and prevent hackers from stepping through the front door.
How to change the WordPress login URL
Since the WordPress login URL is a common path shared by default configurations of WordPress, changing the login URL can help hide the main entrance to your website, making automated attacks from hackers a bit more difficult.
There are two methods you can use to change the WordPress login URL: with a plugin or manually.
1. Changing the default WordPress login URL with a plugin
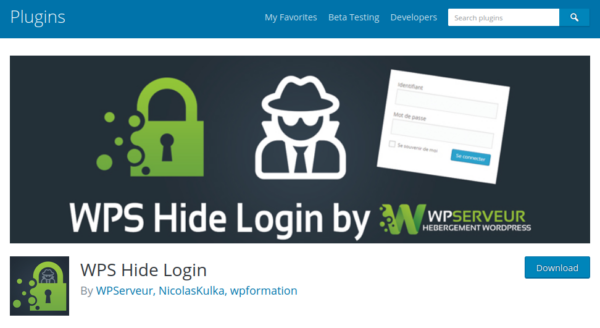
The most straightforward method to alter your WordPress login URL is by utilizing a plugin like WPS Hide login.

To modify your WordPress login URL with the WPS Hide Login plugin:
- Navigate to Plugins > Add New.
- Download the WPS Hide Login plugin, then install and activate it.
- Navigate to the WPS Hide Login settings page.
- Update your login path and click Save Changes.
To log in to your site in the future, you’ll need to use your new URL — so be sure to save it for future reference!
2. Changing the default WordPress login URL manually
Although it’s safer and more straightforward to use a plugin for changing the WordPress login URL, you can also change it manually.
Note: Manually changing involves altering key files, which can break your website if not done right. Also, WordPress updates may undo these manual changes unless you use a child theme.
Should you choose to proceed manually, you’d need to edit a copy of the wp-login.php file. First, connect to your site via FTP and go to the WordPress root directory. Locate and download a copy of the wp-login.php file to your local device.

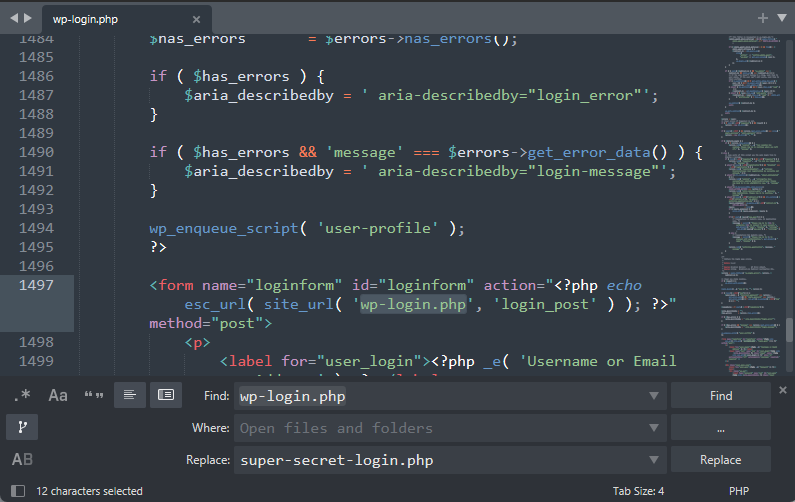
Using a text editor that includes a search and replace function, open the local copy of the wp-login.php file. Use this tool to find and replace each occurrence of wp-login.php in the file with your desired login page name.
In this example, we’ll use super-secret-login.php but you can change it to whatever name you prefer.

After replacing all instances of wp-login.php, save the changes and rename the file to your chosen login page name (such as super-secret-login.php). Now upload it back to the WordPress root directory.
Next, go to your wp-content/themes directory and locate your child theme’s folder. You’ll need to use a child theme unless you’re OK with your customized login URL disappearing whenever you update your theme.
Open the functions.php file and locate the line that reads // END ENQUEUE PARENT ACTION and then add the following WordPress “hook” right before it:
add_filter( 'login_url', 'custom_login_url', PHP_INT_MAX );
function custom_login_url( $login_url ) {
$login_url = site_url( 'super-secret-login.php', 'login' );
return $login_url;
}
Replace my example of “super-secret-login.php” with your new WordPress login file name. This code tells WordPress to use your new file for logins.
Save the changes to your functions.php. Now, try accessing the new custom login URL you’ve set up. It should work just like the original wp-login.php file.
Finally, you can delete the original wp-login.php file from the WordPress root directory. If you switch themes later, remember you’ll need to re-add this hook to the new theme’s functions.php file in order to access your custom login URL page.
Protecting your WordPress login from hackers
Customizing your WordPress login URL is an excellent step towards deterring potential attacks against your site. However, even with a unique login URL, your login page could still be susceptible to unauthorized users.
This is because attackers often reuse login details from various data leaks. They might also employ brute force methods to crack your login page.
To minimize the risk of unauthorized access to your WordPress site, you can further protect your site with the following measures:
- Restrict access to specific IP addresses: By using the Sucuri firewall or the .htaccess file, you can specify IP addresses that can access the WordPress dashboard. This means others won’t be able to access your login page.
- Use two factor authentication (2FA): Implementing two-factor authentication can greatly reduce the chance of unauthorized access to your WordPress dashboard. This requires users to have an additional device for verification, besides login credentials.
- Implement CAPTCHA: Adding CAPTCHA aids in protecting your login page against attacks by bots or automated brute force attempts.
- Limit login attempts: Limiting login attempts can discourage attackers from attempting to guess your credentials. This means your site only allows specific login attempts within a set timeframe.
- Use strong and unique passwords: Make it a habit to use strong and unique passwords for every single one of your accounts. While this might not be popular among some users, it is a vital security measure.
- Patch your software to protect against vulnerabilities. Keeping WordPress core, themes, plugins and other components updated ensures the latest security patches are in place, fortifying your website against threats. If you’re unable to patch in a timely manner, leverage a firewall to virtually patch known vulnerabilities to prevent exploits.
Changing the WordPress login URL adds complexity for hackers trying to access your site. But these additional six steps make it even more difficult for an attacker to gain a foothold in your website’s environment.
Sucuri offers an easy and effective way to protect your WordPress website from hacks. Simply put your site behind our firewall and you’ll be able to limit website access to certain IPs, set up two-factor authentication, protect sensitive pages, and add CAPTCHA to protect your site from spam and bots. You’ll also enjoy virtual patching for a wide range of plugin and theme vulnerabilities to help protect your site against hackers.
Interested? We offer a free 30 day trial and 24/7 support for a range of website security issues!
如有侵权请联系:admin#unsafe.sh
