对TLS证书签名
但是,在验证证书的有效性时,客户更喜欢检查你的电话,而不是证书的常用名称。他们还会检查它的“密码签名”。密码签名是某个第三方(通常是“证书颁发机构”)附加在证书上的批准印章。CA是安全可靠的组织,其工作是颁发和签署TLS证书。毫不夸张地说,它们共同负责互联网上加密的完整性。在向某个客户颁发域名或主机名证书之前,CA会进行尽职调查,以验证该客户确实是该业务的真正所有者。
满足CA后,它将为主机名生成一个证书和私钥,并将加密签名附加到该证书上。 CA通过使用自己的私钥来加密证书的内容来创建签名。客户可以使用CA的公钥对签名进行解密,然后确认解密后的文本与证书中的文本匹配,从而验证签名是否有效。由于无法访问CA的私钥(无法对其进行高度保密和安全保护),就无法生成签名,因此可以安全地假定CA认可了证书的内容。他们已经确信证书的持有者(或更准确地说,是拥有相应私钥的组织)是证书所包含的域或主机名的真正所有者。此时,签名有效地表示一个语句。
像你的手机这样的客户端仅信任由其信任的CA签名的TLS证书,你的手机会使用经过手机制造商认可的根CA硬编码列表来决定信任哪些CA。例如,可以在线获取预加载到iOS11中的根CA列表。
可以为api.targetapp.com生成一个DIY证书,但是,由于我们不是api.targetapp.com的真正所有者,所以我们将永远无法说服真正可信的CA对其进行签名。如果签名都不保证我们的证书,那么你的手机将拒绝信任它。
我们可以通过启动自己的根CA“Robert 's trusted Certificate Corp”来解决这个问题,并将它放到智能手机的可信根CA列表中。一种非常困难的方法是建立一家真正的公司,雇用数百人来经营它,建立一些非常安全的证书生成基础架构,填写大量文书,以说服Google和Apple以及我们其他人应该被赋予数亿人的在线安全性,并最终在手机的下一个操作系统更新中包含我们的CA的公钥。之后,你可以继续进行此TCP代理项目的工作。
由于所有这些工作听起来都很繁琐,所以我们会做些简单的事情。我们仍将为Robert's Trusty Certificate Corp生成一个根CA证书。然后,我们将无需手动进行上述所有操作,而是将该证书手动添加到你手机的受信任根CA列表中。这告诉你的手机信任由Robert's Trusty Certificate Corp签名的其他证书。我们将使用RTCC的私钥对我们的api.targetapp.com证书进行签名,并将此签名的证书及其私钥传递到我们代理的listenSSL方法中。
当我们的代理人向你的手机提供最新签名的api.targetapp.com证书时,你的手机将看到该手机已由“ Robert’s Trusty Certificate Corp”签名。它将检查其受信任的CA的内部列表,并查看是否有这个出色的信誉机构。它将很乐意接受api.targetapp.com的证书为有效证书,并在开始发送TCP流量之前继续协商TLS会话。
请注意,掌握我们自制CA私钥的任何人都可以使用它为所需的任何主机名签署自己的证书。在你的手机(仅限你的手机)眼中,这些证书是合法且可信赖的。攻击者将能够使用它们对你执行自己的中间人攻击,从而允许他们读取你的加密流量。你应该小心确保CA的私钥非常安全。完成此项目后,你还应确保从手机的根CA列表中删除CA的公钥。
生成你的手机将信任的TLS证书后,我们可以通过listenSSL将其传递到我们的代理中。twisted将为我们处理其余的问题,然后我们的代理将启用TLS。
具体伪造过程
1.为我们的目标应用程序的主机名生成一个TLS证书和私钥;
2.生成根CA公钥/私钥对,并使用私钥对该TLS证书签名;
3.将我们的根CA的公钥安装为手机上受信任的授权机构;
4.将此证书和相应的私钥传递到twisted的listenSSL函数中,并使用listenSSL监控传入的TCP连接。
稍后,我们将针对英国广播公司的网站www.bbc.com测试我们的代理。
为我们的目标主机名生成证书
用于创建和签名TLS证书的库以大多数合理的编程语言提供,只需几行代码就可以生成bbc.com的第一个证书。
为我们的证书颁发机构生成证书
我们将为我们的原始根CA“ Robert's Trusty Certificate Corp”生成第二个TLS证书,该证书将是自签名的-使用证书自己的私钥签名。这是因为根CA是隐式受信任的,不需要其他任何人为其担保。
在目标证书上签名
现在,我们可以使用新的CA的私钥在www.bbc.com上签署我们的证书。此签名将对语句“ Robert's Trusty Certificate Corp断言该证书属于www.bbc.com的真实所有者”进行加密编码。
在手机上安装根CA的证书
最后,我们需要在你的手机上安装我们的根CA,以便你的手机信任由它签名的其他证书。最安全的方法是:
1. 运行下面的代理服务器脚本一次,它将生成一个根CA证书并打印出它的位置;
2. 打开证书文件,然后将后半部分(包括----- BEGIN CERTIFICATE -----之后的所有内容)复制到一个名为ca.pub的新文件中;
3. 通过电子邮件将ca.pub作为文件附件发送到你可以在手机上访问的电子邮件帐户;
4. 打开手机上的电子邮件,然后打开附件;
5. 其余步骤将取决于手机的品牌和型号,例如,在iOS上,你必须将密钥安装为根CA,然后在系统设置中找到它并启用它,并在此过程中勾选各种“是的,我知道这样做很冒险”选项。
在你的手机上安装根CA证书的方法更简单,更省力。
监控SSL
现在,我们拥有了启用TLS的中间人TCP代理所需的一切。我们将更新代理的启动脚本,以便它为目标主机名生成并签署自己的证书(在我们的测试中,它为www.bbc.com)。然后,我们将签名的证书传递到我们的代理中,并启动我们的代理。
此代码也在GitHub上。
import time

from twisted.internet import protocol, reactor
from twisted.internet import ssl as twisted_ssl
import dns.resolver

from OpenSSL.crypto import (X509Extension, X509,
        dump_privatekey, dump_certificate,
        load_certificate, load_privatekey,
        PKey, TYPE_RSA, X509Req)
from OpenSSL.SSL import FILETYPE_PEM
import tempfile
import os
import netifaces as ni

# Adapted from http://stackoverflow.com/a/15645169/221061

class TLSTCPProxyProtocol(protocol.Protocol):
    """
    TLSTCPProxyProtocol listens for TCP connections from a
    client (eg. a phone) and forwards them on to a specified
    destination (eg. an app's API server) over a second TCP
    connection, using a ProxyToServerProtocol.

    It assumes that both legs of this trip are encrypted
    using TLS.
    """
    def __init__(self):
        self.buffer = None
        self.proxy_to_server_protocol = None

    def connectionMade(self):
        """
        Called by twisted when a client connects to the
        proxy.  Makes an TLS connection from the proxy to
        the server to complete the chain.
        """
        print("Connection made from CLIENT => PROXY")
        proxy_to_server_factory = protocol.ClientFactory()
        proxy_to_server_factory.protocol = ProxyToServerProtocol
        proxy_to_server_factory.server = self

        reactor.connectSSL(DST_IP, DST_PORT,
                           proxy_to_server_factory,
                           twisted_ssl.CertificateOptions())

    def dataReceived(self, data):
        """
        Called by twisted when the proxy receives data from
        the client. Sends the data on to the server.

        CLIENT ===> PROXY ===> DST
        """
        print("")
        print("CLIENT => SERVER")
        print(FORMAT_FN(data))
        WRITE_TO_FILE(data)
        print("")
        if self.proxy_to_server_protocol:
            self.proxy_to_server_protocol.write(data)
        else:
            self.buffer = data

    def write(self, data):
        self.transport.write(data)


class ProxyToServerProtocol(protocol.Protocol):
    """
    ProxyToServerProtocol connects to a server over TCP.
    It sends the server data given to it by an
    TLSTCPProxyProtocol, and uses the TLSTCPProxyProtocol
    to send data that it receives back from the server on
    to a client.
    """

    def connectionMade(self):
        """
        Called by twisted when the proxy connects to the
        server.  Flushes any buffered data on the proxy
        to server.
        """
        print("Connection made from PROXY => SERVER")
        self.factory.server.proxy_to_server_protocol = self
        self.write(self.factory.server.buffer)
        self.factory.server.buffer = ''

    def dataReceived(self, data):
        """
        Called by twisted when the proxy receives data
        from the server. Sends the data on to to the
        client.

        DST ===> PROXY ===> CLIENT
        """
        print("")
        print("SERVER => CLIENT")
        print(FORMAT_FN(data))
        print("")
        self.factory.server.write(data)

    def write(self, data):
        if data:
            self.transport.write(data)


# A class that represents a CA. It wraps a root CA TLS
# certificate, and can generate and sign certificates using
# this root cert.
#
# Inpsiration from
# https://github.com/allfro/pymiproxy/blob/master/src/miproxy/proxy.py
class CertificateAuthority(object):

    CERT_PREFIX = 'fake-cert'

    def __init__(self, ca_file, cache_dir=tempfile.mkdtemp()):
        print("Initializing CertificateAuthority ca_file=%s cache_dir=%s" %
              (ca_file, cache_dir))

        self.ca_file = ca_file
        self.cache_dir = cache_dir
        if not os.path.exists(ca_file):
            raise Exception("No cert exists at %s" % ca_file)
        else:
            self._read_ca(ca_file)

    def get_cert_path(self, cn):
        cnp = os.path.sep.join([self.cache_dir, '%s-%s.pem' %
            (self.CERT_PREFIX, cn)])
        if os.path.exists(cnp):
            print("Cert already exists common_name=%s" % cn)
        else:
            print("Creating and signing cert common_name=%s" % cn)
            key = PKey()
            key.generate_key(TYPE_RSA, 2048)

            # Generate CSR
            req = X509Req()
            req.get_subject().CN = cn
            req.set_pubkey(key)
            req.sign(key, 'sha1')

            # Sign CSR
            cert = X509()
            cert.set_subject(req.get_subject())
            cert.set_serial_number(123)
            cert.gmtime_adj_notBefore(0)
            cert.gmtime_adj_notAfter(31536000)
            cert.set_issuer(self.cert.get_subject())
            cert.set_pubkey(req.get_pubkey())
            cert.sign(self.key, 'sha1')

            with open(cnp, 'wb+') as f:
                f.write(dump_privatekey(FILETYPE_PEM, key))
                f.write(dump_certificate(FILETYPE_PEM, cert))

            print("Created cert common_name=%s location=%s" % (cn, cnp))

        return cnp

    def _read_ca(self, file):
        self.cert = load_certificate(FILETYPE_PEM, open(file).read())
        self.key = load_privatekey(FILETYPE_PEM, open(file).read())

    @staticmethod
    def generate_ca_cert(path, common_name):
        if os.path.exists(path):
            print("Cert already exists at %s, not regenerating" % path)
            return
        # Generate key
        key = PKey()
        key.generate_key(TYPE_RSA, 2048)

        # Generate certificate
        cert = X509()
        cert.set_version(3)
        cert.set_serial_number(1)
        cert.get_subject().CN = common_name
        cert.gmtime_adj_notBefore(0)
        cert.gmtime_adj_notAfter(315360000)
        cert.set_issuer(cert.get_subject())
        cert.set_pubkey(key)
        cert.sign(key, "sha256")

        with open(path, 'wb+') as f:
            f.write(dump_privatekey(FILETYPE_PEM, key))
            f.write(dump_certificate(FILETYPE_PEM, cert))


def get_local_ip(iface):
    ni.ifaddresses(iface)
    return ni.ifaddresses(iface)[ni.AF_INET][0]['addr']


# Alternative functions for formating output data
def _side_by_side_hex(data):
    BLOCK_SIZE = 16

    output_lines = []
    for i in range(0, len(data), BLOCK_SIZE):
        block = data[i:i+BLOCK_SIZE]
        _hex = ["%.2x" % el for el in block]
        _str = [chr(el) if chr(el).isprintable() else "." for el in block]
        line = " ".join(_hex).ljust((3*BLOCK_SIZE)+4) + "".join(_str).replace("\n", ".")
        output_lines.append(line)
    return "\n".join(output_lines)

def _stacked_hex(data):
    BLOCK_SIZE = 32

    hex_lines = []
    plaintext_lines = []
    for i in range(0, len(data), BLOCK_SIZE):
        block = data[i:i+BLOCK_SIZE]
        _hex = ["%.2x" % el for el in block]
        _str = [chr(el) if chr(el).isprintable() else "." for el in block]

        hex_line = " ".join(_hex)
        hex_lines.append(hex_line)

        plaintext_line = "  ".join(_str).replace("\n", ".")
        plaintext_lines.append(plaintext_line)

    lines = hex_lines + ["\n"] + plaintext_lines
    return "\n".join(lines)

def _replayable(data):
    d = data[0:4000]
    _hex = "".join(["%.2x" % el for el in d])
    _str = "".join([chr(el) if chr(el).isprintable() else "." for el in d])

    return _hex + "\n" + _str

def _noop(data):
    return data

# Change this line to use an alternative formating function
FORMAT_FN = _noop

# Record data sent to the server to files
DIR_NAME = "replays/messages-%d/" % time.time()
os.mkdir(DIR_NAME)
f_n = 0
def _write_to_file(data):
    # Global variables are bad but they do the job
    global f_n
    with open(DIR_NAME + str(f_n), 'wb') as f:
        f.write(data)
        f_n += 1
WRITE_TO_FILE = _write_to_file

CA_CERT_PATH = "./ca-cert.pem"

LISTEN_PORT = 443
DST_PORT = 443
DST_HOST = "www.bbc.com"
local_ip = get_local_ip('en0')

print("Querying DNS records for %s..." % DST_HOST)
a_records = dns.resolver.query(DST_HOST, 'A')
print("Found %d A records:" % len(a_records))
for r in a_records:
    print("* %s" % r.address)
print("")
assert(len(a_records) > 0)

DST_IP = a_records[0].address
print("Choosing to proxy to %s" % DST_IP)

print("""
#-#-#-#-#-#-#-#-#-#-#-#-#-#-#-#-#-#-#-#-#-#
-#-#-#-#-#-RUNNING TLS TCP PROXY-#-#-#-#-#-
#-#-#-#-#-#-#-#-#-#-#-#-#-#-#-#-#-#-#-#-#-#

Root CA path:\t%s

Dst IP:\t%s
Dst port:\t%d
Dst hostname:\t%s

Listen port:\t%d
Local IP:\t%s
""" % (CA_CERT_PATH, DST_IP, DST_PORT, DST_HOST, LISTEN_PORT, local_ip))

CertificateAuthority.generate_ca_cert(CA_CERT_PATH, "Robert's Trusty Certificate Corp")
ca = CertificateAuthority(CA_CERT_PATH)
certfile = ca.get_cert_path(DST_HOST)
with open(certfile) as f:
    cert = twisted_ssl.PrivateCertificate.loadPEM(f.read())

print("""
Next steps:

1. Make sure you are spoofing DNS requests from the
device you are trying to proxy request from so that they
return your local IP (%s).
2. Make sure you have set the destination and listen
ports correctly (they should generally be the same).
3. Use the device you are proxying requests from to make
requests to %s and check that they are logged in this
terminal.
4. Look at the requests, write more code to replay them,
fiddle with them, etc.

Listening for requests on %s:%d...
""" % (local_ip, DST_HOST, local_ip, LISTEN_PORT))

factory = protocol.ServerFactory()
factory.protocol = TLSTCPProxyProtocol
reactor.listenSSL(LISTEN_PORT, factory, cert.options(),
                  interface=local_ip)
reactor.run()
为什么我们要使用BBC进行测试?
如前所述,我们将使用英国广播公司(BBC)的网站www.bbc.com测试我们的代理。这是因为www.bbc.com使用HTTPS,但未在其响应主体上使用压缩。
使用类似gzip的压缩算法可以大大减少服务器发送的数据大小,然而,这也增加了测试代理的难度。我们的代理只会看到被压缩的HTTP对象数据处于混乱的压缩状态,我们的代理不知道如何解压数据,因此无法将其以真实的、人类可读的形式显示给我们。但由于BBC不压缩其响应对象(截至2018年8月),我们在本文不讨论这个问题,只处理可读的非压缩数据。
在测试我们的启用了TLS的代理之前,请确保:
1. 你的DNS欺骗脚本被设置为欺骗www.bbc.com;
2. 你的智能手机将其DNS服务器设置为你的笔记本电脑的IP地址;
3. 你的TCP代理脚本指向www.bbc.com(www很重要!);
4. 你的TCP代理脚本设置为监控并在端口443上发送;
5. 然后启动DNS欺骗脚本,启动TCP代理脚本,然后在手机上访问www.bbc.com/news(www.bbc.com主页不使用HTTPS,因此此处对我们没有用)。你应该看到HTTP请求和响应的未加密纯文本出现在代理的日志中!
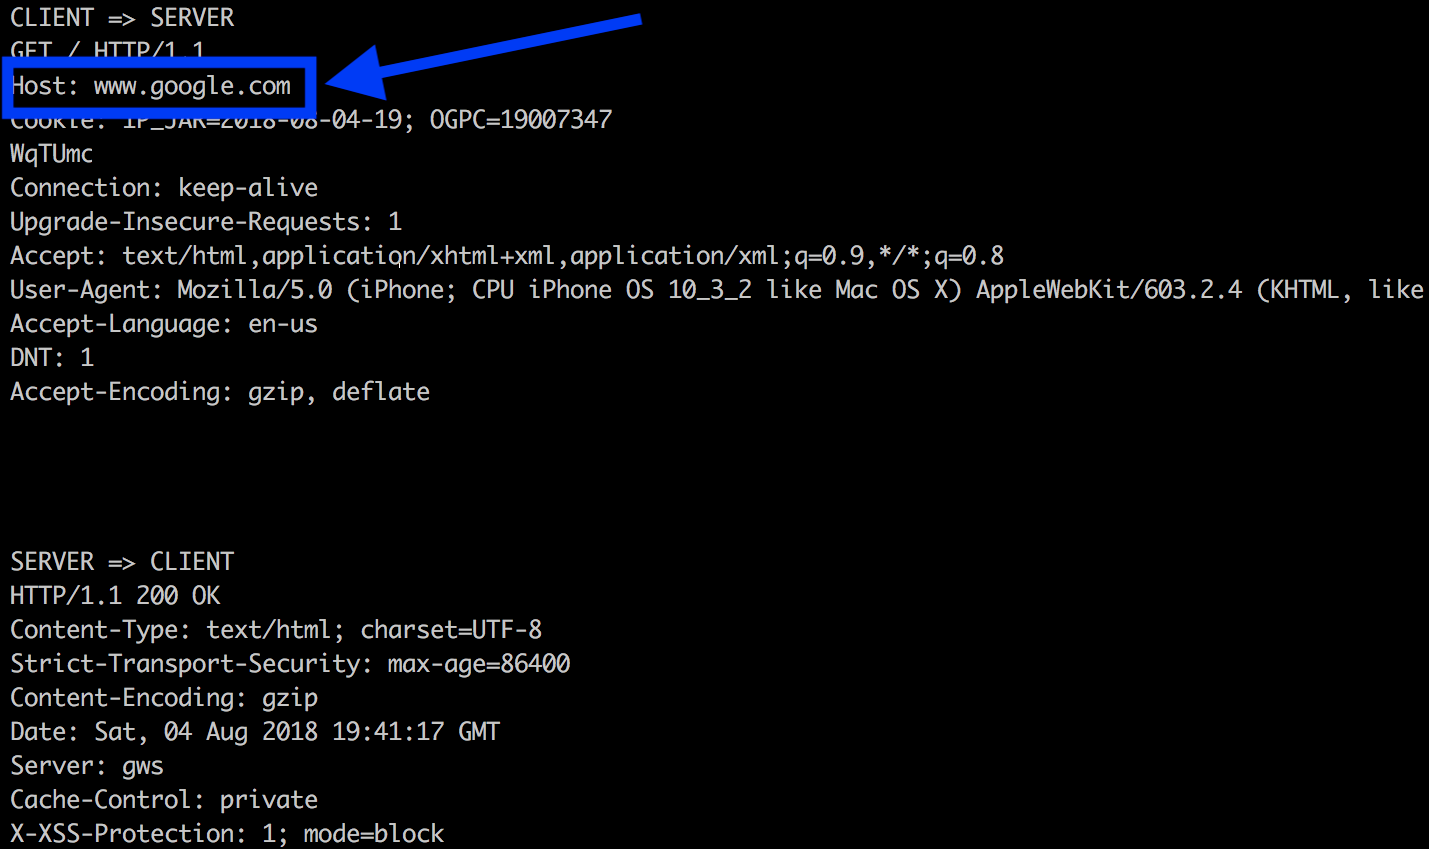
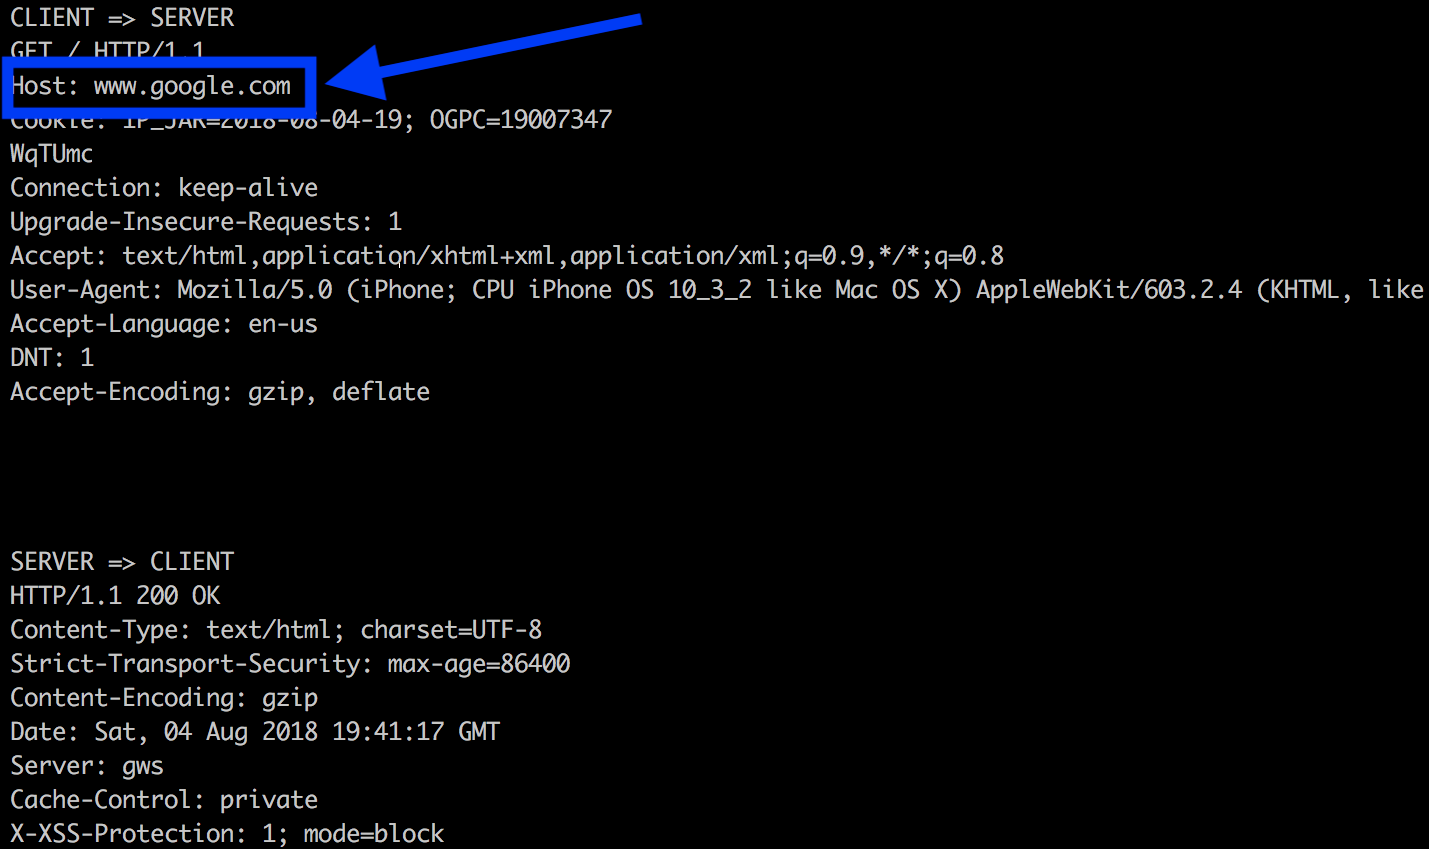
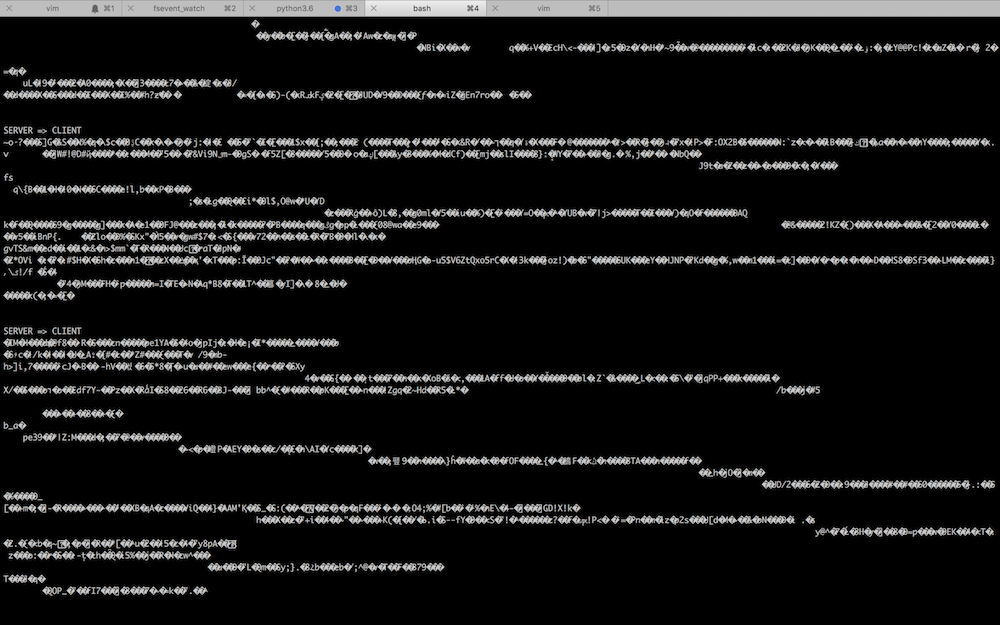
完成此操作后,请通过www.google.com再次尝试。 HTTP响应标头仍然是可读的,但是由于Google确实使用gzip压缩,因此响应对象看起来像是难以理解的废话。


总结
现在,你可以代理和检查你的智能手机发送的任意TCP流。
这比构建仅处理HTTP请求的代理要困难得多,由于我们希望能够代理任何TCP流,而不仅仅是HTTP请求,因此我们无法利用你手机的任何内置HTTP代理功能。正如我们在开头中所看到的,如果你想通过笔记本电脑代理来自智能手机的HTTP请求,你要做的就是将设备连接到同一网络,告诉手机的代理使用笔记本电脑的IP地址作为代理。
在这几篇文章中,我们建立了一个伪造的DNS服务器,并用它来欺骗对你手机发送的对你手机的DNS请求的响应。这欺骗了你的手机,使其无法与笔记本电脑建立用于目标主机名的TCP连接。我们建立了一个代理来接收这些连接,并将数据从它们转发到目标服务器。它还将来自目标服务器的所有响应数据转发回你的智能手机,从而完成诱骗过程。这意味着,你的智能手机也不知道发生了什么事。
另外,我们还添加了TLS支持。创建了自己的虚假证书颁发机构,并将其公钥添加到你的智能手机的受信任CA列表中。这样就可以使用其私钥对已生成的TLS证书进行签名,并使用这些证书来协商手机和笔记本电脑之间的TLS会话。完成后,我们从你手机的受信任CA列表中删除了CA的公钥。
未来,代理过程的最高境界是“使TCP代理更像Burp Suite”,这样保存跨连接到文件或数据库的数据非常有用。稍后能够重播这些请求也很方便,如果我们可以先进行编辑,如果我们能先编辑它们那就太好了。
本文翻译自:https://robertheaton.com/2018/08/31/how-to-build-a-tcp-proxy-4/如若转载,请注明原文地址:
如有侵权请联系:admin#unsafe.sh