2020-10-17 04:56:49 Author: derflounder.wordpress.com(查看原文) 阅读量:324 收藏
Home > Amazon Web Services, Mac administration, macOS, Scripting > Remotely gathering sysdiagnose files and uploading them to S3
Remotely gathering sysdiagnose files and uploading them to S3
One of the challenges for helpdesks with folks now working remotely instead of in offices has been that it’s now harder to gather logs from user’s Macs. A particular challenge for those folks working with AppleCare Enterprise Support has been with regards to requests for sysdiagnose logfiles.
The sysdiagnose tool is used for gathering a large amount of diagnostic files and logging, but the resulting output file is often a few hundred megabytes in size. This is usually too large to email, so alternate arrangements have to be made to get it off of the Mac in question and upload it to a location where the person needing the logs can retrieve them.
After needing to gather sysdiagnose files a few times, I’ve developed a scripted solution which does the following:
- Collects a sysdiagnose file.
- Creates a read-only compressed disk image containing the sysdiagnose file.
- Uploads the compressed disk image to a specified S3 bucket in Amazon Web Services.
- Cleans up the directories and files created by the script.
For more details, please see below the jump.
Pre-requisites
You will need to provide the following information to successfully upload the sysdiagnose file to an S3 bucket:
- S3 bucket name
- AWS region for the S3 bucket
- AWS programmatic user’s access key and secret access key
- The S3 ACL used on the bucket
The AWS programmatic user must have at minimum the following access rights to the specified S3 bucket:
- s3:ListBucket
- s3:PutObject
- s3:PutObjectAcl
The AWS programmatic user must have at minimum the following access rights to all S3 buckets in the account:
- s3:ListAllMyBuckets
These access rights will allow the AWS programmatic user the ability to do the following:
- Identify the correct S3 bucket
- Write the uploaded file to the S3 bucket
Note: The AWS programmatic user would not have the ability to read the contents of the S3 bucket.
Information on S3 ACLs can be found via the link below:
https://docs.aws.amazon.com/AmazonS3/latest/dev/acl-overview.htmlcanned-acl
In an S3 bucket’s default configuration, where all public access is blocked, the ACL should be the one listed below:
private
Using the script
Once you have the S3 bucket and AWS programmatic user set up, you will need to configure the user-editable variables in the script:
| # User-editable variables | |
| s3AccessKey="add_AWS_access_key_here" | |
| s3SecretKey="add_AWS_secret_key_here" | |
| s3acl="add_AWS_S3_ACL_here" | |
| s3Bucket="add_AWS_S3_bucket_name_here" | |
| s3Region="add_AWS_S3_region_here" |
For example, if you set up the following S3 bucket and user access:
What: S3 bucket named sysdiagnose-log-s3-bucket
Where: AWS’s US-East-1 region
ACL configuration: Default ACL configuration with all public access blocked
AWS access key: AKIAX0FXU19HY2NLC3NF
AWS secret access key: YWRkX0FXU19zZWNyZXRfa2V5X2hlcmUK
The user-editable variables should look like this:
| # User-editable variables | |
| s3AccessKey="AKIAX0FXU19HY2NLC3NF" | |
| s3SecretKey="YWRkX0FXU19zZWNyZXRfa2V5X2hlcmUK" | |
| s3acl="private" | |
| s3Bucket="sysdiagnose-log-s3-bucket" | |
| s3Region="us-east-1" |
Note: The S3 bucket, access key and secret access key information shown above is no longer valid.
The script can be run manually or by a systems management tool. I’ve tested it with Jamf Pro and it appears to work without issue.
When run manually in Terminal, you should see the following output.
| username@computername ~ % sudo /Users/username/Desktop/remote_sysdiagnose_collection.sh | |
| Password: | |
| Progress: | |
| [|||||||||||||||||||||||||||||||||||||||100%|||||||||||||||||||||||||||||||||||] | |
| Output available at '/var/folders/zz/zyxvpxvq6csfxvn_n0000000000000/T/logresults-20201016144407.1wghyNXE/sysdiagnose-VMDuaUp36s8k-564DA5F0-0D34-627B-DE5E-A7FA6F7AF30B-20201016144407.tar.gz'. | |
| ……………………………………………………….. | |
| created: /var/folders/zz/zyxvpxvq6csfxvn_n0000000000000/T/sysdiagnoselog-20201016144407.VQgd61kP/VMDuaUp36s8k-564DA5F0-0D34-627B-DE5E-A7FA6F7AF30B-20201016144407.dmg | |
| Uploading: /var/folders/zz/zyxvpxvq6csfxvn_n0000000000000/T/sysdiagnoselog-20201016144407.VQgd61kP/VMDuaUp36s8k-564DA5F0-0D34-627B-DE5E-A7FA6F7AF30B-20201016144407.dmg (application/octet-stream) to sysdiagnose-log-s3-bucket:VMDuaUp36s8k-564DA5F0-0D34-627B-DE5E-A7FA6F7AF30B-20201016144407.dmg | |
| ######################################################################### 100.0% | |
| VMDuaUp36s8k-564DA5F0-0D34-627B-DE5E-A7FA6F7AF30B-20201016144407.dmg uploaded successfully to sysdiagnose-log-s3-bucket. | |
| username@computername ~ % |
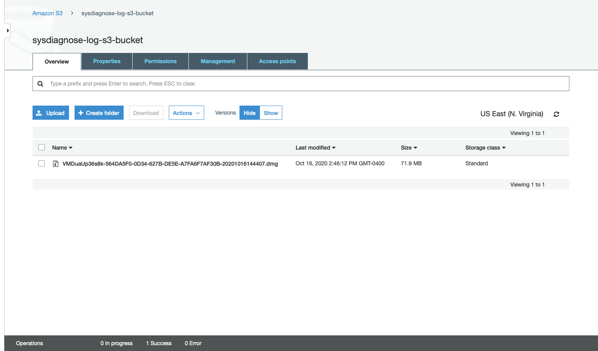
Once the script runs, you should see a disk image file appear in the S3 bucket with a name automatically generated using the following information:
Mac’s serial number – Mac’s hardware UUID – Year-Month-Day-Hour-Minute-Second

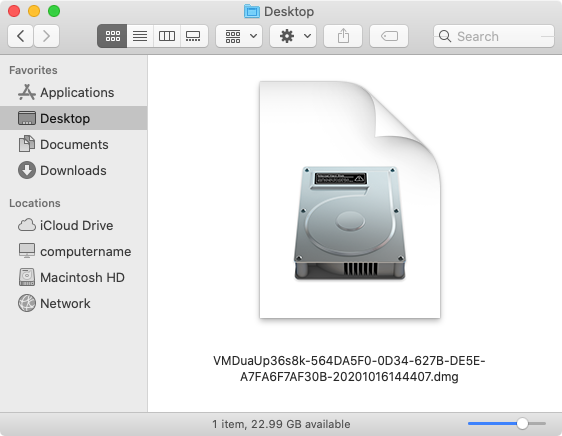
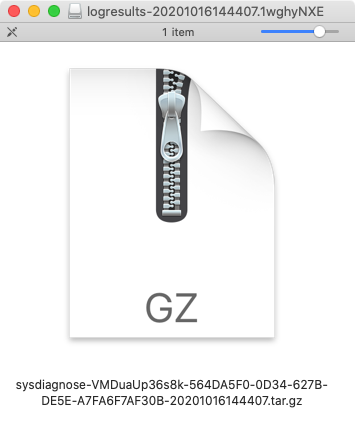
Once downloaded, the sysdiagnose file is accessible by mounting the disk image.


The script is available below, and at the following address on GitHub:
| #!/bin/bash | |
| # Log collection script which performs the following tasks: | |
| # | |
| # * Collects a sysdiagnose file. | |
| # * Creates a read-only compressed disk image containing the sysdiagnose file. | |
| # * Uploads the compressed disk image to a specified S3 bucket. | |
| # * Cleans up the directories and files created by the script. | |
| # | |
| # You will need to provide the following information to successfully upload | |
| # to an S3 bucket: | |
| # | |
| # S3 bucket name | |
| # AWS region for the S3 bucket | |
| # AWS programmatic user's access key and secret access key | |
| # The S3 ACL used on the bucket | |
| # | |
| # The AWS programmatic user must have at minimum the following access rights to the specified S3 bucket: | |
| # | |
| # s3:ListBucket | |
| # s3:PutObject | |
| # s3:PutObjectAcl | |
| # | |
| # The AWS programmatic user must have at minimum the following access rights to all S3 buckets in the account: | |
| # | |
| # s3:ListAllMyBuckets | |
| # | |
| # These access rights will allow the AWS programmatic user the ability to do the following: | |
| # | |
| # A. Identify the correct S3 bucket | |
| # B. Write the uploaded file to the S3 bucket | |
| # | |
| # Note: The AWS programmatic user would not have the ability to read the contents of the S3 bucket. | |
| # | |
| # Information on S3 ACLs can be found via the link below: | |
| # https://docs.aws.amazon.com/AmazonS3/latest/dev/acl-overview.html#canned-acl | |
| # | |
| # By default, the ACL should be the one listed below: | |
| # | |
| # private | |
| # | |
| # User-editable variables | |
| s3AccessKey="add_AWS_access_key_here" | |
| s3SecretKey="add_AWS_secret_key_here" | |
| s3acl="add_AWS_S3_ACL_here" | |
| s3Bucket="add_AWS_S3_bucket_name_here" | |
| s3Region="add_AWS_S3_region_here" | |
| # It should not be necessary to edit any of the variables below this line. | |
| error=0 | |
| date=$(date +%Y%m%d%H%M%S) | |
| serial_number=$(ioreg -c IOPlatformExpertDevice -d 2 | awk -F\" '/IOPlatformSerialNumber/{print $(NF-1)}') | |
| hardware_uuid=$(ioreg -ad2 -c IOPlatformExpertDevice | xmllint –xpath '//key[.="IOPlatformUUID"]/following-sibling::*[1]/text()' –) | |
| results_directory=$(mktemp -d -t logresults-${date}) | |
| sysdiagnose_name="sysdiagnose-${serial_number}–${hardware_uuid}–${date}.tar.gz" | |
| dmg_name="${serial_number}–${hardware_uuid}–${date}.dmg" | |
| dmg_file_location=$(mktemp -d -t sysdiagnoselog-${date}) | |
| fileName=$(echo "$dmg_file_location"/"$dmg_name") | |
| contentType="application/octet-stream" | |
| LogGeneration() | |
| { | |
| /usr/bin/sysdiagnose -f ${results_directory} -A "$sysdiagnose_name" -u -b | |
| if [[ -f "$results_directory/$sysdiagnose_name" ]]; then | |
| /usr/bin/hdiutil create -format UDZO -srcfolder ${results_directory} ${dmg_file_location}/${dmg_name} | |
| else | |
| echo "ERROR! Log file not created!" | |
| error=1 | |
| fi | |
| } | |
| S3Upload() | |
| { | |
| # S3Upload function taken from the following site: | |
| # https://very.busted.systems/shell-script-for-S3-upload-via-curl-using-AWS-version-4-signatures | |
| usage() | |
| { | |
| cat <<USAGE | |
| Simple script uploading a file to S3. Supports AWS signature version 4, custom | |
| region, permissions and mime-types. Uses Content-MD5 header to guarantee | |
| uncorrupted file transfer. | |
| Usage: | |
| `basename $0` aws_ak aws_sk bucket srcfile targfile [acl] [mime_type] | |
| Where <arg> is one of: | |
| aws_ak access key ('' for upload to public writable bucket) | |
| aws_sk secret key ('' for upload to public writable bucket) | |
| bucket bucket name (with optional @region suffix, default is us-east-1) | |
| srcfile path to source file | |
| targfile path to target (dir if it ends with '/', relative to bucket root) | |
| acl s3 access permissions (default: public-read) | |
| mime_type optional mime-type (tries to guess if omitted) | |
| Dependencies: | |
| To run, this shell script depends on command-line curl and openssl, as well | |
| as standard Unix tools | |
| Examples: | |
| To upload file '~/blog/media/image.png' to bucket 'storage' in region | |
| 'eu-central-1' with key (path relative to bucket) 'media/image.png': | |
| `basename $0` ACCESS SECRET storage@eu-central-1 \\ | |
| ~/blog/image.png media/ | |
| To upload file '~/blog/media/image.png' to public-writable bucket 'storage' | |
| in default region 'us-east-1' with key (path relative to bucket) 'x/y.png': | |
| `basename $0` '' '' storage ~/blog/image.png x/y.png | |
| USAGE | |
| exit 0 | |
| } | |
| guessmime() | |
| { | |
| mime=`file -b –mime-type $1` | |
| if [ "$mime" = "text/plain" ]; then | |
| case $1 in | |
| *.css) mime=text/css;; | |
| *.ttf|*.otf) mime=application/font-sfnt;; | |
| *.woff) mime=application/font-woff;; | |
| *.woff2) mime=font/woff2;; | |
| *rss*.xml|*.rss) mime=application/rss+xml;; | |
| *) if head $1 | grep '<html.*>' >/dev/null; then mime=text/html; fi;; | |
| esac | |
| fi | |
| printf "$mime" | |
| } | |
| if [ $# -lt 5 ]; then usage; fi | |
| # Inputs. | |
| aws_ak="$1" # access key | |
| aws_sk="$2" # secret key | |
| bucket=`printf $3 | awk 'BEGIN{FS="@"}{print $1}'` # bucket name | |
| region=`printf $3 | awk 'BEGIN{FS="@"}{print ($2==""?"us-east-1":$2)}'` # region name | |
| srcfile="$4" # source file | |
| targfile=`echo -n "$5" | sed "s/\/$/\/$(basename $srcfile)/"` # target file | |
| acl=${6:-'public-read'} # s3 perms | |
| mime=${7:-"`guessmime "$srcfile"`"} # mime type | |
| md5=`openssl md5 -binary "$srcfile" | openssl base64` | |
| # Create signature if not public upload. | |
| key_and_sig_args='' | |
| if [ "$aws_ak" != "" ] && [ "$aws_sk" != "" ]; then | |
| # Need current and file upload expiration date. Handle GNU and BSD date command style to get tomorrow's date. | |
| date=`date -u +%Y%m%dT%H%M%SZ` | |
| expdate=`if ! date -v+1d +%Y-%m-%d 2>/dev/null; then date -d tomorrow +%Y-%m-%d; fi` | |
| expdate_s=`printf $expdate | sed s/-//g` # without dashes, as we need both formats below | |
| service='s3' | |
| # Generate policy and sign with secret key following AWS Signature version 4, below | |
| p=$(cat <<POLICY | openssl base64 | |
| { "expiration": "${expdate}T12:00:00.000Z", | |
| "conditions": [ | |
| {"acl": "$acl" }, | |
| {"bucket": "$bucket" }, | |
| ["starts-with", "\$key", ""], | |
| ["starts-with", "\$content-type", ""], | |
| ["content-length-range", 1, `ls -l -H "$srcfile" | awk '{print $5}' | head -1`], | |
| {"content-md5": "$md5" }, | |
| {"x-amz-date": "$date" }, | |
| {"x-amz-credential": "$aws_ak/$expdate_s/$region/$service/aws4_request" }, | |
| {"x-amz-algorithm": "AWS4-HMAC-SHA256" } | |
| ] | |
| } | |
| POLICY | |
| ) | |
| # AWS4-HMAC-SHA256 signature | |
| s=`printf "$expdate_s" | openssl sha256 -hmac "AWS4$aws_sk" -hex | sed 's/(stdin)= //'` | |
| s=`printf "$region" | openssl sha256 -mac HMAC -macopt hexkey:"$s" -hex | sed 's/(stdin)= //'` | |
| s=`printf "$service" | openssl sha256 -mac HMAC -macopt hexkey:"$s" -hex | sed 's/(stdin)= //'` | |
| s=`printf "aws4_request" | openssl sha256 -mac HMAC -macopt hexkey:"$s" -hex | sed 's/(stdin)= //'` | |
| s=`printf "$p" | openssl sha256 -mac HMAC -macopt hexkey:"$s" -hex | sed 's/(stdin)= //'` | |
| key_and_sig_args="-F X-Amz-Credential=$aws_ak/$expdate_s/$region/$service/aws4_request -F X-Amz-Algorithm=AWS4-HMAC-SHA256 -F X-Amz-Signature=$s -F X-Amz-Date=${date}" | |
| fi | |
| # Upload. Supports anonymous upload if bucket is public-writable, and keys are set to ''. | |
| echo "Uploading: $srcfile ($mime) to $bucket:$targfile" | |
| curl \ | |
| -# -k \ | |
| -F key=$targfile \ | |
| -F acl=$acl \ | |
| $key_and_sig_args \ | |
| -F "Policy=$p" \ | |
| -F "Content-MD5=$md5" \ | |
| -F "Content-Type=$mime" \ | |
| -F "file=@$srcfile" \ | |
| https://${bucket}.s3.amazonaws.com/ | cat # pipe through cat so curl displays upload progress bar, *and* response | |
| } | |
| CleanUp() | |
| { | |
| if [[ -d ${results_directory} ]]; then | |
| /bin/rm -rf ${results_directory} | |
| fi | |
| if [[ -d ${dmg_file_location} ]]; then | |
| /bin/rm -rf ${dmg_file_location} | |
| fi | |
| } | |
| LogGeneration | |
| if [[ -f ${fileName} ]]; then | |
| S3Upload "$s3AccessKey" "$s3SecretKey" "$s3Bucket"@"$s3Region" ${fileName} "$dmg_name" "$s3acl" "$contentType" | |
| if [[ $? -eq 0 ]]; then | |
| echo "$dmg_name uploaded successfully to $s3Bucket." | |
| else | |
| echo "ERROR! Upload of $dmg_name failed!" | |
| error=1 | |
| fi | |
| else | |
| echo "ERROR! Creating $dmg_name failed! No upload attempted." | |
| error=1 | |
| fi | |
| CleanUp | |
| exit $error |
如有侵权请联系:admin#unsafe.sh