In the article, we will focus on the Active Directory Enumeration tool called Blood 2021-05-01 03:41:41 Author: www.hackingarticles.in(查看原文) 阅读量:615 收藏
In the article, we will focus on the Active Directory Enumeration tool called BloodHound. It takes the data from any device on the network and then proceeds to plot the graph that can help the attacker to strategize their way to the Domain Admins.
Table of Content
- Introduction
- Linux Installation
- Extracting Data from Domain
- Enumerating with BloodHound
- BloodHound on Windows
- Extracting Data from Domain
- Windows Installation
- Enumerating with BloodHound
- SharpHound on PowerShell
- SharpHound on PowerShell Empire
- Conclusion
Introduction
BloodHound is programmed to generate graphs that reveal the hidden and relationships within an Active Directory Network. BloodHound also supports Azure. BloodHound enables the Attackers to identify complex attack paths that would otherwise be not possible to identify. The Blue Team can use BloodHound to identify and fix those same attack patterns.
Linux Installation
Some multiple guides and methods can help you set up and install bloodhound on your host machine. We will be following the official documents of BloodHound that can be found on their GitHub but refining the process. As always before installing any tool on your Linux Machine, it is recommended to perform an update and upgrade your software packages. Also, for any reason, if you don’t have Java installed, install java to continue. We won’t be installing java as we are working on Kali Linux which comes preinstalled with Java. Configuring Bloodhound is a 3-step process. BloodHound has a GUI and Data scrapper and neo4j Database. This means that we need to configure them individually. We start with the Bloodhound GUI which can be installed directly using the apt command.

Next, we need to configure the neo4j service that will hold the data which can be represented in graphical form. When we ran the apt install bloodhound, it installed neo4j with it. If that didn’t happen in your case you can always download it by running apt install neo4j. Now, we need to configure the authentication and other settings on the neo4j service. To do that we run the neo4j console instance. It will host the Remote Interface which can be accessed using a Web Browser. By default, it is hosted on port 7474.

Entering the URL that was highlighted in the image above in a Web Browser, we have the remote interface. It has some prefilled values and some black fields. Here, enter a username, we choose the username neo4j and enter a password. After entering the following information, you will be able to connect to the neo4j database.

Before connecting, it will ask you to change the password as it is your first login. Enter any password of your choice. And Move to connect the neo4j Remote Interface.

Now that we have the neo4j service up and running, we can run the Bloodhound GUI. Running it is a simple task of typing bloodhound on your terminal and hitting Enter key. You can also try to look for bloodhound in your list of installed applications in the menu of Kali Linux and run it directly from there.

As soon as the BloodHound GUI kicks in, it asks for a set of credentials that we just set up in the neo4j configuration. Use the same set of credentials and you will be able to login into this interface. You can save your credentials so that you don’t need to log in each time you want to use bloodhound.

After logging in on BloodHound GUI, it opens up a blank white screen with some interaction buttons on the right-hand side and a search box on the left-hand side with some modules attached to it. This is basically where the setting up of the GUI completes. As discussed in the introduction, that Bloodhound represents the data in pretty graphs and searches for possible paths. To plot the graphs, it requires data from the Domain. This data can be extracted using a data scrapper which we now need to install.

To install this data Ingestor which is so unusually named bloodhound. This can lead to some confusion but to make it clear once again. We installed BloodHound GUI in previous steps that plot graphs based on the data. Now we are installing a bloodhound that will extract the data from the Domain. As it is made in Python, we can use pip3 to install bloodhound as shown in the image below.

Extracting Data from Domain
We will run the python Bloodhound that we just installed using pip3 and extract the data from the Domain. It is a good time to mention that here the Domain setup is in such a way that we have connected the Domain Controller, Clients, and our Attacker Machine essentially in the same network. To get data from the Domain, any user can be used. We will be using the Administrator account to extract maximum data for this enumeration. In a realistic scenario, you will end up with a normal user and then you will run the bloodhound and then use the data enumerated to get to the Administrator. We need to provide the following parameters to extract data from Domain: username, password, Name Server (IP Address of Domain Controller), Domain and Data we want to extract (We are using “All” to extract maximum data from the Domain). The data extracted will be in the form of .json files that will be created based on the queries that ran across the Domain in search of possible paths and permissions of various groups and users.
bloodhound-python -u administer -p Ignite@987 -ns 192.168.1.172 -d ignite.local -c All |

After running bloodhound-python, you will have json files in your current directory. It is possible to check them with the ls command. To analyze them in BloodHound GUI, you need to drag and drop those json files onto the GUI. As it can be observed from the image below that we have the computers.json, domains.json, groups.json, users.json.

Now that all the json files have been uploaded, BloodHound GUI can start plotting the graphs. The way Bloodhound works is that now that it is loaded with the data files from the domain, you can either enter queries to plot graphs or use the Pre-Built Queries. In this guide, we will be using the Pre-Built Queries.

Enumerating with BloodHound
Let’s begin our enumeration with the Pre-Built Analytics Queries. First of them that we use is the Find all Domain Admins. This Query will fetch all the Domain Admins it can find in its database and plot them on the graph as shown in the image below. Since our Domain has only one Domain Admin, it shows one node and then for 2 groups under that Domain Admin.

The next one is pretty interesting. This one is called Find Shortest Paths to Domain Admins. This means that BloodHound will plot the Domain Admins and the users that it can find and then we will be able to deduce what kind of path we want to take to go on exploiting so that we can reach the Domain Admin with the least Resistance. As we can see in the image below, there are 4 paths among which two (yellow nodes) are equidistant. This means we can either use any one of them to get to the Domain Admins and we know that there is Generic Write permission that we can use to exploit to get to the Domain Admin. Hence, this is how in a particularly complicated and big Domain Environment, it can help the attacker to figure out their way into the mess and get that Domain Admin Access.

Another Prebuilt Query that we will be using is the Find AS-REP Roastable Users (DontReqPreAuth) Query. AS-REP roasting is an offensive technique against Kerberos that allows password hashes to be retrieved for users that do not require pre-authentication. If the user has “Do not use Kerberos pre-authentication” enabled, then an attacker can recover a Kerberos AS-REP encrypted with the user’s RC4-HMAC’d password and he can attempt to crack this ticket offline.
Pre-authentication is the initial stage in Kerberos authentication, which is managed by the KDC Authentication server and is meant to prevent brute-force attacks.
From the image, we can see that the Japneet user is vulnerable to the AS-REP Roasting attack.
Learn More: AS-REP Roasting

The conclusion that we came to according to our Enumeration with BloodHound is that the Japneet user is vulnerable to AS-REP Roasting. This claim can be verified by browsing the Active Directory Users and Computers and then further descending into the user Properties of the Japneet user. In the Japneet user Properties Window, there is an Account Tab. Inside the Account tab, we can see that the Japneet user does not require Kerberos preauthetication.

Another attack for which we can enumerate using the BloodHound is the DC Sync Attack. This attack allows an attacker to replicate Domain Controller (DC) behavior. Typically impersonates as a domain controller and requests other DC’s for user credential data via GetNCChanges. But compromised account should be a member of administrators, Domain Admin, or Enterprise Admin to retrieve account password hashes from the others domain controller.
From the BloodHound graph, we can see that Geet user is vulnerable to this attack.
Learn More: DCSync Attack

The conclusion that we came to according to our Enumeration with BloodHound is that Geet user is vulnerable to DCSync Attack. This claim can be verified by browsing the Active Directory Users and Computers and then further descending into the user Properties of the Geet user. In the Geet user Properties Window, there is a Member Of Tab. Inside the Member Of tab, we can see that the Geet user is a part of Domain Admins which makes that user vulnerable to DC Sync Attack.

The next enumeration that we are going to perform using BloodHound is the Listing of all Kerberoastable Accounts. Kerberoasting is a technique that allows an attacker to steal the KRB_TGS ticket, which is encrypted with RC4, to brute force application services hash to extract its password. From the graph plotted by the BloodHound, it can be said that KRBTGT and SVC_SQLSERVICE are the two users that are vulnerable to this attack.
Learn More: Kerberoasting Attack

There are a lot of different custom queries and built-in queries that can be used to enumerate using BloodHound. Once you are done with the Enumeration and Analysis, you can clear the database of values and add new JSON files of different values by browsing the Database Info tab on BloodHound GUI and Clicking the Clear Database Button as demonstrated below.

BloodHound on Windows
It is possible to analyze and enumerate BloodHound directly from a Windows machine as well. This can be helpful in the Environments that restrict the deployment of Kali Linux and other attacker tools. The process remains more or less the same. We need to set up the Data Ingestor, BloodHound GUI, and neo4j database on Windows Machine as we did in Linux earlier. To begin, we will be installing the Data Ingestor for Windows that is named Sharphound. The difference between the Linux Investor and Windows Investor is that instead of crafting JSON files, the SharpHound creates a compressed file that includes CSV files. The data collection method remains the same.
SharpHound can be Downloaded for GitHub.
Extracting Data from Domain
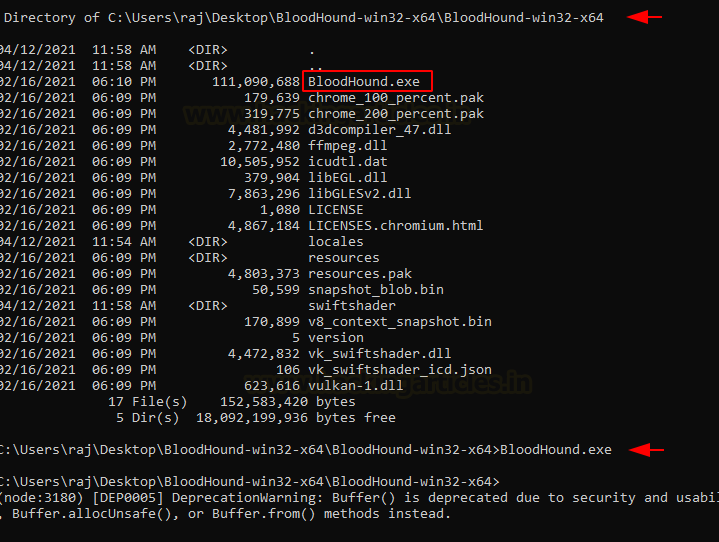
In the image presented below, it can be observed that when the attacker runs the SharpHound on the machine connected to Domain, it created a compressed file with the BloodHound name as highlighted.

Windows Installation
From the Linux setup, we remember that BloodHound requires the neo4j service. It can be downloaded for Windows and then run using a batch file that comes with the installation package. This service runs on port 7474 as well.
Download Neo4j Windows dir neo4j.bat console |

We take the URL from the neo4j console and open it in our Web Browser. If we remember correctly, we require to configure the credentials at this stage which will also be used for the BloodHound as well.

After the configuration of the password, we try and log in for the first time in the neo4j service. This requires us to rest the password as shown in the screenshot below.

After resetting the password and connecting to the neo4j service that we configured on our Windows device, we can access the service from our Web browser. The panel tells us that we are connected successfully to the neo4j service.

Now that we have installed the SharpHound Ingestor and Neo4j service on our Windows device, we are now left with the process of installing the BloodHound GUI. This is quite simple as we have executable for the same. We use the Windows Command Prompt to run the GUI as shown in the image below.
Download BloodHound GUI Windows

The BloodHound GUI gets executed and we have ourselves a Login panel as shown in the image below. We use the credentials that we set up in the Neo4j Configuration to login into BloodHound GUI.

Enumerating with BloodHound
From here onwards the process of analyzing and enumerating on BloodHound is the same as we discussed above. Using this set of instructions has made you able to run BloodHound on a Windows device.

SharpHound on PowerShell
As an extension to the BloodHound Enumeration process on Windows, we also want to demonstrate the process which can be followed by Security professionals when they want to use the SharpHound on Windows through PowerShell. This can be done as we have the PowerShell scripts for the SharpHound Ingestor. After bypassing the script restriction on PowerShell, we import the modules from the SharpHound PowerShell script. It contains a cmdlet by the name of Invoke BloodHound. This can be used to collect data on the target machine. This is useful in the scenario where it is not possible to run an executable on the target machine.
Download SharpHound PowerShell Script
powershell -ep bypass Import-Module .\SharpHound.ps1 Invoke-BloodHound -CollectMethod All |

SharpHound on PowerShell Empire
The SharpHound script that we used previously on PowerShell can be found inside the Kali Linux as well. It is located inside the PowerShell Empire. After successfully gaining the initial foothold on a device that is part of a Domain, the attacker can directly use the Empire to run SharpHound and extract the data from there as well. To do this we need to use the bloodhound module in the Empire’s Situational Awareness Modules. After execution, it tells the attacker the location at which the data csv files are located at.
usemodule situtationa_awareness/network/bloodhound execute |

An attacker can use the download command on PowerShell Empire to transfer the csv files to the host machine i.e., Kali Linux. We can use the multiple csv files in a similar way that we used the json files earlier to plot graphs and enumerate an Active Directory.
ls download group_memberships.csv download local_admins.csv download trusts.csv download user_sessions.csv |

Conclusion
This guide was created by us so that Security Professionals irrespective of the Red Team or Blue Team can deploy, configure and use BloodHound to Enumerate on Active Directory Deployments. It is a very useful tool that can be used to understand the mechanics of an Active Directory Network and then use that information to elevate the privileges or exploit the network.
Author: Pavandeep Singh is a Technical Writer, Researcher, and Penetration Tester. Can be Contacted on Twitter and LinkedIn
如有侵权请联系:admin#unsafe.sh