不好意思,图片挂掉了。重新补一下:
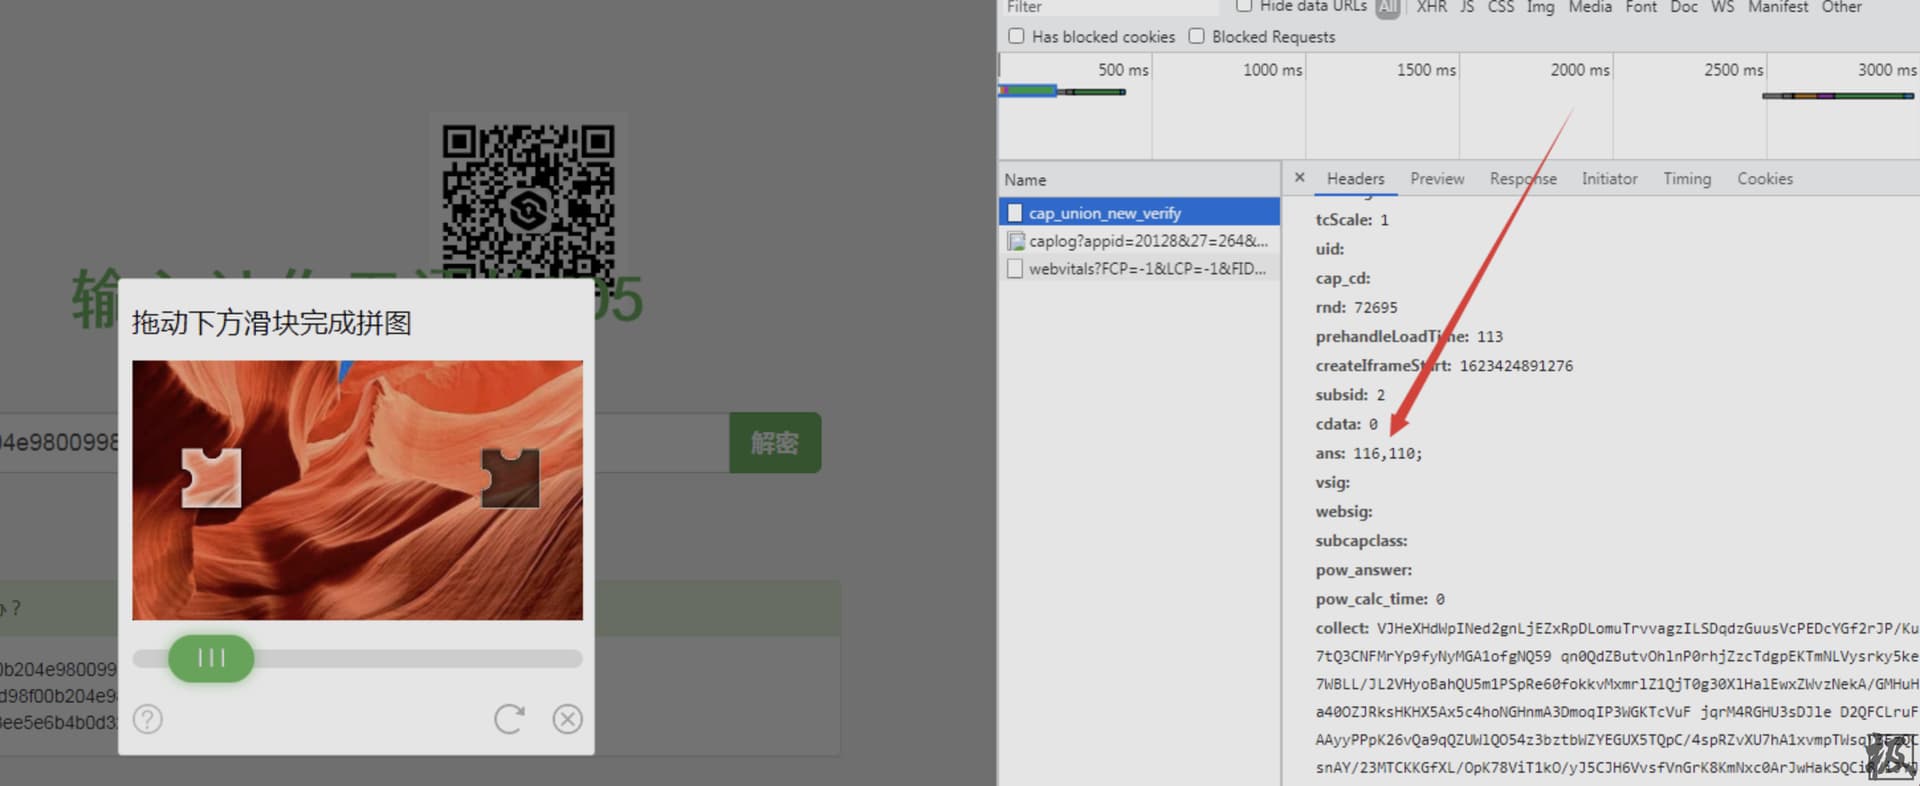
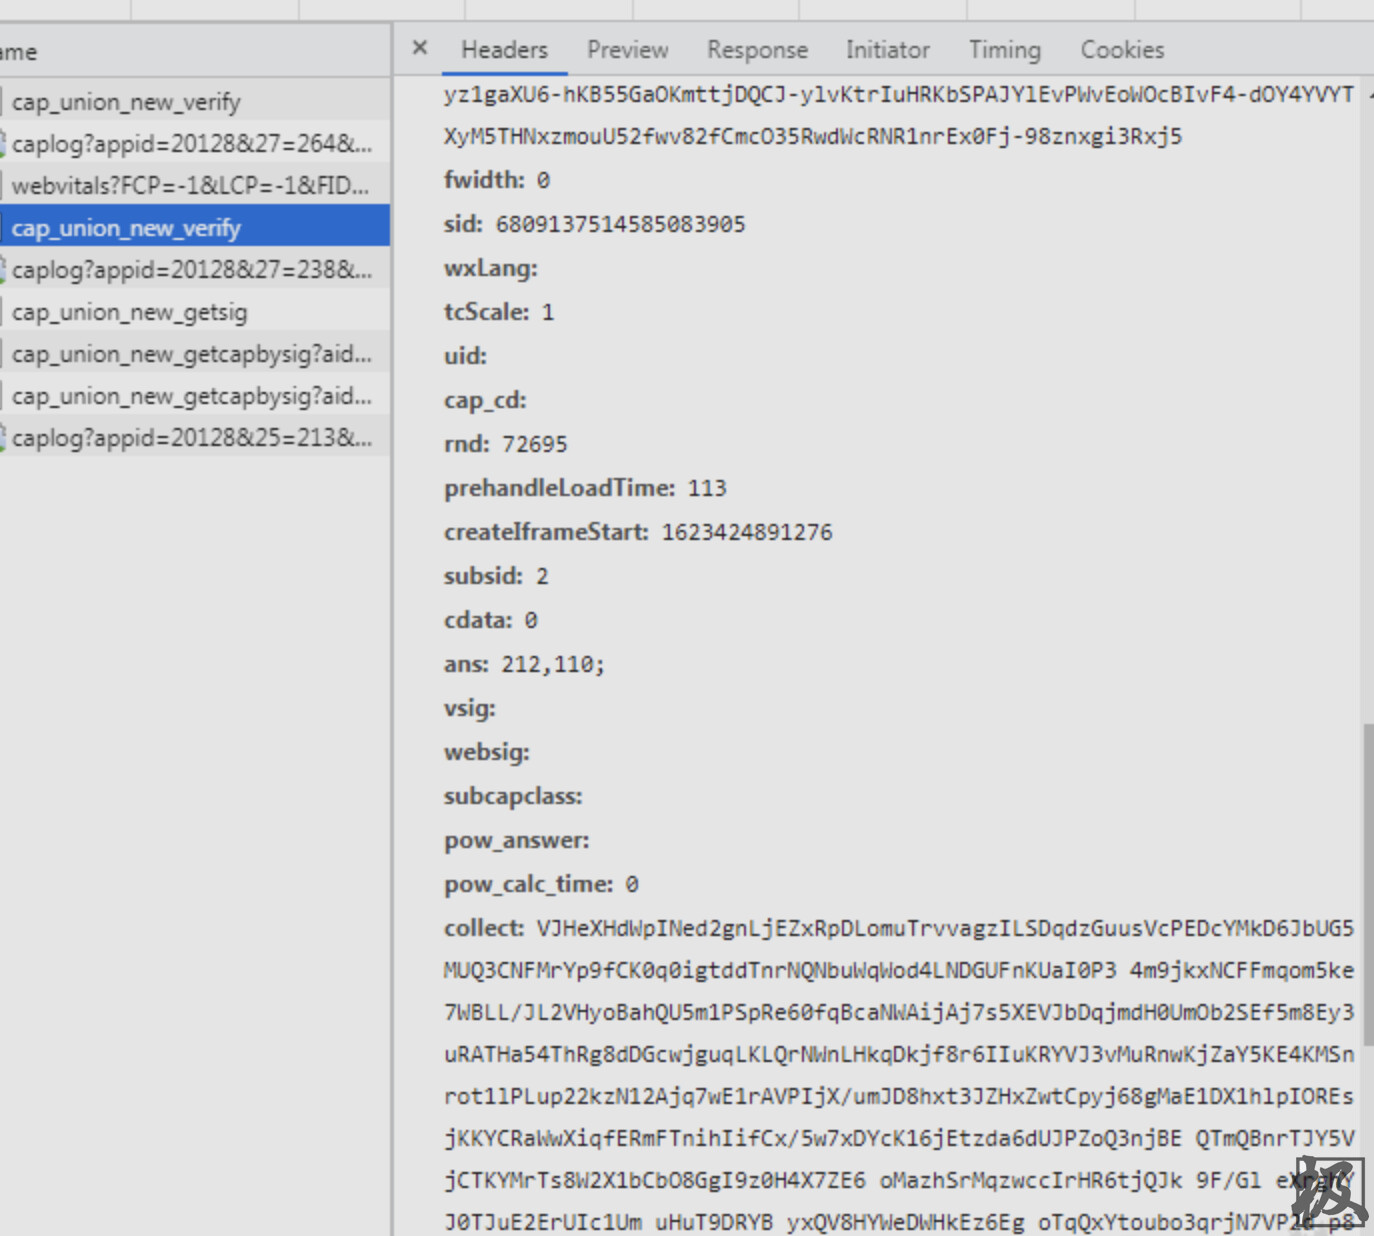
采集信息:

The conference was held at the Pomeranian Science and Technology Park located at a walking distance from the city center.

What interested me the most for attending the conference was the speakers lineup which included Rob Fuller (@mubix) my good friend Nikhil Mittal (@nikhil_mitt) and Daniel Bohannon (danielhbohannon) amongst other great speakers.

There is not much to say about @mubix magic and all presentations where truly very good and technical but the one that was an eye opener for me was the one by Aaron Wade.
“Enhancing your threat Simulation: How to look less like a pentester and more like a threat actor – A Defender’s perspective”
I look forward for the 2nd x33fcon which will definitely be improved and draw even a bigger crowd.
]]>
This is the final part on the Bloodhound series and the most important for pen testers and red teamers.
Picking up from Part 2 where the results are imported into the database it is time for making sense of them and achieving the objectives of our testing.
The database info table on the left shows basic information about the current database and elements included.

The Queries tab BloodHound comes with a number of predefined queries. In many cases these should be adequate to complete the goals.

For example, if we need to find the shortest paths to Domain Admins we click the appropriate query and then select the domain to run this against in case we have multiple domains.

Depending on the domain size the output can be quite messy and confusing.
To make sense of the results lets take small branch as an example:

LBRUNGARDT is an Admin to the DATABASE2 workstation which has an established session with KCLARK. This means that we can go onto the DATABASE2 computer and run mimikatz and get the credentials for KCLARK. KCLARK is a member of the OFFICE2 group which has administrative access to the DESKTOP31 workstation. So LBRUNGARDT is a derivative local admin to the OFFICE2 workstation.
Following that path we can end up to a workstation that the domain admin is logged in and we have local administrative rights therefore extract the credentials from memory.
Another scenario is to select to find all Domain Admins. Clicking on the “Find all Domain Admins” query shows the following graph. In this example BGRIFFIN is a member of the “INFORMATION TECHNOLOGY” group and that group is a member of the “DOMAIN ADMINS” group therefore BGRIFFIN is a domain admin.

If we queried the DC directly for the domain administrators, we wouldn’t see the name of BGRIFFIN but instead the we would find the group “INFORMATION TECHNOLOGY” and then we would have to enumerate that group as well to find its members. This process is called unrolling group memberships. In large domains where there are multiple groups in groups this will be a time consuming task with the risk of missing key information. BloodHound makes this easy but it can be also done with PowerView and the Recurse flag.

In the example above you can see that TKINKHEAD is member of the “CONTRACTINGH” group which is a member of the “CONTRACTINGI” group which is a member of the “CONTRACTINGJ” group and so on and the process of manually of unrolling the group memberships would be tedious.
Clicking on a user opens up this menu. Alternatively, you can start typing a username/group/workstation in the search box and the autocomplete will show you the available options.
Definitions – Taken from https://github.com/adaptivethreat/Bloodhound/wiki/Users
The SAMAccount name, Display Name and Password Last Changed are not currently collected by the ingestor.
First Degree Group Memberships: These are the groups that the user is explicitly a member of. This is the information you would see when typing net user username /domain
Unrolled Group Memberships: These are all of the user’s effective group memberships. This is the equivalent of running Get-NetGroup -User username
Foreign Group Memberships: These are all of the foreign groups that the user belongs to.
First Degree Local Admin: These are the computers where the user itself is added explicitly as a local administrator on a system.
Group Delegated Local Admin Rights: These are the computers that the user gains administrator privileges to based on delegated group rights.
Derivative Local Admin Rights: These are the computers the user can gain administrator rights to by impersonating a user currently using a computer the user has administrator privileges to, regardless of how deep this chaining goes.
Sessions: These are all the computers the ingestor identified the user as logged onto during collection.
Pathfinding is the process of finding a path from one endpoint to another.

This feature requires you to enter a starting and an ending node like the image below.

If there is an availalble path BloodHound will display it.
]]>
This is part 2 of the series on Bloodhound. For setting up the database and the tool refer to Part 1.
BloodHound data is done using the BloodHound.ps1 file located at:
https://github.com/adaptivethreat/BloodHound/tree/master/PowerShell
Clone the file and upload it to a host you have foothold.
From either CMD or PS shell cd to a folder you have write access and follow these steps:
*There is an API for sending the data directly from Cobalt Strike to BloodHound but it is not described in this post.
The above command will create 4 .csv files which can later be imported into BloodHound
Use the upload data functionality to import the 4 .csv files created before.

In Part 3 of the series we will look into working with the database and results.
]]>大功告成!完整代码如下
使用时切记把要查的内容放在md5.txt里
from selenium.webdriver import ActionChains
from selenium import webdriver
from time import sleep
from selenium.webdriver.chrome.options import Options
import requests
import cv2

def init():
    options = Options()
    options.binary_location = "C:\Program Files (x86)\Google\Chrome\Application\chrome.exe"    #chrome binary location specified here
    options.add_argument("-enable-webgl")
    options.add_argument("--no-sandbox") #bypass OS security model
    options.add_argument("--disable-dev-shm-usage") #overcome limited resource problems
    driver = webdriver.Chrome(options=options, executable_path=r'C:\Program Files (x86)\Google\Chrome\Application\chromedriver.exe')#改成自己的chromedriver所在位置
    driver.get('https://www.somd5.com/')
    return driver


def download(url,file):
    r = requests.get(url)
    with open(file, "wb") as code:
        code.write(r.content)

def identify_gap(bg,tp):
 '''
 bg: 背景图片
 tp: 缺口图片
 '''
 # 读取背景图片和缺口图片
 bg_img = cv2.imread(bg) # 背景图片
 tp_img = cv2.imread(tp) # 缺口图片

 # 识别图片边缘
 bg_edge = cv2.Canny(bg_img, 100, 200)
 tp_edge = cv2.Canny(tp_img, 100, 200)

 # 转换图片格式
 bg_pic = cv2.cvtColor(bg_edge, cv2.COLOR_GRAY2RGB)
 tp_pic = cv2.cvtColor(tp_edge, cv2.COLOR_GRAY2RGB)

 # 缺口匹配
 res = cv2.matchTemplate(bg_pic, tp_pic, cv2.TM_CCOEFF_NORMED)
 min_val, max_val, min_loc, max_loc = cv2.minMaxLoc(res) # 寻找最优匹配

 # 绘制方框
 th, tw = tp_pic.shape[:2]
 tl = max_loc
 # 返回缺口的坐标(x
 return tl[0]
def search(driver,md5):
    # 定位查询按钮
    username = driver.find_element_by_id('hash')
    username.clear()
    username.send_keys(md5)
    sleep(1)


    # 定位登录按钮
    btn = driver.find_element_by_id('TencentCaptcha')
    btn.click()

    sleep(1)

    # 定位 iframe
    frame = driver.find_element_by_xpath(xpath='//iframe')

    # 切换到 iframe
    # driver.switch_to_frame(frame)  # 这个方法也可以运行,但是会报错
    sleep(2)
    driver.switch_to.frame(driver.find_element_by_xpath("/html/body/div[5]/iframe"))

    # 定位滑动块
    test_button = driver.find_element_by_xpath('//*[@id="tcaptcha_drag_thumb"]')

    #获取大图 and 缺口 url
    big_img=driver.find_element_by_xpath('/html/body/div/div[3]/div[2]/div[1]/div[2]/img').get_attribute("src")
    small_img=driver.find_element_by_xpath('/html/body/div/div[3]/div[2]/div[1]/div[3]/img').get_attribute("src")
    download(big_img,'big_img.jpg')
    download(small_img,'small_img.png')
    #print(big_img,small_img)#输出大图 & 缺口链接
    # 实例一个动作链对象
    action = ActionChains(driver)
    action.click_and_hold(on_element=test_button).perform()#抓住滑块
    action.move_by_offset(xoffset=(identify_gap('big_img.jpg','small_img.png')-52)/2, yoffset=0).perform()#滑动
    test_button.click()
    #print(identify_gap('big_img.jpg','small_img.png')) #输出680px的情况下的x坐标
    sleep(6)
    result=driver.find_element_by_xpath('/html/body/div[1]/div[2]/div[2]/div[2]/div/div[2]').get_attribute("innerHTML")
    return result

    # 松开滑动

if __name__=='__main__':
    driver=init()
    f = open("md5.txt")
    line = f.readline()
    while line:
        result=search(driver,line)
        with open('result.txt','a+') as q:
            q.write(line.strip('\n')+"的查询结果:"+result+'\n')
        line = f.readline()
    f.close()
然后就能实现了:
#4
曾经见到过一个滑块验证码,前端会上传滑动时间,以及滑动过程中对滑块坐标的采样数据数组。当时是发现从头生成这个采样数组过不了检测,好像用的某种算法来从轨迹区分是不是人滑动